
Brownstone Boys: We Choose Plants and Grow Grass for Our DIY Budget Backyard Garden
We have already planned our space, built our hardscaping, and now we are finally ready to put in the plantings.

The raised flower bed will help separate the garden apartment outdoor space
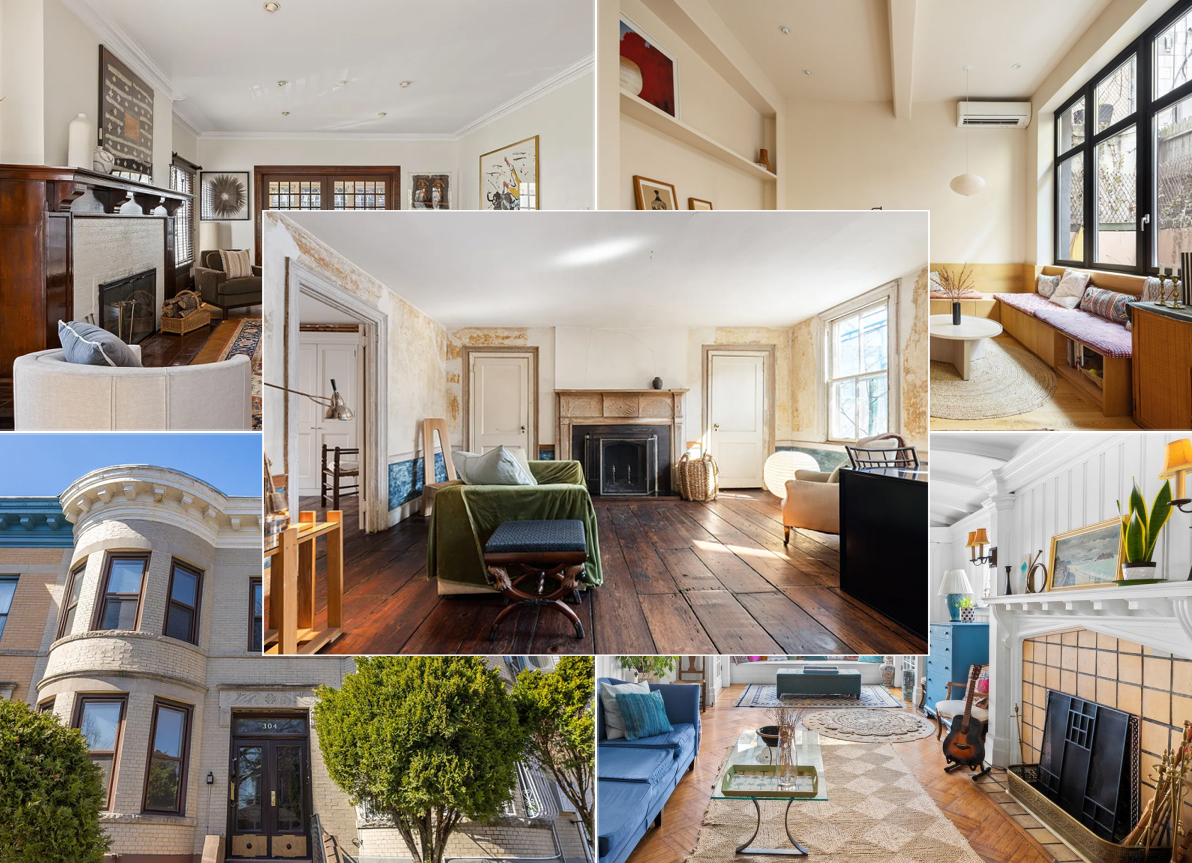
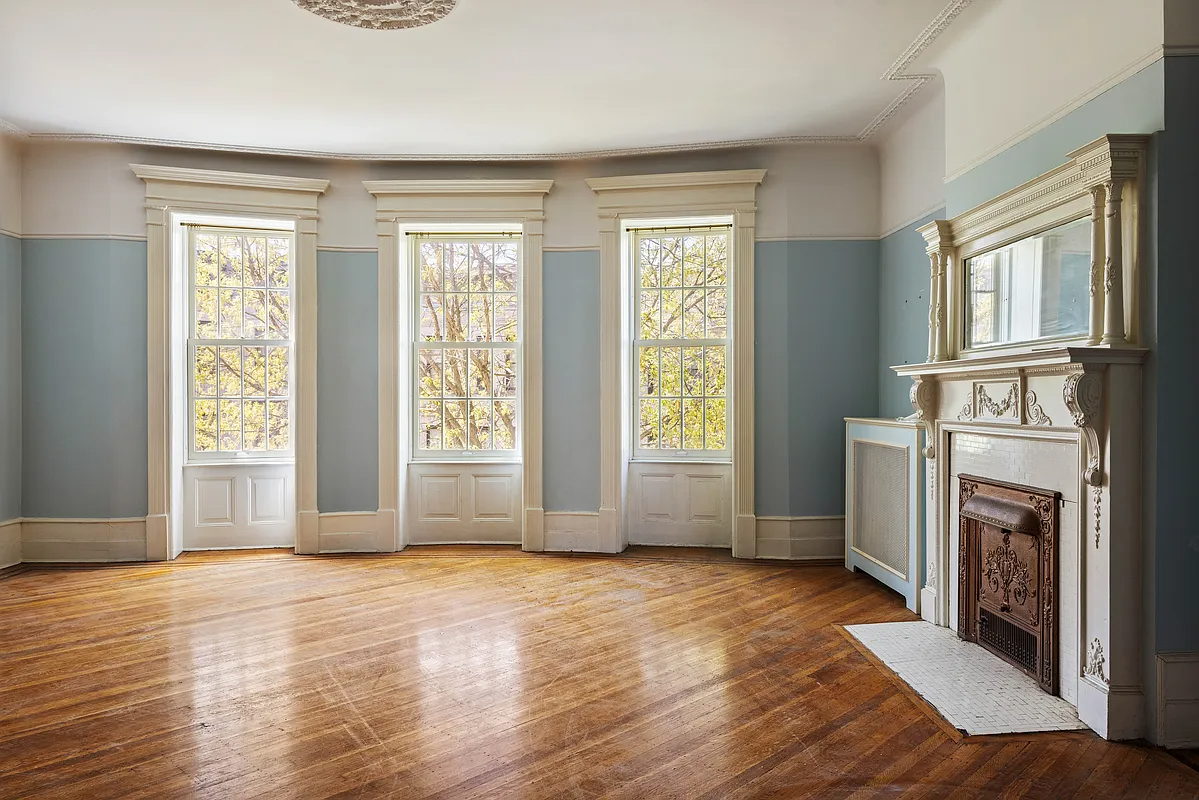
Editor’s note: Welcome to the 72nd installment of Brownstone Boys Reno, a reader renovation diary about renovating a brownstone in Bed Stuy. See the first one here. They also blog at www.thebrownstoneboys.com.
‘Tis the season for gardening and planting! The sun is out and birds are chirping and we’ve been working on our backyard makeover the past two months. It’s been a really fun 100 percent DIY project and the perfect distraction from the problems of the world. We have already planned our space, torn out a lot of the existing features, built our hardscaping, and now we are finally ready for planting. Our budget is tiny so we really needed to be smart about choices. Over this past weekend we did an Instagram Live Q&A with our backyard beautifier and gardening guru, Jeanette Williams, to help answer questions. We thought we would talk about everything we have learned and provide as much info as we can (with the help of Jeannette of course) to help you get your gardening on too.
Backyard Recap
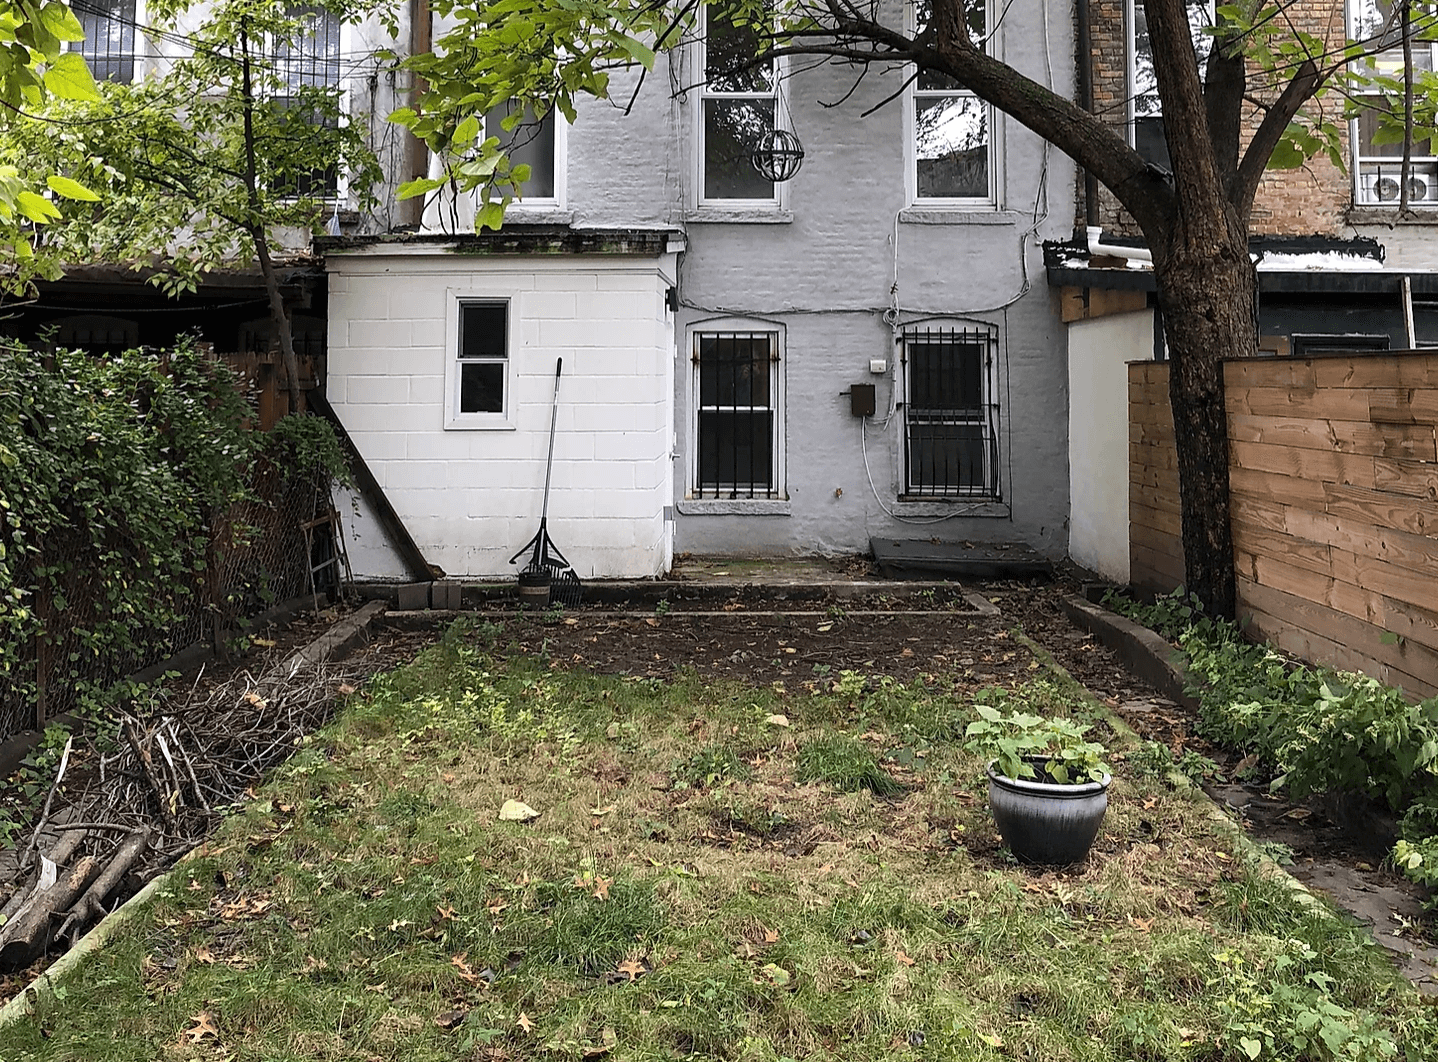
First a quick recap of where we are in the process. Our backyard was always a project we put off until after our larger renovation was complete. It was a pile of rubble for a lot of it and it was an overgrown mess for all of it. We built the deck as part of the renovation but it wasn’t even a pleasant place to be because the rest of the yard was not very inspiring. We were so fortunate to find Jeannette who is so good at everything we are not when it comes to gardening. We had questions. Can we have grass with a shady yard and a large dog? What kind of plants should we get? What kind of patio/hardscape will fit into our very small budget?
We planned, designed and started installation. We removed all of the existing features including a lot of cement. We fortunately found some bluestone that we are reusing, we built a large raised flower bed, and we planted grass! Our backyard is already completely transformed and we have one more big step of putting in all of the plantings.
Where to Begin
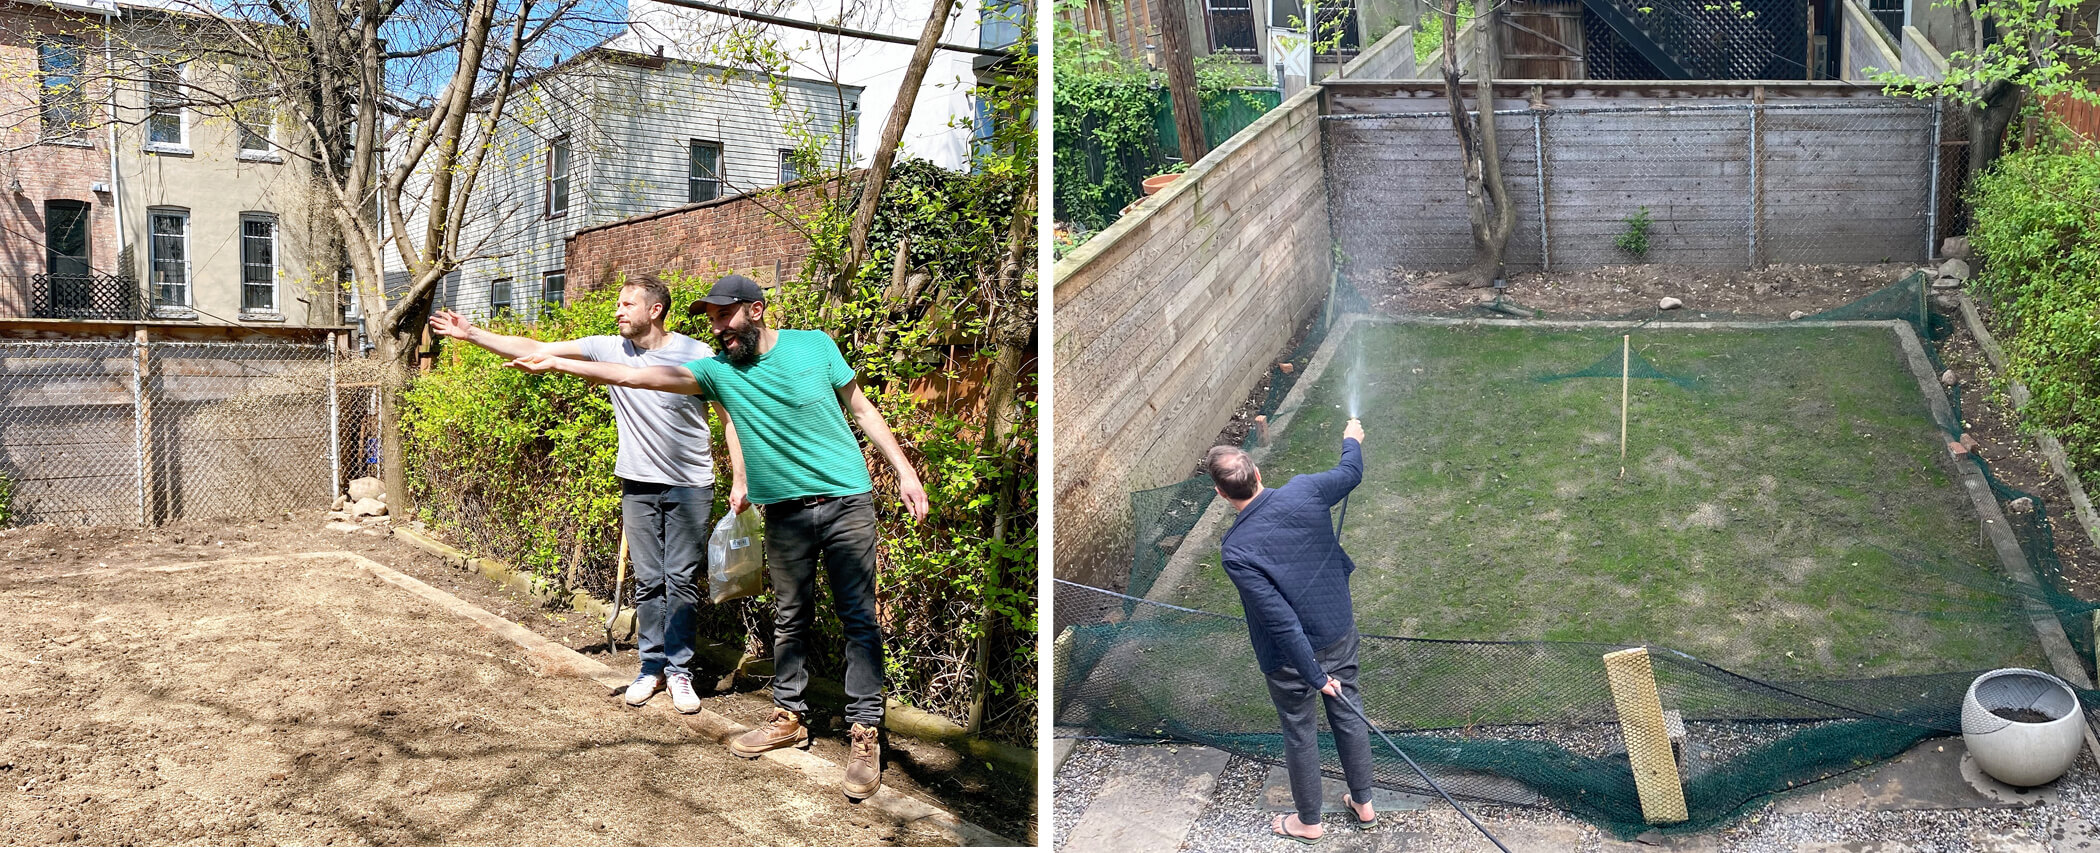
If you’re like we were, you are currently staring at your overgrown or not-so-inspiring backyard just not knowing where to start. Fortunately, the first time Jeannette came over to see our space we developed a clear plan. She suggested that we first just observe our space. Note where the sunlight falls (we took a picture every hour on the hour of the backyard so we can understand where the sunny spots are). We also gathered inspiration from photos of spaces we loved and tried to envision ourselves in the space. All of this pretty quickly developed into a plan. We noticed that the back half of our yard gets a good amount of sun, while the front half gets almost none. It made it very easy to determine where our patio space would be and where we would attempt to plant grass. We also listed our priorities for the space (relaxing, eating, dog play…etc). It all clicked when Jeannette suggested the perfect inspiration picture, and we were ready for the next phase!
Designing the Space
Designing the space is the most important part. This is when you’ll decide where to build the hardscape, where to put softscape, what plants go with that and make sense for your yard, and of course budget.
Hardscape
This is where budget was a big concern for us. We were hardscaping a pretty big area from the patio that is under the deck all the way out to about half of the yard. Pavers, bluestone, or flagstone for the entire area would have pushed us out of budget. So we decided to use the bluestone we reclaimed from our backyard and pea gravel to cover a large area for the patio. Read more about our patio installation and budget here, but the plan came to about $800. Flagstone runs about $16 to $20 per square foot so we feel that it was a great decision!
Softscape
Once we understood where the hardscape was going we designed the softscape and plantings. Our backyard is fairly shady although the back half gets partial sun. We really wanted grass at least in part of our yard. Jeannette helped us determine where it would make sense to have grass and also to find the right type.
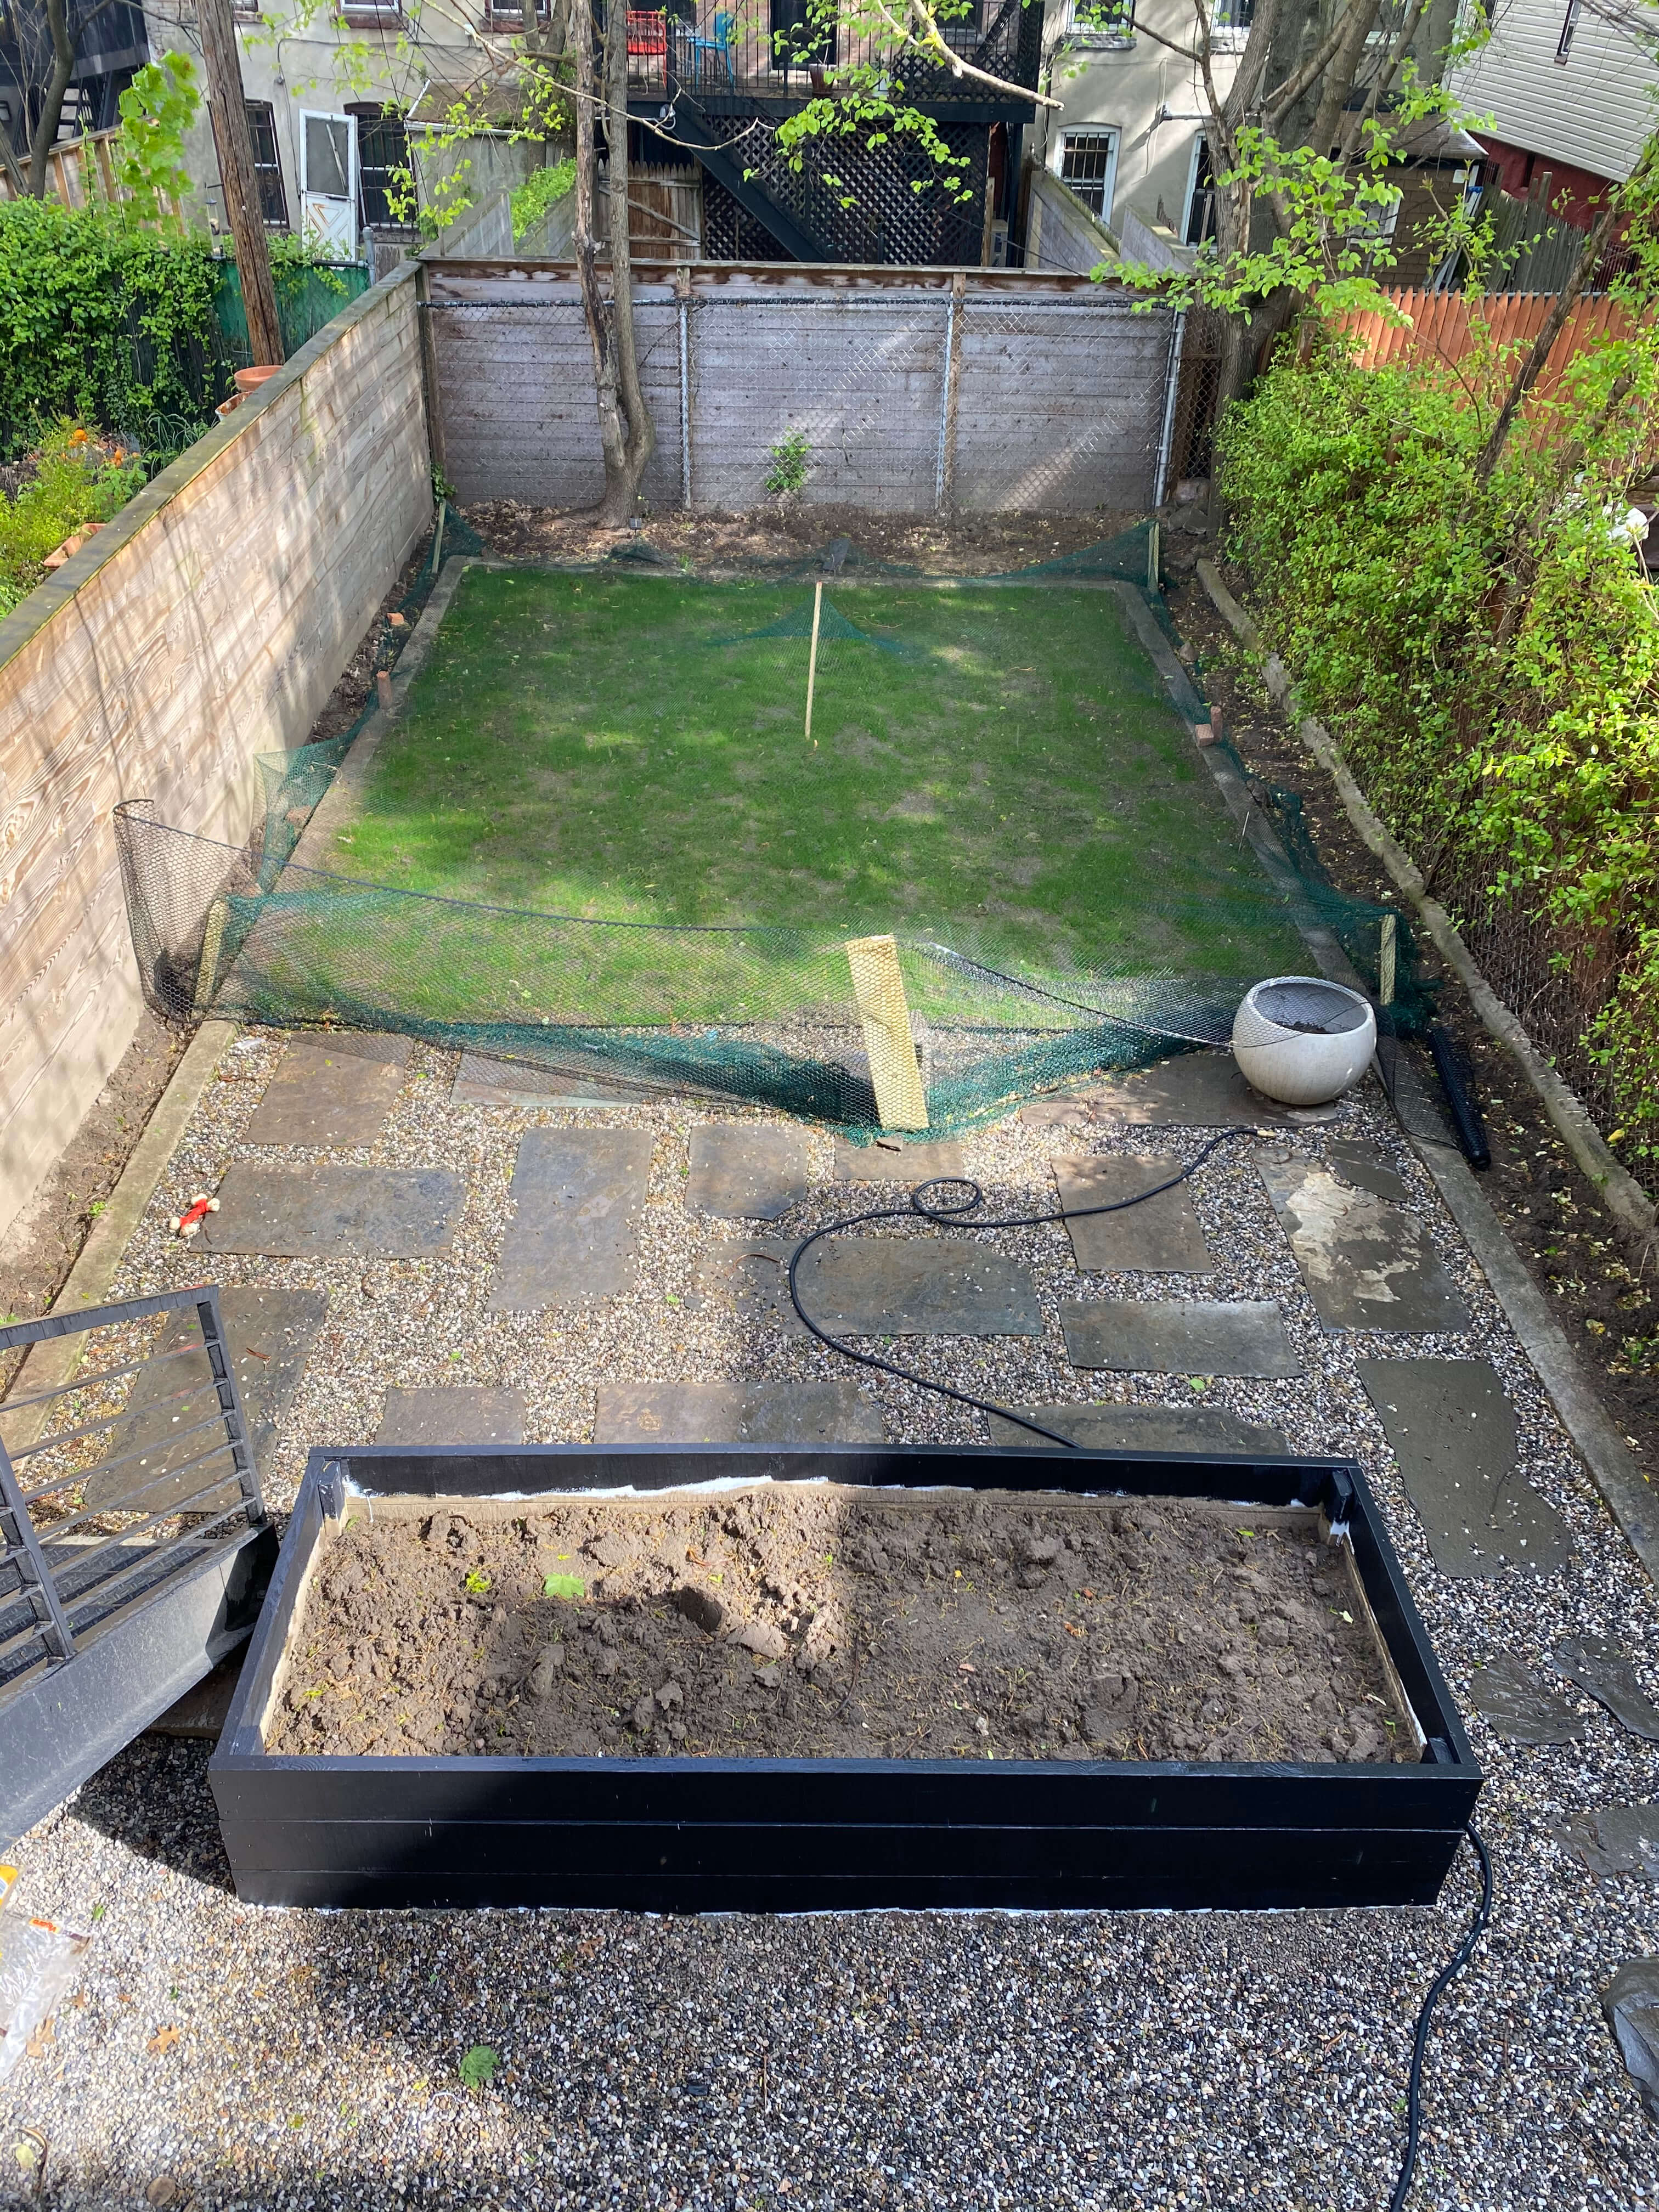
Grass Update
To sod or to seed, that is the question! After carrying 145 bags of sand and gravel through our house and into the backyard, getting a two-pound bag of seed was definitely the way to go rather than carrying sod. It was also much cheaper and gave us the ability to really customize the mix of turf seed. We went with a pet-friendly microclover turf mix. It has four varieties of grass, fescue, and microclover, which is supposed to handle pet urine better as well as being drought tolerant (aka us forgetting to water it!). We prepared the area by removing some excess soil, turning it all over, adding 1 bag of peat moss to aerate, an organic lawn starter fertilizer (you could do without this if you have an issue with it), and just hand sprinkling our seed. We cover it all with bird netting so that the birds and squirrels won’t steal half our seed. You need to keep the seed moist at all times during germination which means watering three to four times a day when it’s not raining. We expected that we wouldn’t see any sprouts for a couple of weeks (and perhaps never since this is our first grass seed planting experiment!) but after one week we had a green fuzz starting to form over the entire area. After two weeks we had grass that almost needed cutting. We do need to go back and fill in some places either we missed laying the seed by hand or that possibly moved around while watering. Overall it looks great and we’re very glad we went with seed over sod.
Plantings and Veggies
One of the things Jeanette suggested we do during the observation phase was to get a soil test. That would tell us if there are any heavy metals or anything we should be worried about when eating veggies grown in our yard. COVID-19 shut down the labs that could do that for us so we had to proceed without it. Because of that we are not planting any edible plants in our yard right now. We could just bring in some top soil for it but we have moved enough soil around for this year and lifetime. We also want to be sure anything we plant is dog friendly. Our dog Zuko loves to take a chomp out of anything green and we don’t want him to get sick. Jeannette let us know that a few of the plants we liked and suggested were potentially toxic to dogs. We didn’t realize how important a consideration that should be. Since our yard is shady we also didn’t want to set ourselves up for failure with the wrong plants.
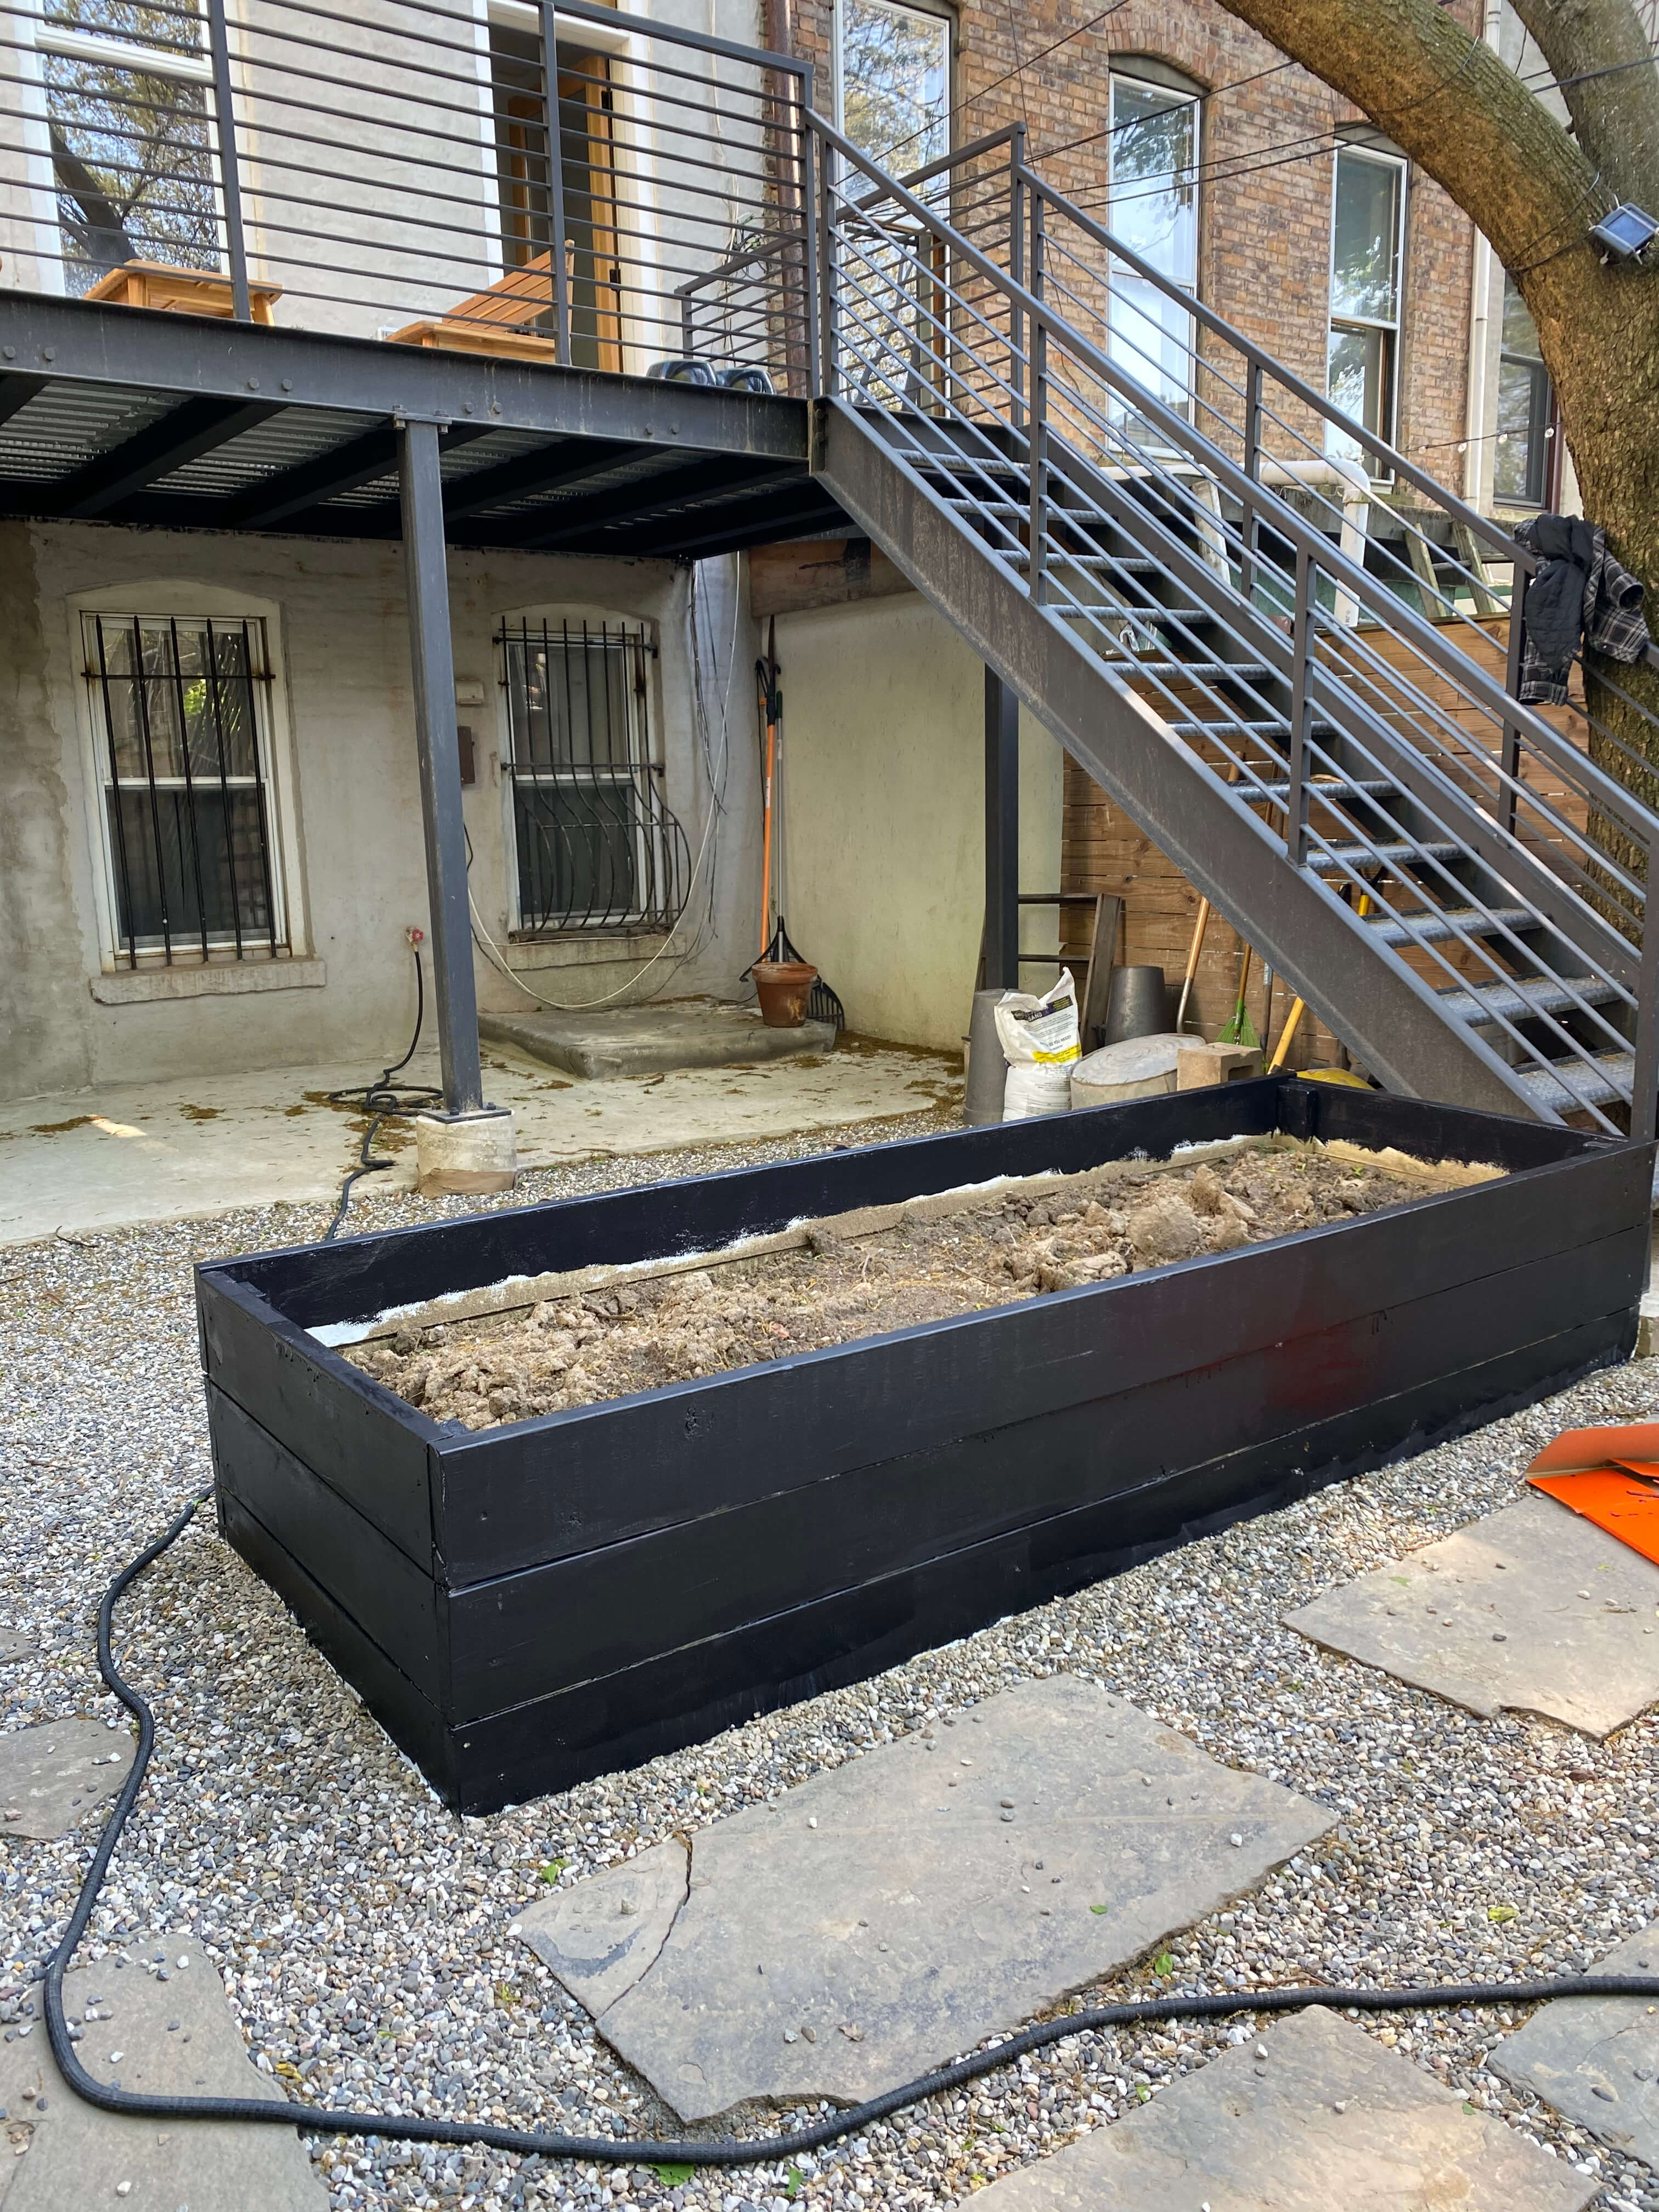
We have beds all around our yard and a large 3-foot by 9-foot planter box to cover. We really want to plant mature plants so we were worried about the budget. Fortunately Jeannette suggested many options that fit our requirements for shade friendly and dog friendly plants.
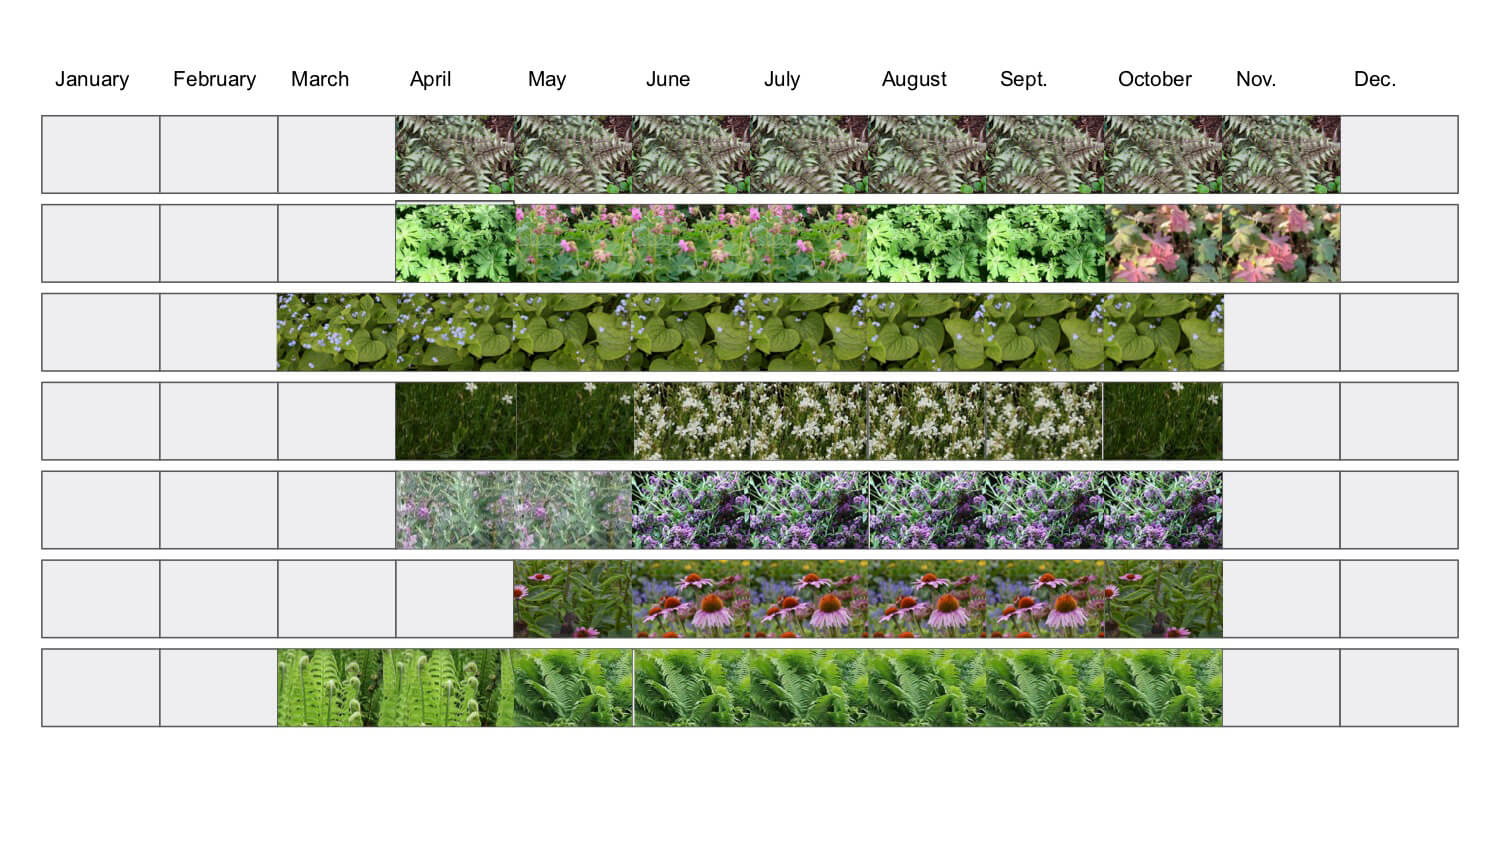
Our Plant Choices
We’re doing ferns and geraniums in the extra shady spots, Bugloss and Buddleia Unique in partial sun, Echinacea magnus in the sunniest spots, and Eastern redbud Ruby Falls for some pops of bright color.
We’re sourcing plants from a few places but we were able to find great prices and selection at Natty Garden, Kings County Nursery, Hicks Nurseries, and Fanelli’s Landscape Supply.
Plantings Budget
We spent $18 on a 2 pound bag of grass seed. To prep the area, we spent $20 on a bag of lawn starter and $15 on a large bag of peat moss. We haven’t ordered our plants yet but Jeannette is helping us source them and put together an amazing spreadsheet so that we know exactly what we are spending. Plantings for a very full and mature garden covering a typical 20-foot by 50-foot Brooklyn backyard is costing us about $600.
Installation
The design phase is the longest but the installation phase is the most labor intensive. Since it’s a DIY project and we work during the week it took us a couple of months of working on weekends to get to where we are now. Demo and bagging up the existing cement took a couple weekends. Digging, and digging, and digging to remove soil and level the area for the patio area took a couple of days. Installing the gravel and bluestone patio took a couple of days. Removing excess soil and prepping for the grass area took a day. And now we are ready to plant.
Total Budget
Right now our backyard makeover, which very dramatically transformed our space, has cost about $1,500. We are still working and may add a few things, including furniture, but so far we are pleasantly surprised at how inexpensively we were able to do it. It was a good amount of work but we feel it has been totally doable for anyone even with no experience, especially with help of our gardening guru, Jeannette!
[Photos by Brownstone Boys unless noted otherwise]
Related Stories
- Brownstone Boys: How We DIY Landscaped Our Backyard and Patio on a Budget
- Brownstone Boys: Budget Backyard Makeover
- Brownstone Boys: We Design a Deck
Email tips@brownstoner.com with further comments, questions or tips. Follow Brownstoner on Twitter and Instagram, and like us on Facebook.
What's Your Take? Leave a Comment