
Brownstone Boys: Updating Furniture With Our IKEA Dresser Hack
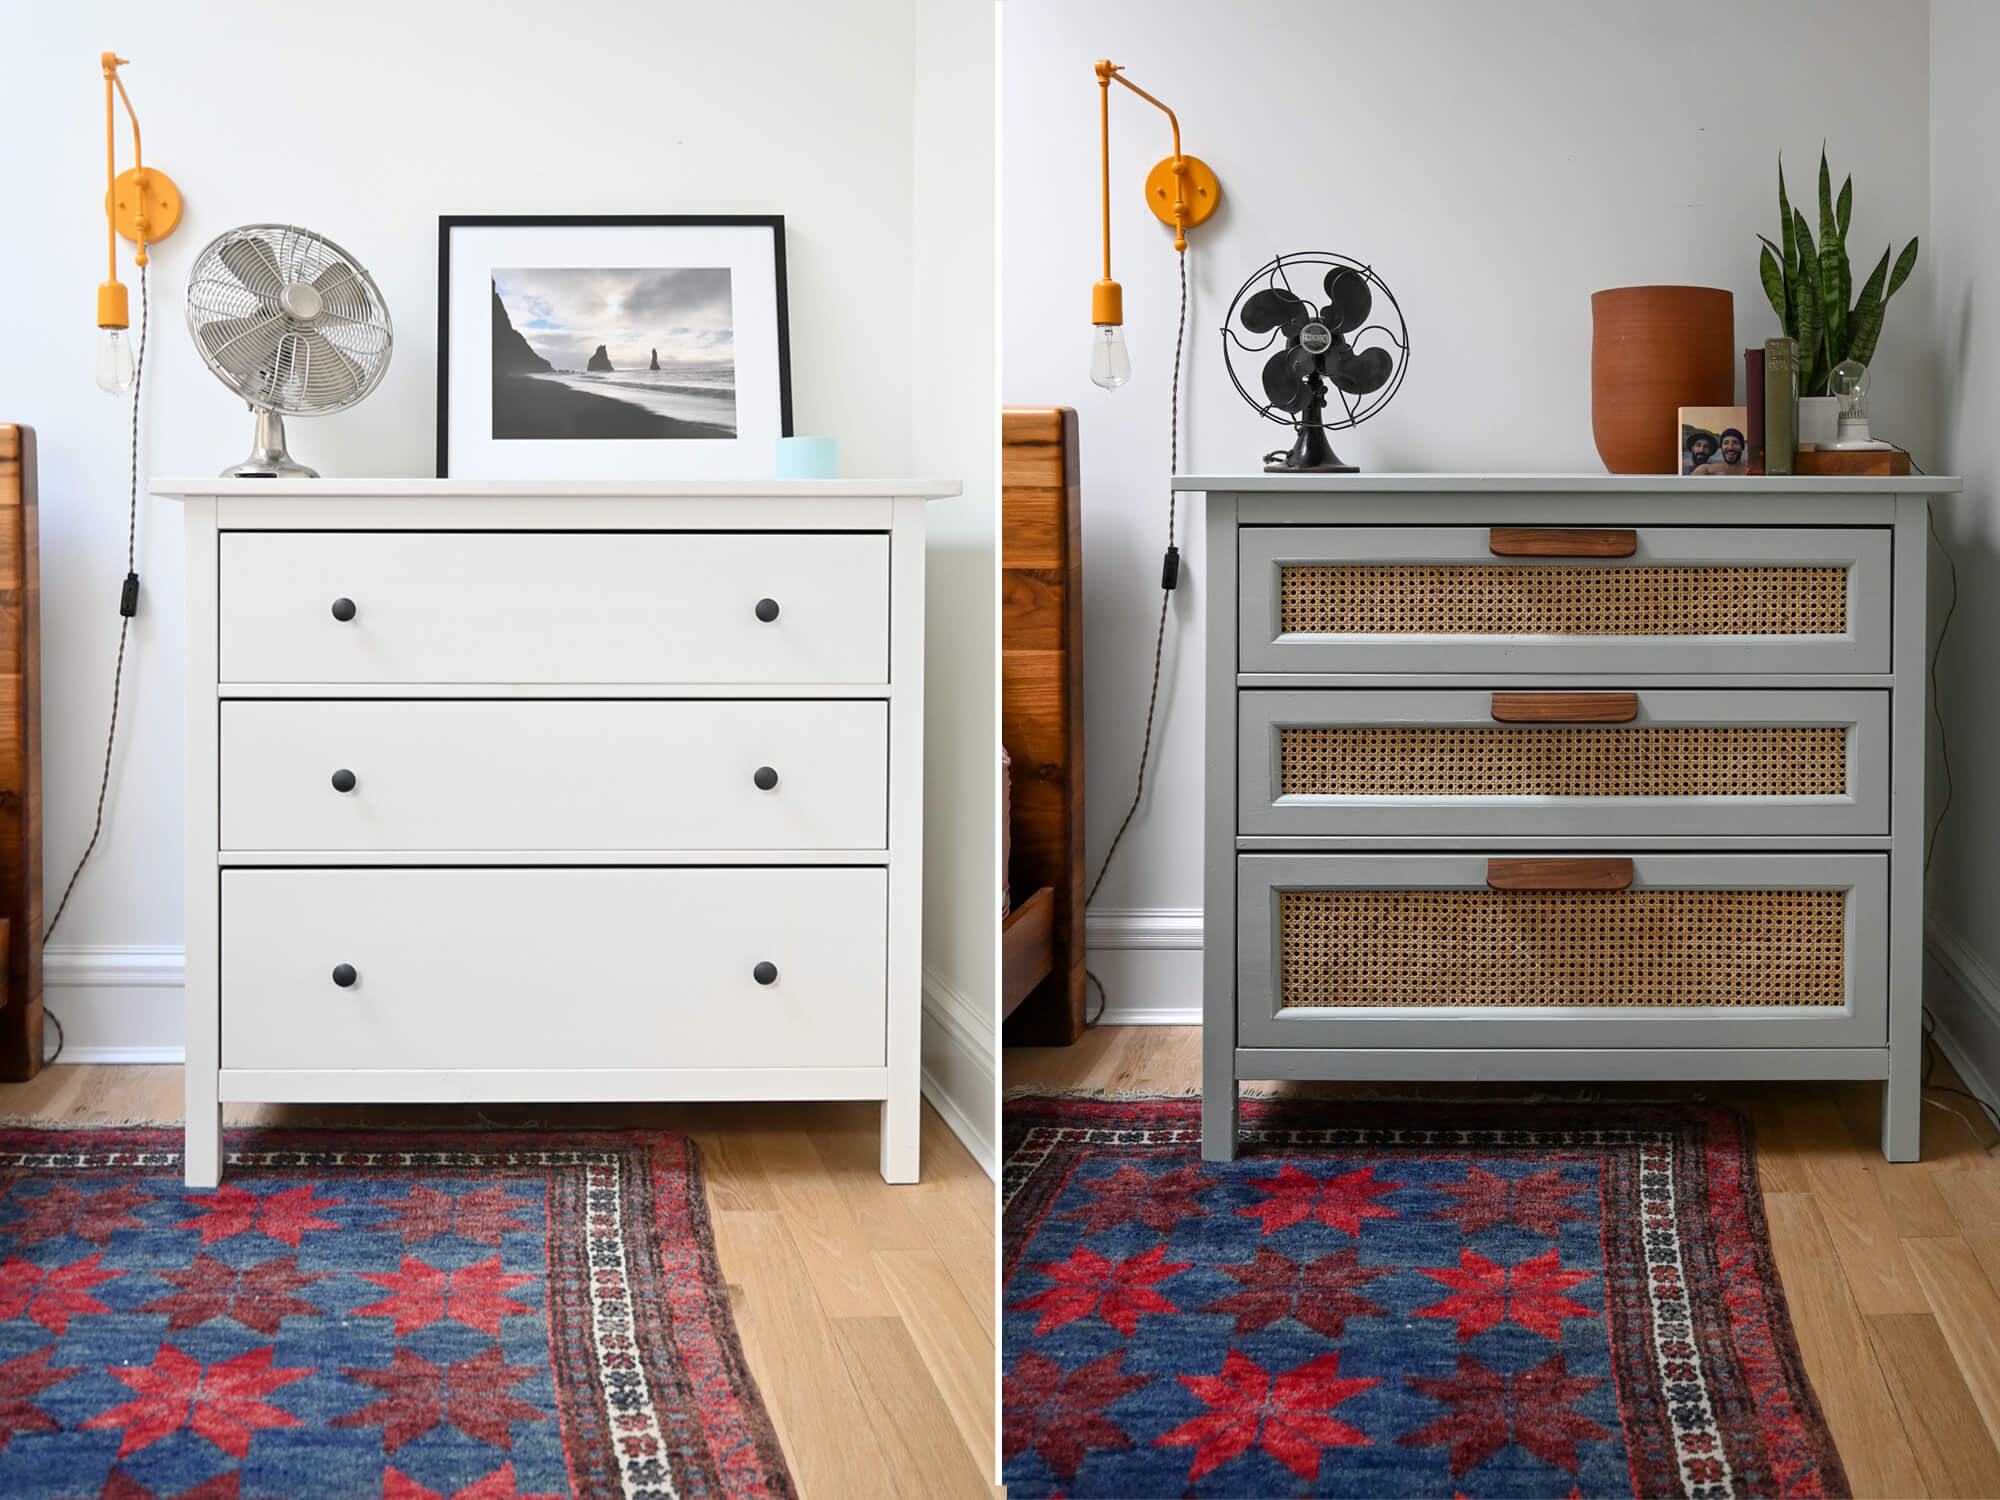
This makeover of an Ikea Hemnes three-drawer dresser cost us less than $50 and took just a couple days.

Photo by Brownstone Boys
Editor’s note: Welcome to the Brownstone Boys Reno, a reader renovation diary about renovating a brownstone in Bed Stuy. See the first one here. They also blog at www.thebrownstoneboys.com.
In honor of Valentine’s Day this week, we’re embracing our strongest love/hate relationship ever….. Ikea!
We all have that one Ikea piece of furniture that’s been with us a little too long. For us, it’s the Hemnes three-drawer that’s hiding in our guest bedroom. We decided it was time for a little DIY love makeover. This redo cost us under $50 and took us just a couple of days to complete! Now, we have a new “old” dresser.
Tools:
Cordless drill and drill bit
Stapler and staples
Paintbrush
Clamps (or tape to hold the molding in place while the glue dries)
Jigsaw
Mitre saw (or fine saw and mitre block)
(If you don’t have power tools and don’t want to get any, you can take the drawer fronts to a local wood store and they might cut it for a small fee)
Supplies:
Ikea Hemnes chest of drawers (we have had ours for over eight years!)
Handles (ours are from House of Antique Hardware)
Cane webbing (we got ours on Amazon. Make sure you order a little extra)
Molding for cabinets (We picked up simple 1/4-inch rounds at Home Depot. Our advice is to get one that is on the smaller side and doesn’t feel too large in the drawer)
Sandpaper
Wood filler
Wood glue
Paint (We went with Clare Paint Greyish)
1. Disassemble the Chest of Drawers
You will want to get everything out of the drawers. We have been hoarding a lot of our clothes we don’t usually wear in this dresser. So this gave us the perfect opportunity to do some early spring cleaning. Once everything was cleared out, we removed the drawers and then took off the existing hardware. It’s Ikea, so you won’t need any special tools for this – a screwdriver will do. Remove the cabinet fronts and make sure to keep the screws for them.
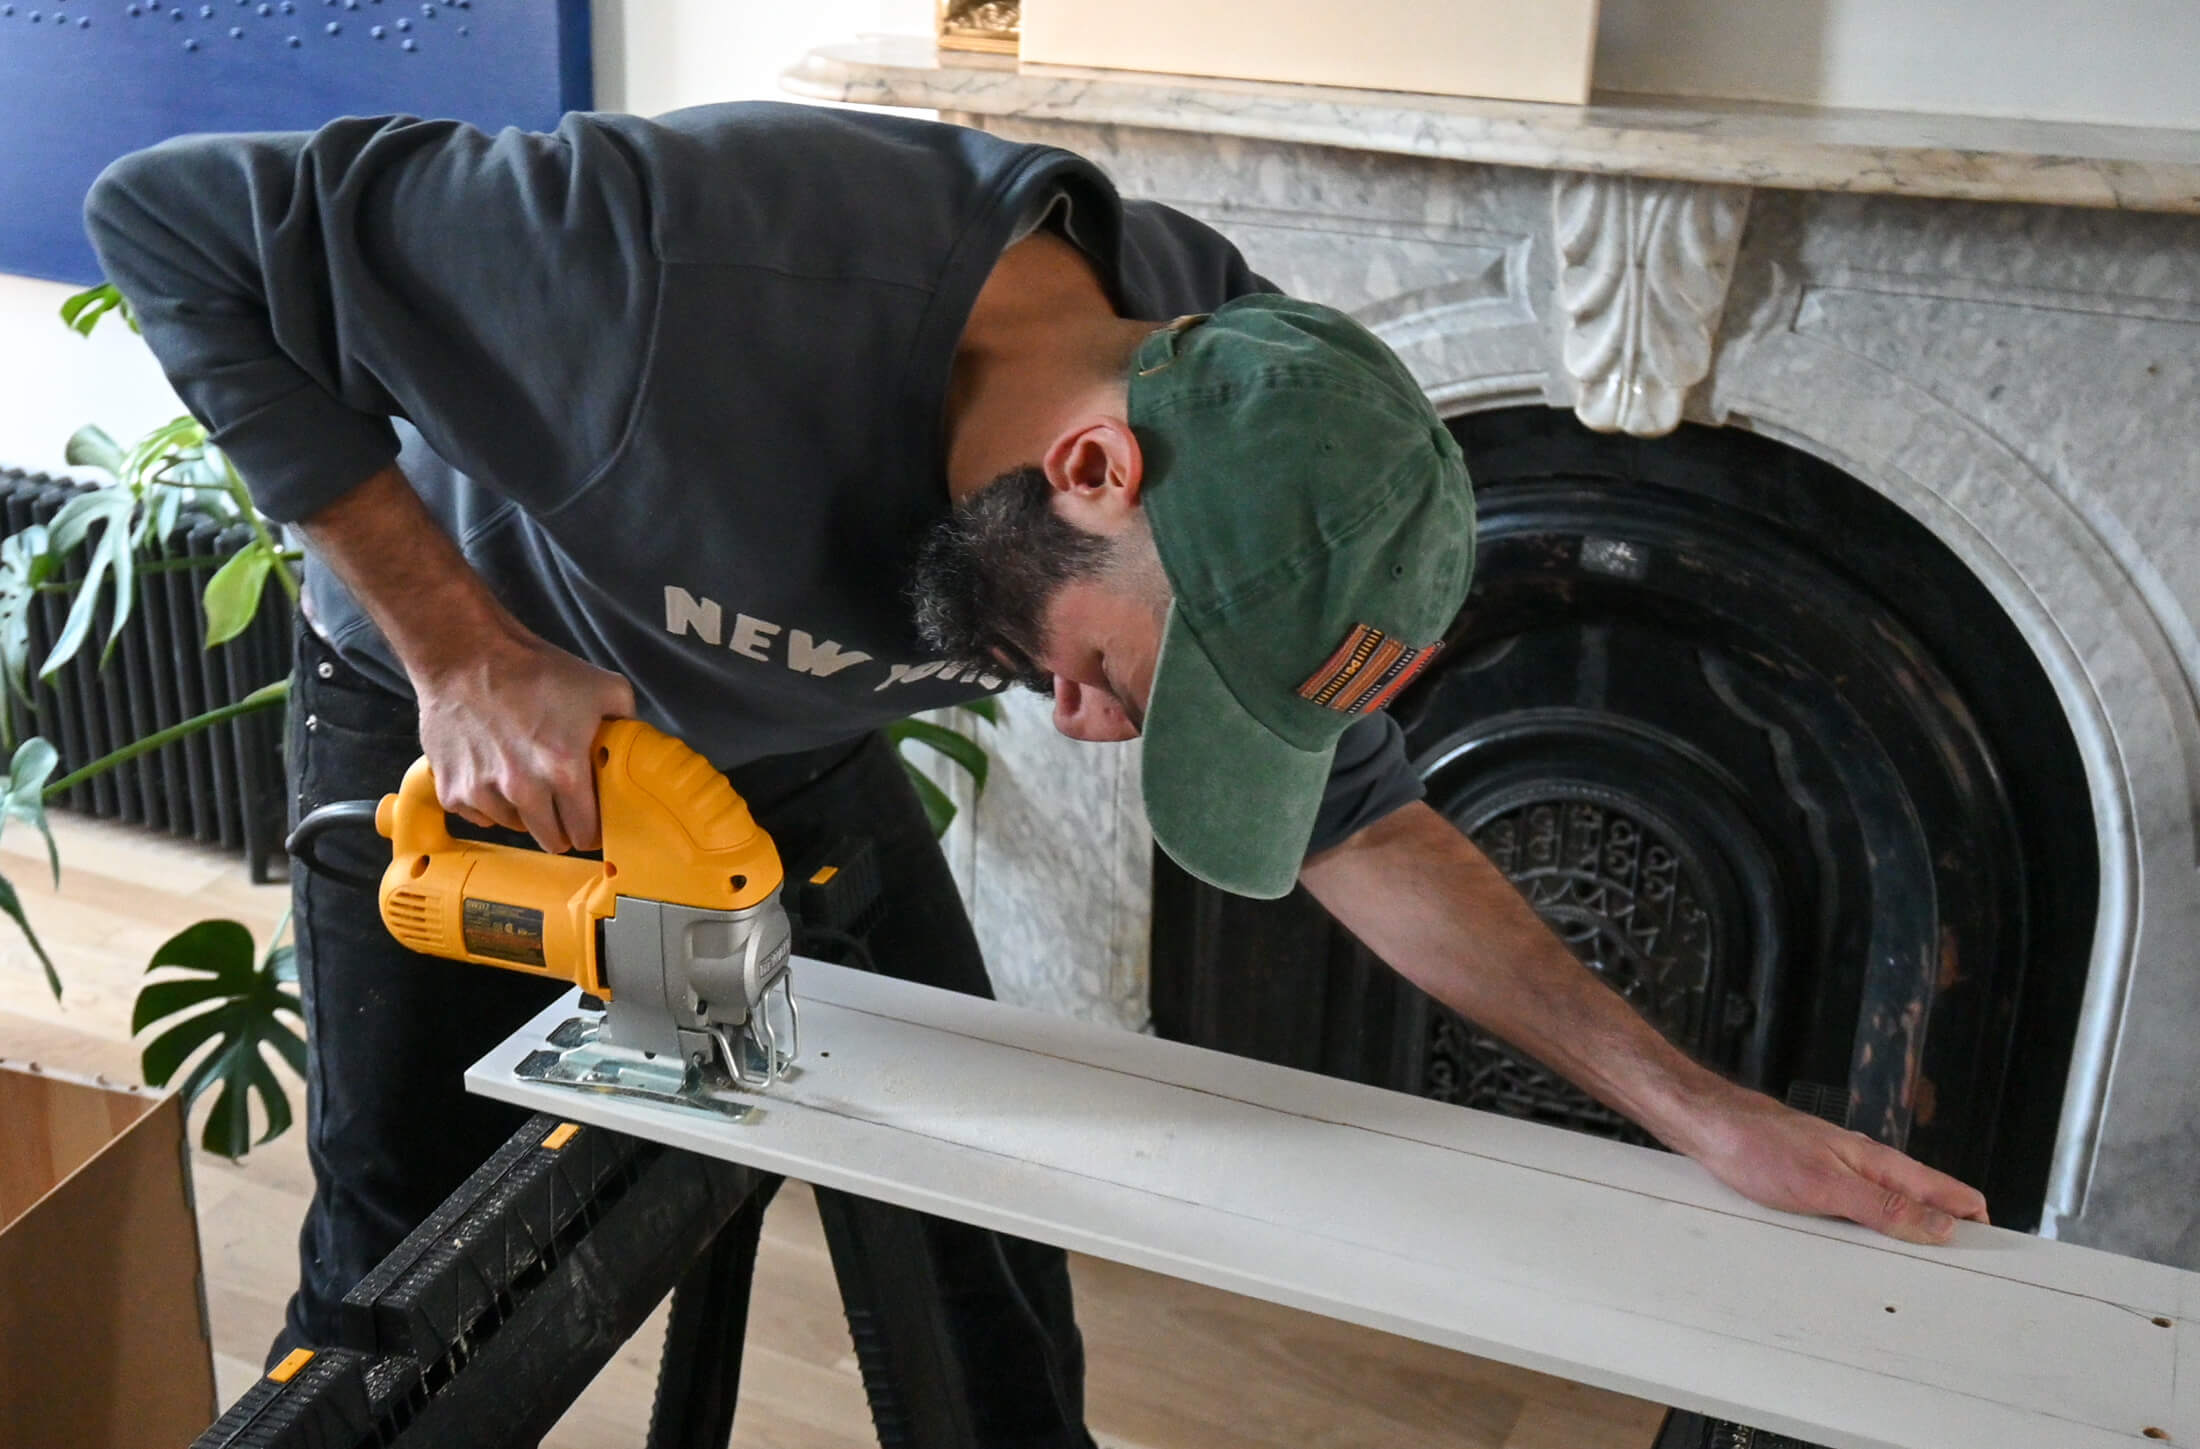
2. Measure, Make and Cut
Next, cut the square holes into the drawers. You’ll want to decide how much border you want around the webbing. You don’t want it to be too narrow because it could leave the drawer too weak. And don’t forget you will need enough space to attach your new handles.
We went with about 2 inches. Measure all the way around and draw the square you’ll be cutting out onto the drawer front. Now you’re ready to grab your jigsaw and start cutting! If you don’t have any power tools you can bring this to a local wood shop and they may be able to cut it for you. But we recommend having a few handy tools around, and maybe this is a good project to get your toolbox started.
Before you can start cutting, you’ll need to drill a hole inside the area you’ll be removing that’s big enough for you to insert your jigsaw blade. Carefully cut out the square and try to follow the lines exactly. Don’t be discouraged if this is difficult at first. If it’s your first time using a jigsaw you’ll need a bit of practice. You will also be putting trim around the cut edge to hide some imperfections.

3. Smooth the Edges and Attach Molding
Sand all edges with sandpaper and make sure everything is as smooth as possible. Since the edge where you cut will be unfinished (and possibly with some imperfections from the cutting) you’ll want to hide it with molding. We used a quarter-round trim to give it nice curved edge detail. You need a miter saw or a miter box to cut the moulding on a 45-degree angle and miter it at the corners. If you’ve never done this before our advice is to get an extra couple of lengths of molding. It’s a little tricky and you might have to redo a few of them.
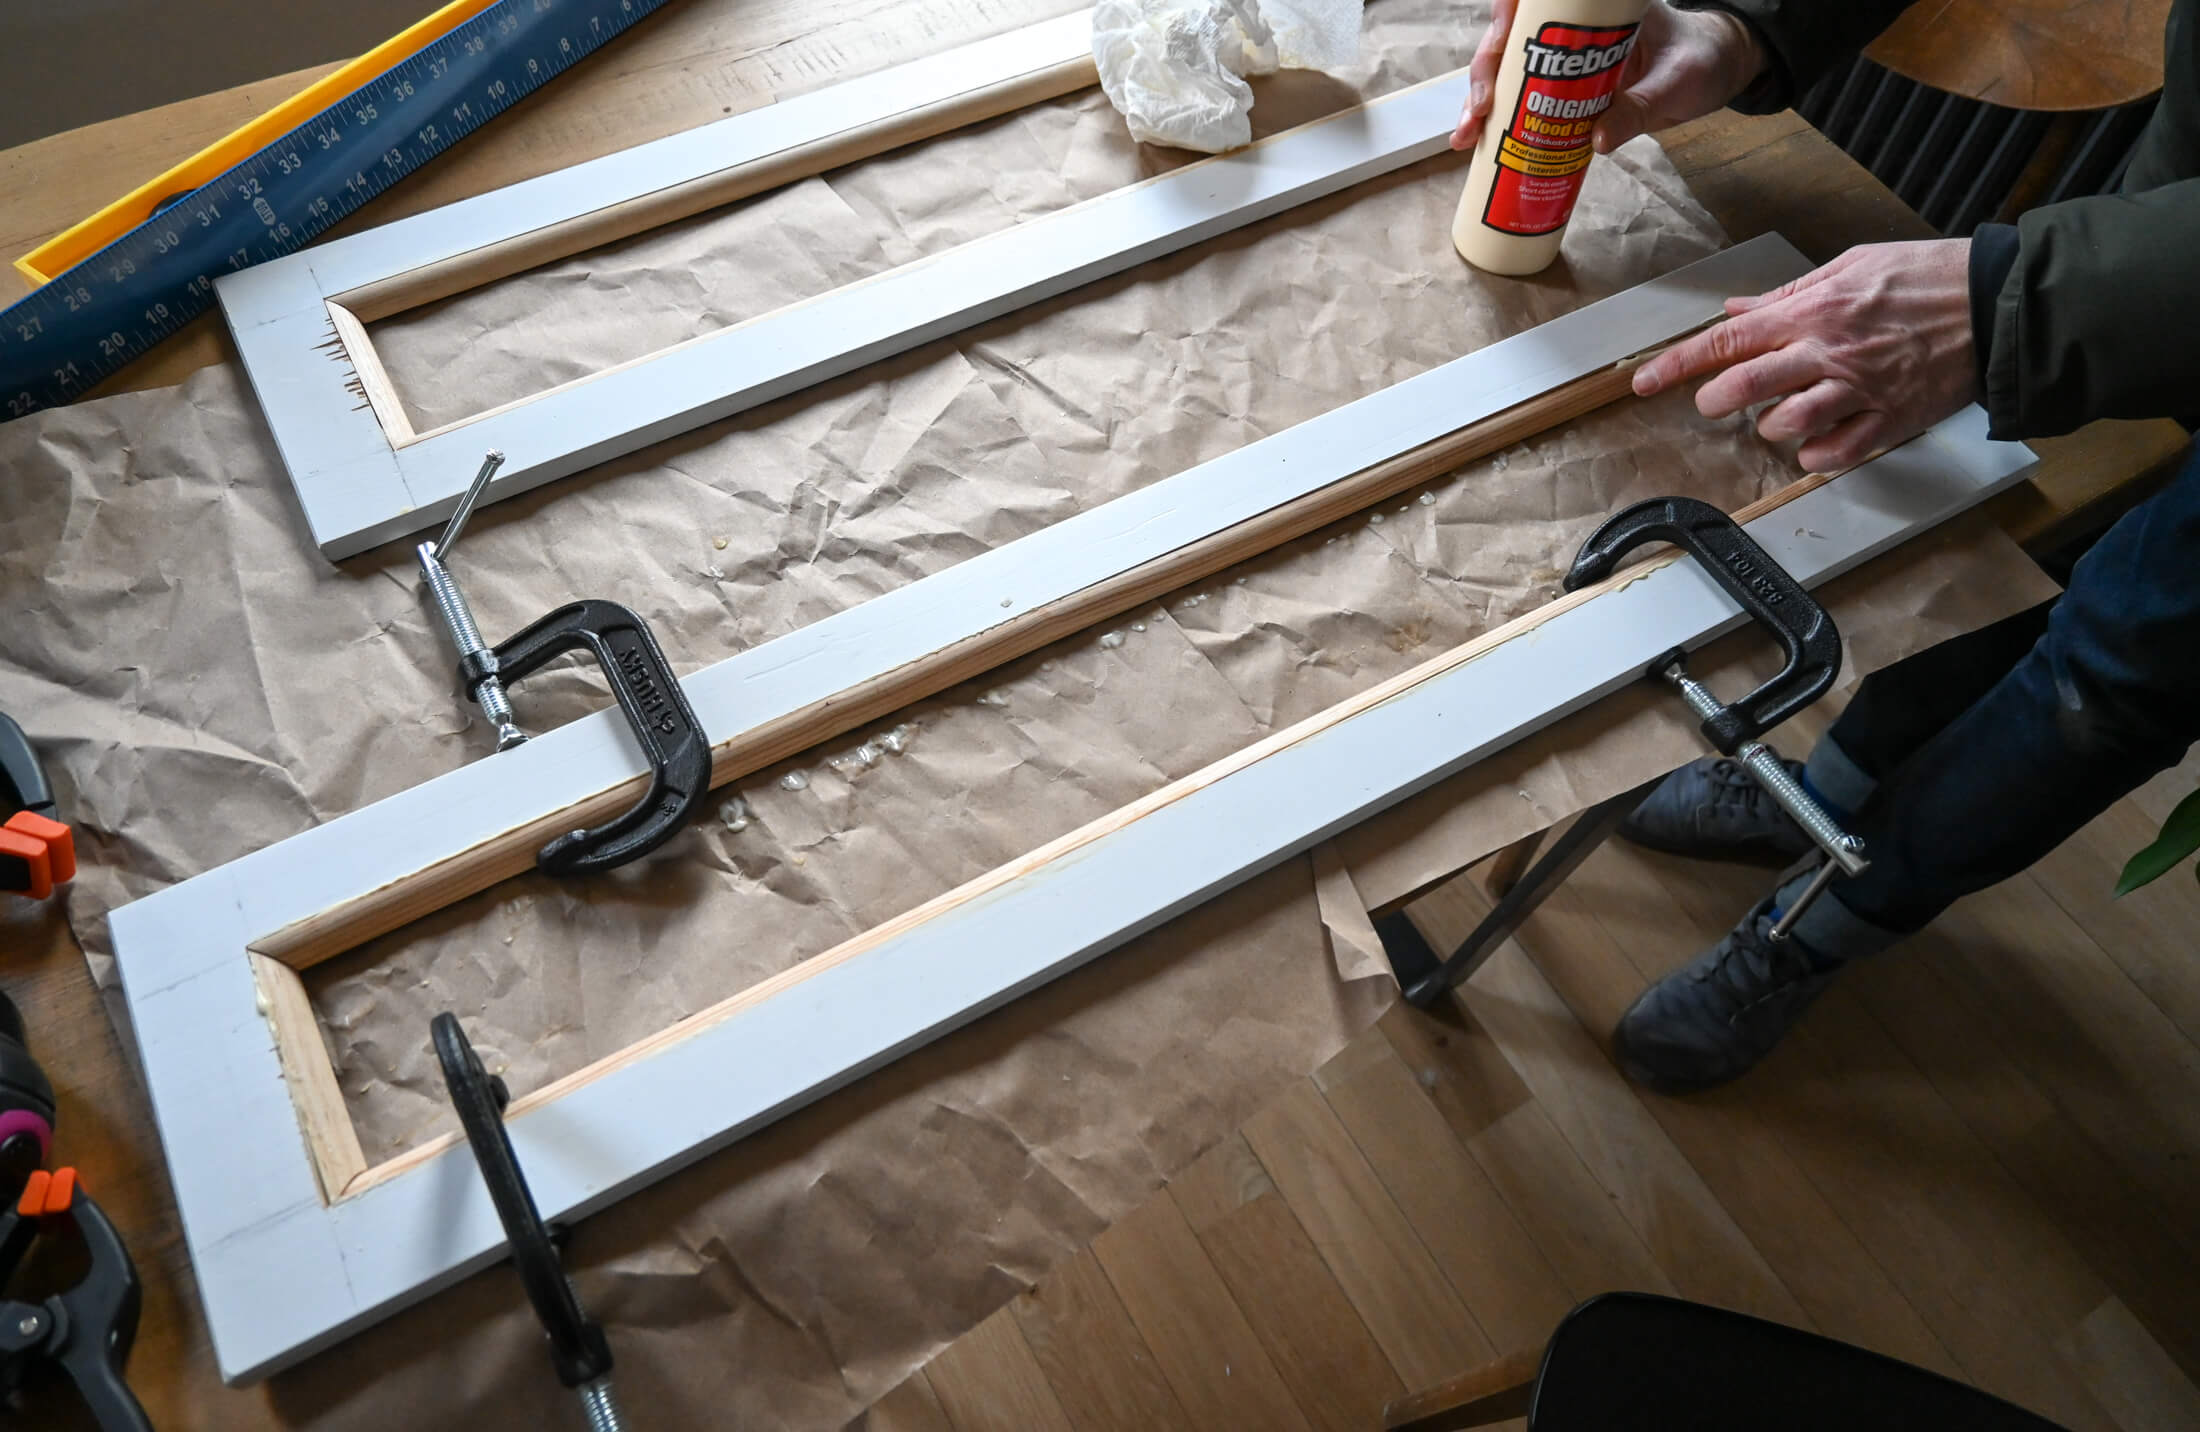
Assemble the molding into the cutout to make sure it all fits. If it’s not perfect at the miter joints and if there are small gaps where the moulding meets the cutout it’s OK. We’re going to fill it with some wood filler before painting. Glue the moldings onto the cut edge and use clamps to hold it into place until it dries. If you don’t have clamps just hold it in place for about two minutes and it should be good from there. It should be dry enough to continue after a couple of hours, but we waited until the next day.
When it’s dried, fill any gaps, uneven cuts, or chips from the cutting with some wood filler and let it dry before sanding everything so that it’s smooth and ready to prime and paint. The wood filler can be sanded and painted so you won’t see these imperfections after.
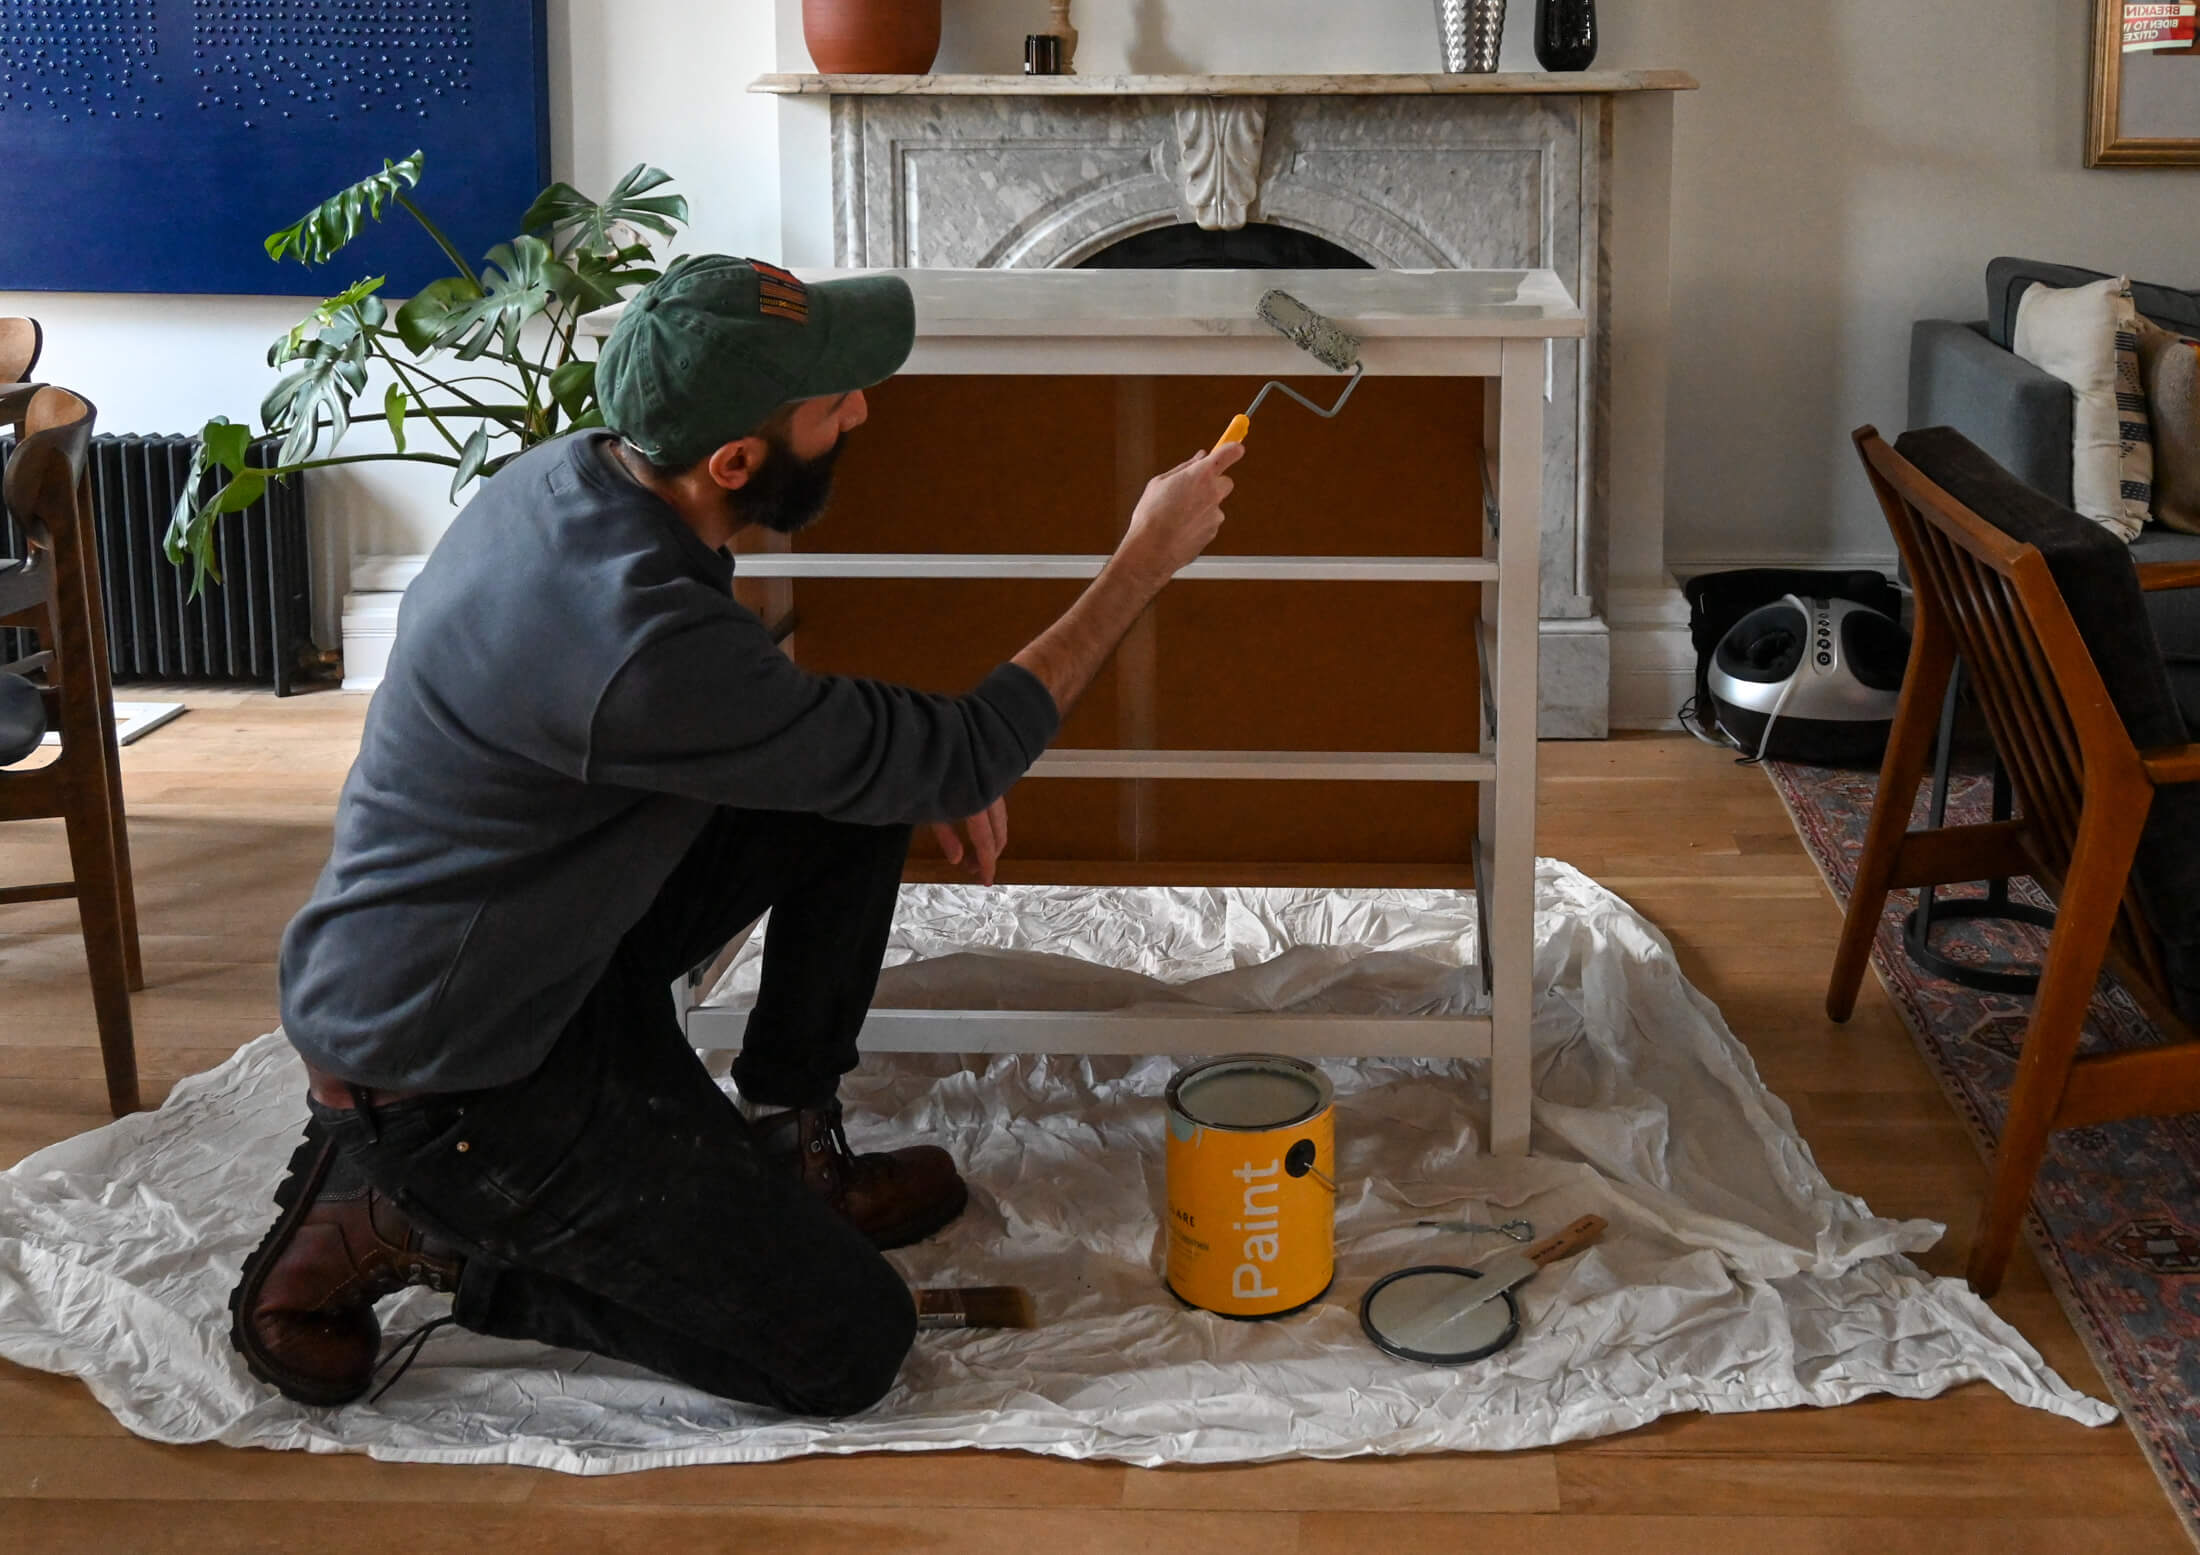
4. Sand, Prime and Paint Everything
When you’ve finished all cutting, glueing and filling it’s time to give everything, including the entire dresser, a sand with some 120 grit sandpaper. We just did ours by hand.
Sanding the surface will roughen it up ever so slightly and provide a good base for the paint to stick. Give everything a wipe down to make sure it’s dust free before painting.
Any unpainted wood will need priming. We skipped the primer because the existing cabinets were white and just needed a couple coats of fresh paint. Don’t forget you also have to sand between every coat of paint to remove any imperfections, air bubbles and provide more grooves for the next coat of paint to stick to.
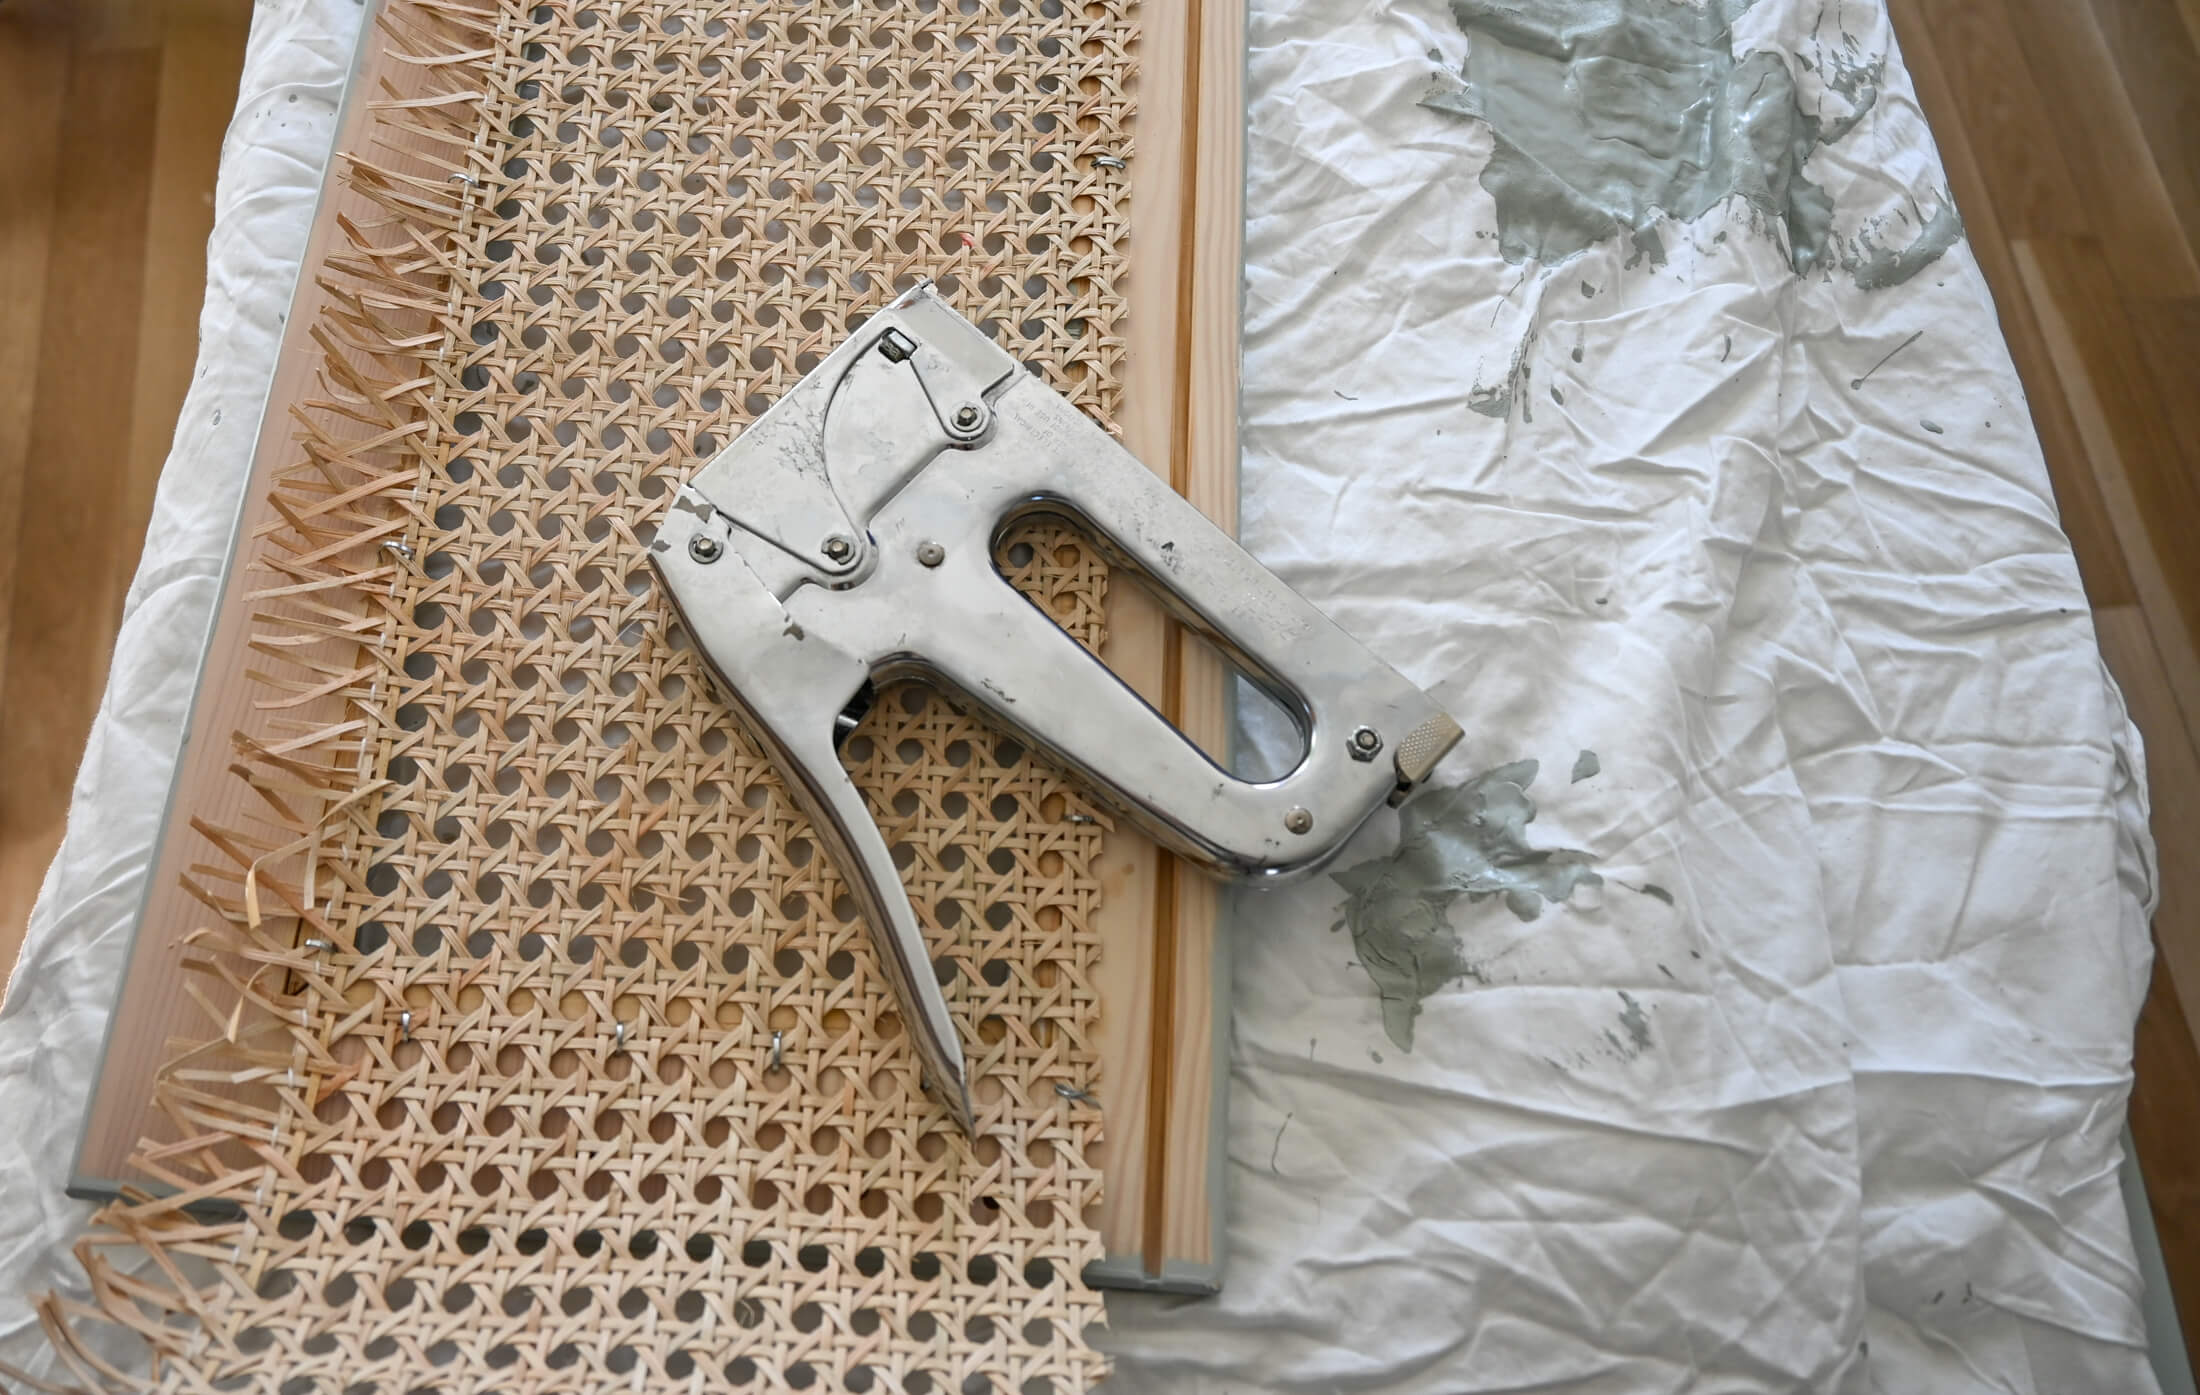
5. Attach the Webbing
When you’ve finished painting and everything has thoroughly dried (give it a good 24 hours for good measure) you can start to update your Hemnes dresser with cane webbing. Flip over the front of your drawers and staple a piece of webbing over the opening. Cut and measure the webbing first! Also, we made sure to flatten our webbing a couple days in advance. It comes rolled up and will be hard to work with if it’s constantly curling up on you.
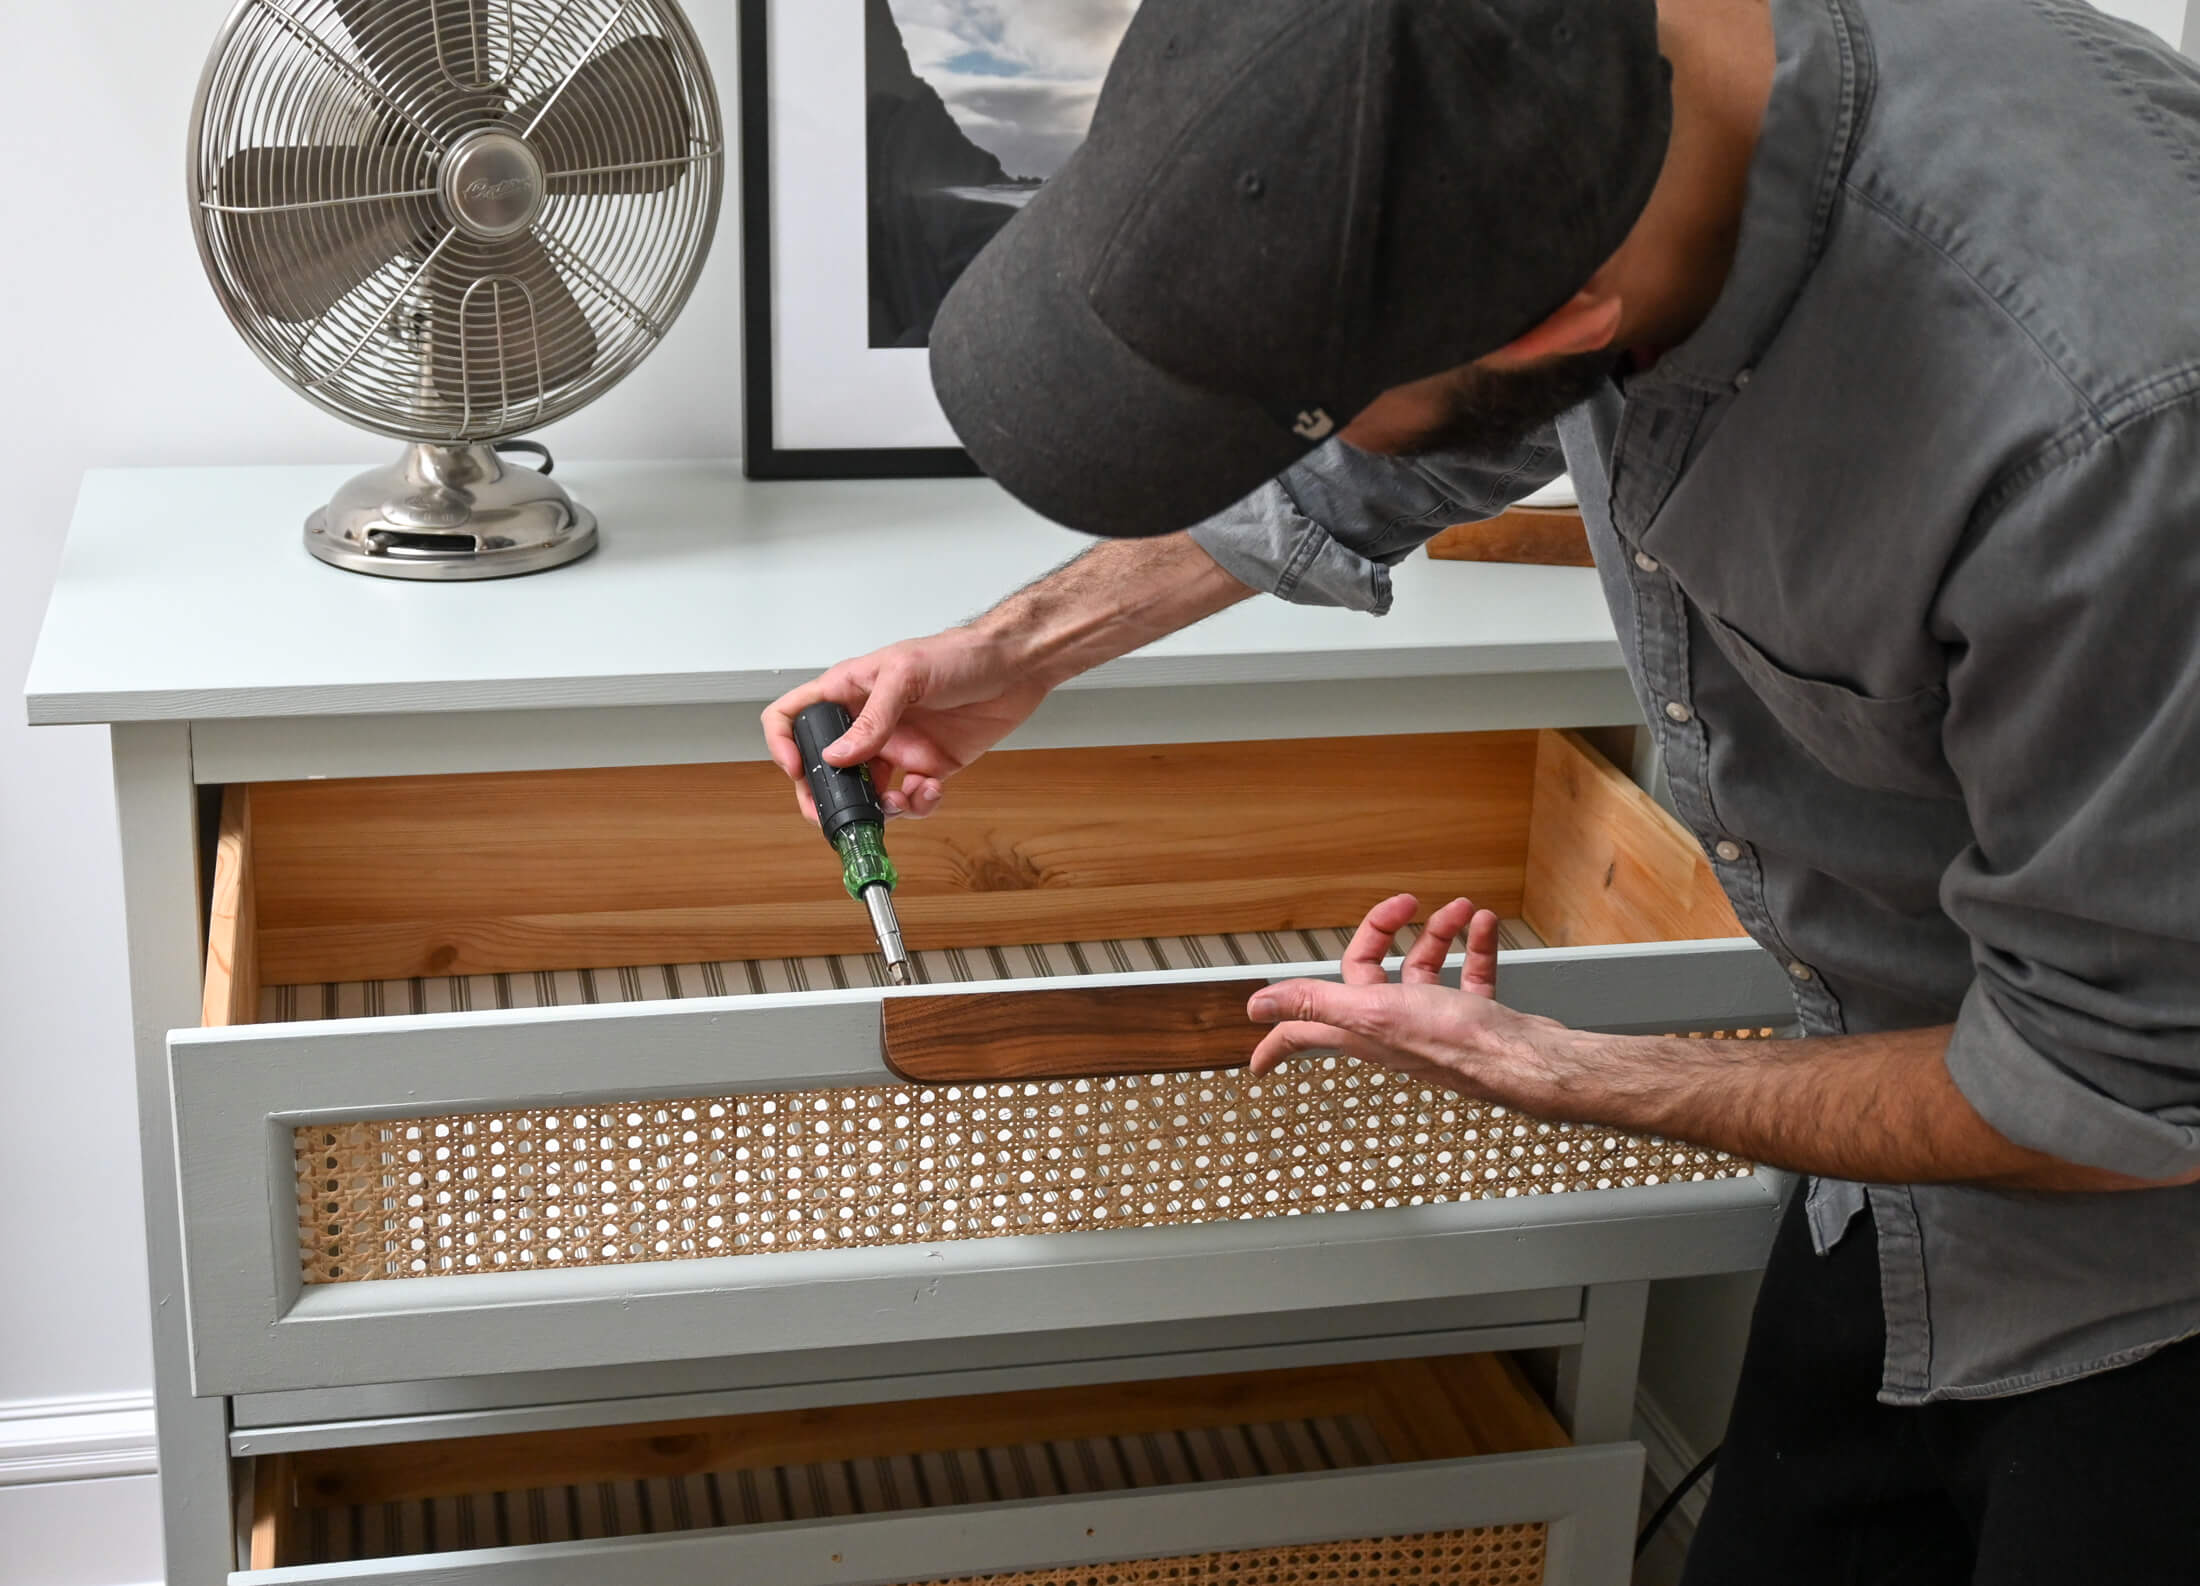
6. Assemble the Drawers and Add Handles
Once everything is looking like it’s back to being a dresser, drill the holes for your new handles. We used these beautiful handles from House of Antique Hardware which meant that we had to drill two holes into each of the larger drawers and one each in the smaller drawers.
We could have spent another couple hours measuring exact screw locations for the hardware but we just used painters tape to mark the screw holes and then transfer that from the tape onto the the drawers! This will save you so much time and be more precise.
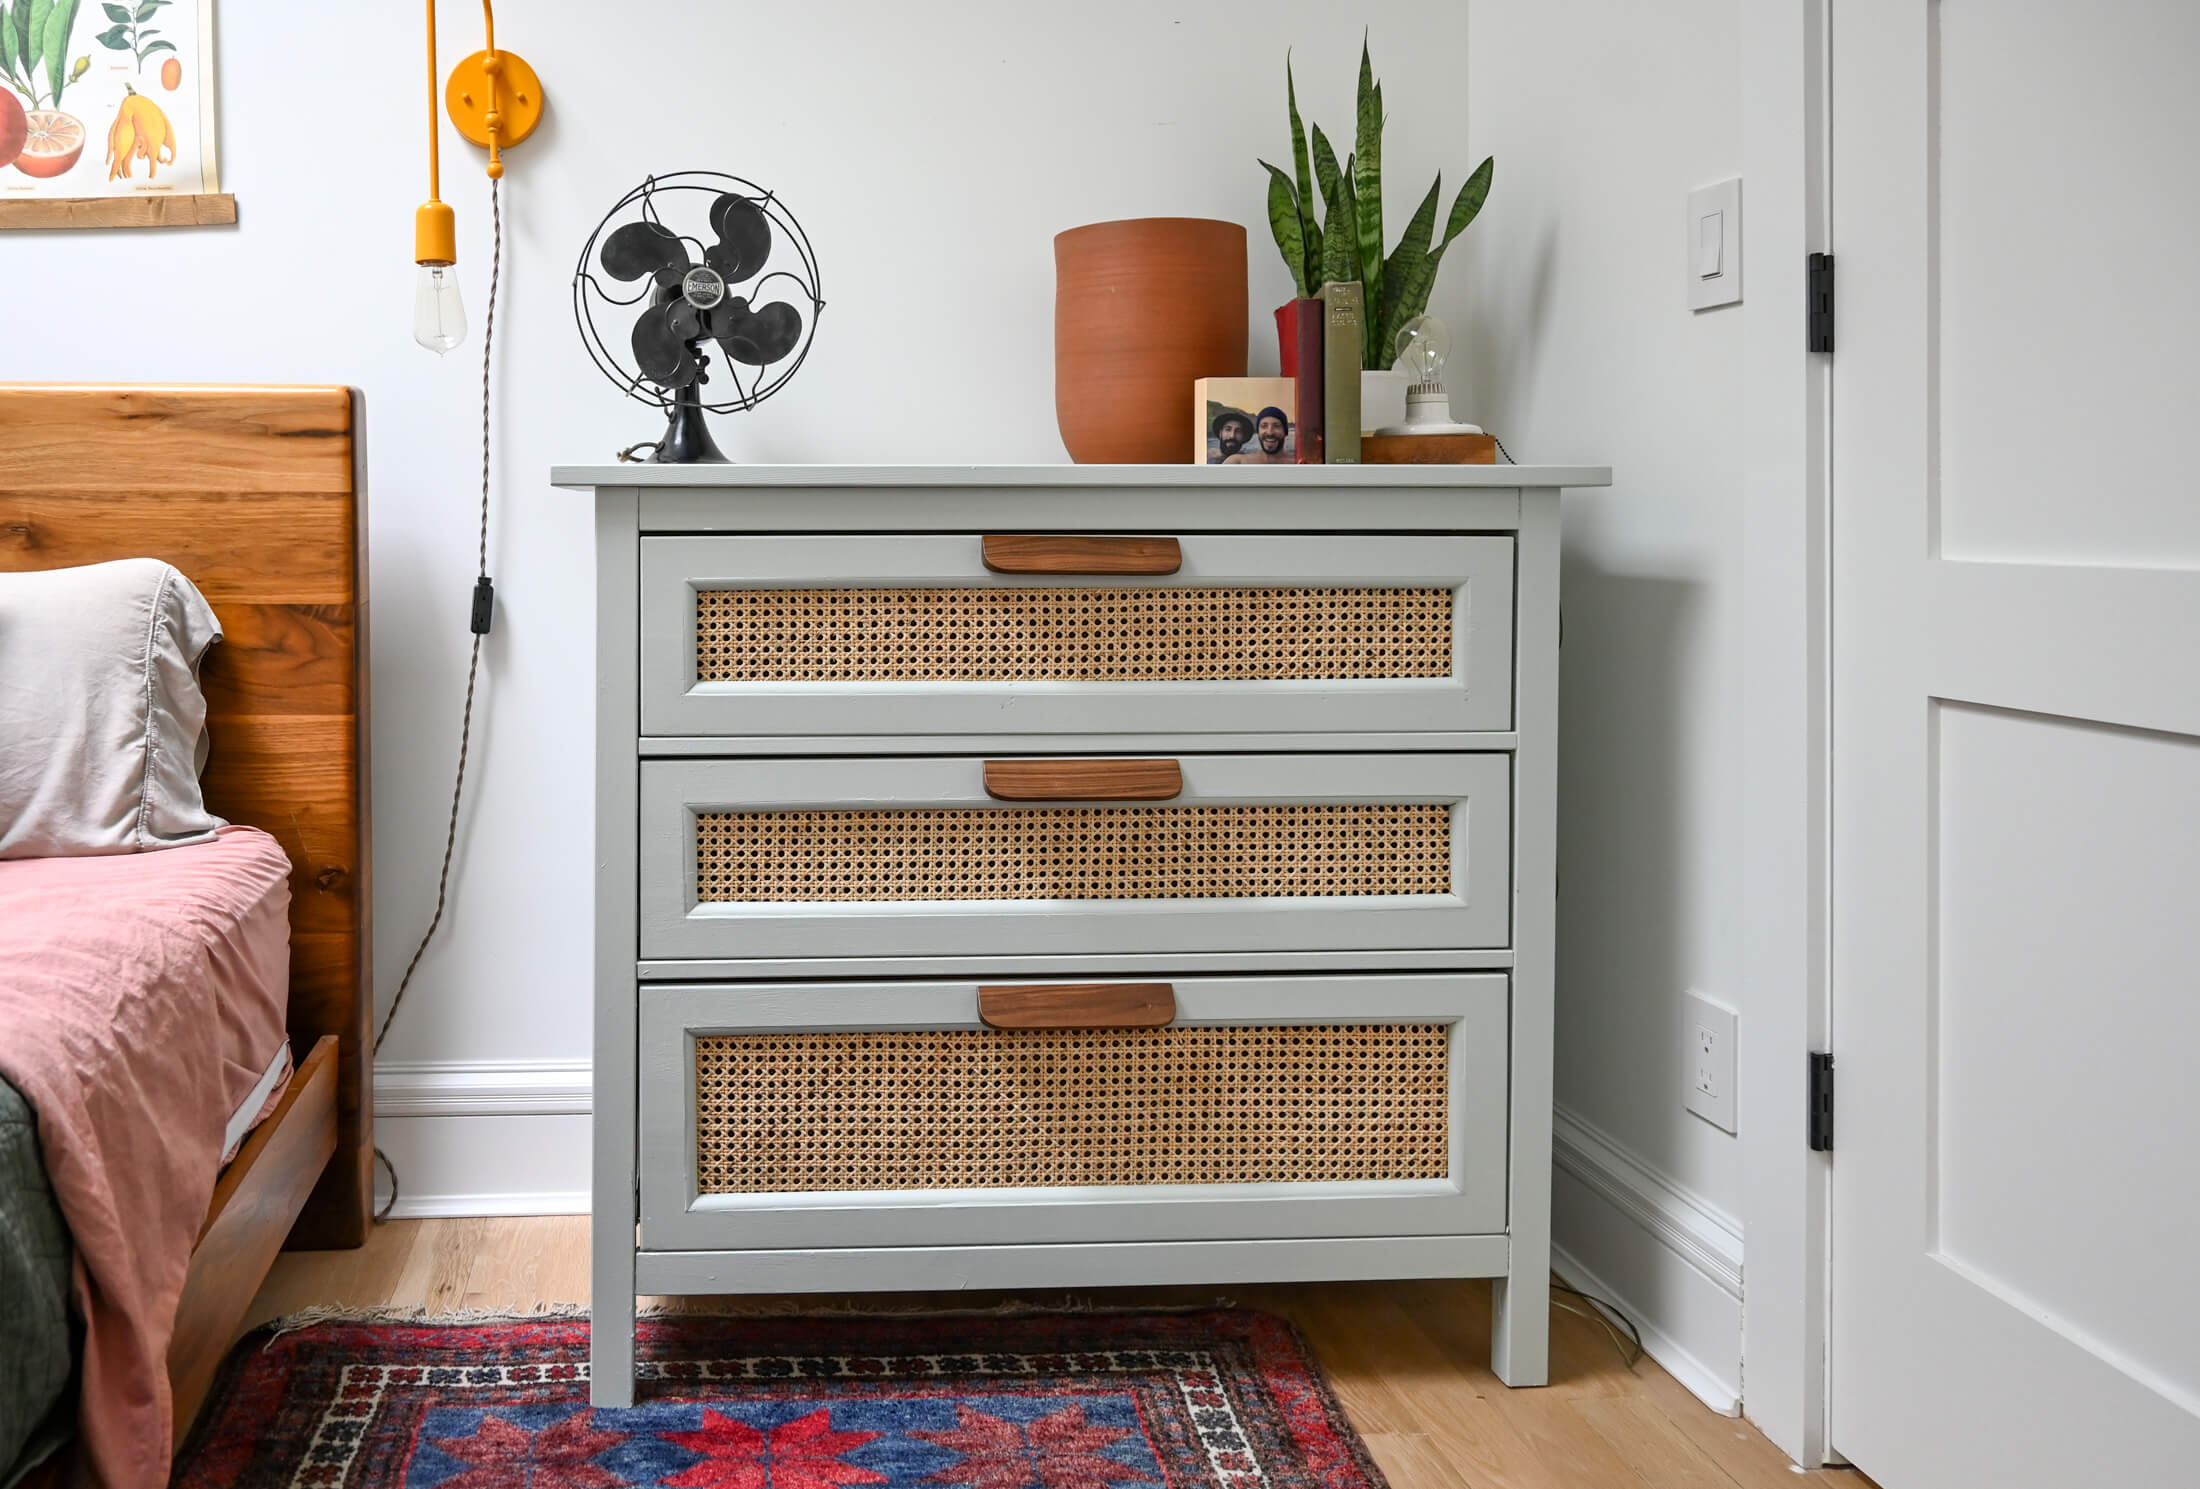
7. Put Your Clothes Back in and Enjoy a New Dresser
We’re absolutely in love with how this Ikea Hemnes dresser with cane webbing turned out! It’s fitting right in with our vintage botanical room, and the dresser has a whole new life that we will enjoy for several more years.
[Photos by Brownstone Boys unless noted otherwise]
Related Stories
- Brownstone Boys: Designing for Small Spaces
- Brownstone Boys: Thinking of Renovating in 2021? Here’s What It Will Cost You
- Brownstone Boys: When Do You Need a Structural Engineer?
Email tips@brownstoner.com with further comments, questions or tips. Follow Brownstoner on Twitter and Instagram, and like us on Facebook.


What's Your Take? Leave a Comment