
Pink Brownstone: How We Silenced Our Extremely Loud, Creaking Stairs
There wasn’t anything structurally wrong with our staircase, which was hard to believe. So why was it so loud?

We tested this out to see if it would work, before doing the entire staircase
Editor’s note: Welcome to the second installment of Pink Brownstone, a reader restoration diary. Brownstoner is delighted to publish this ongoing saga of DIY restoration of a brownstone in Bed Stuy. You can read more at Pink Brownstone.
Stairs!
(Let’s jump right on in with a dense post about squeaky stairs. If your stairs don’t squeak, move right along, this will be boring. But if you’re in the same boat as we were, read on).
It may seem silly, but along with having a backyard, one of the most exciting things about owning our house was to own stairs. Before our brownstone, every building we lived in had stairs, but they weren’t ours. Being the proprietor of several staircases seemed oddly luxurious.
Our fabulous stairs came complete with original newel post and balustrade, wainscoting and the pretty glow of a stained-glass skylight and a top landing pier mirror. It also came with the absolute loudest creaking ever. You expect 120-year-old stairs to make some noise, but ours were so bad I was convinced we would wake the neighbors if we went up/downstairs late at night. On the positive side, there is no chance we would ever have been murdered in our sleep, since it was impossible to tiptoe up the steps.
There wasn’t anything structurally wrong with the staircase, which was hard to believe. So why was it so loud?
We performed some exploratory surgery by removing the plaster from the bottom of the staircase. Gravity had already done most of the work on the plaster removal, so this part of the job was super easy.
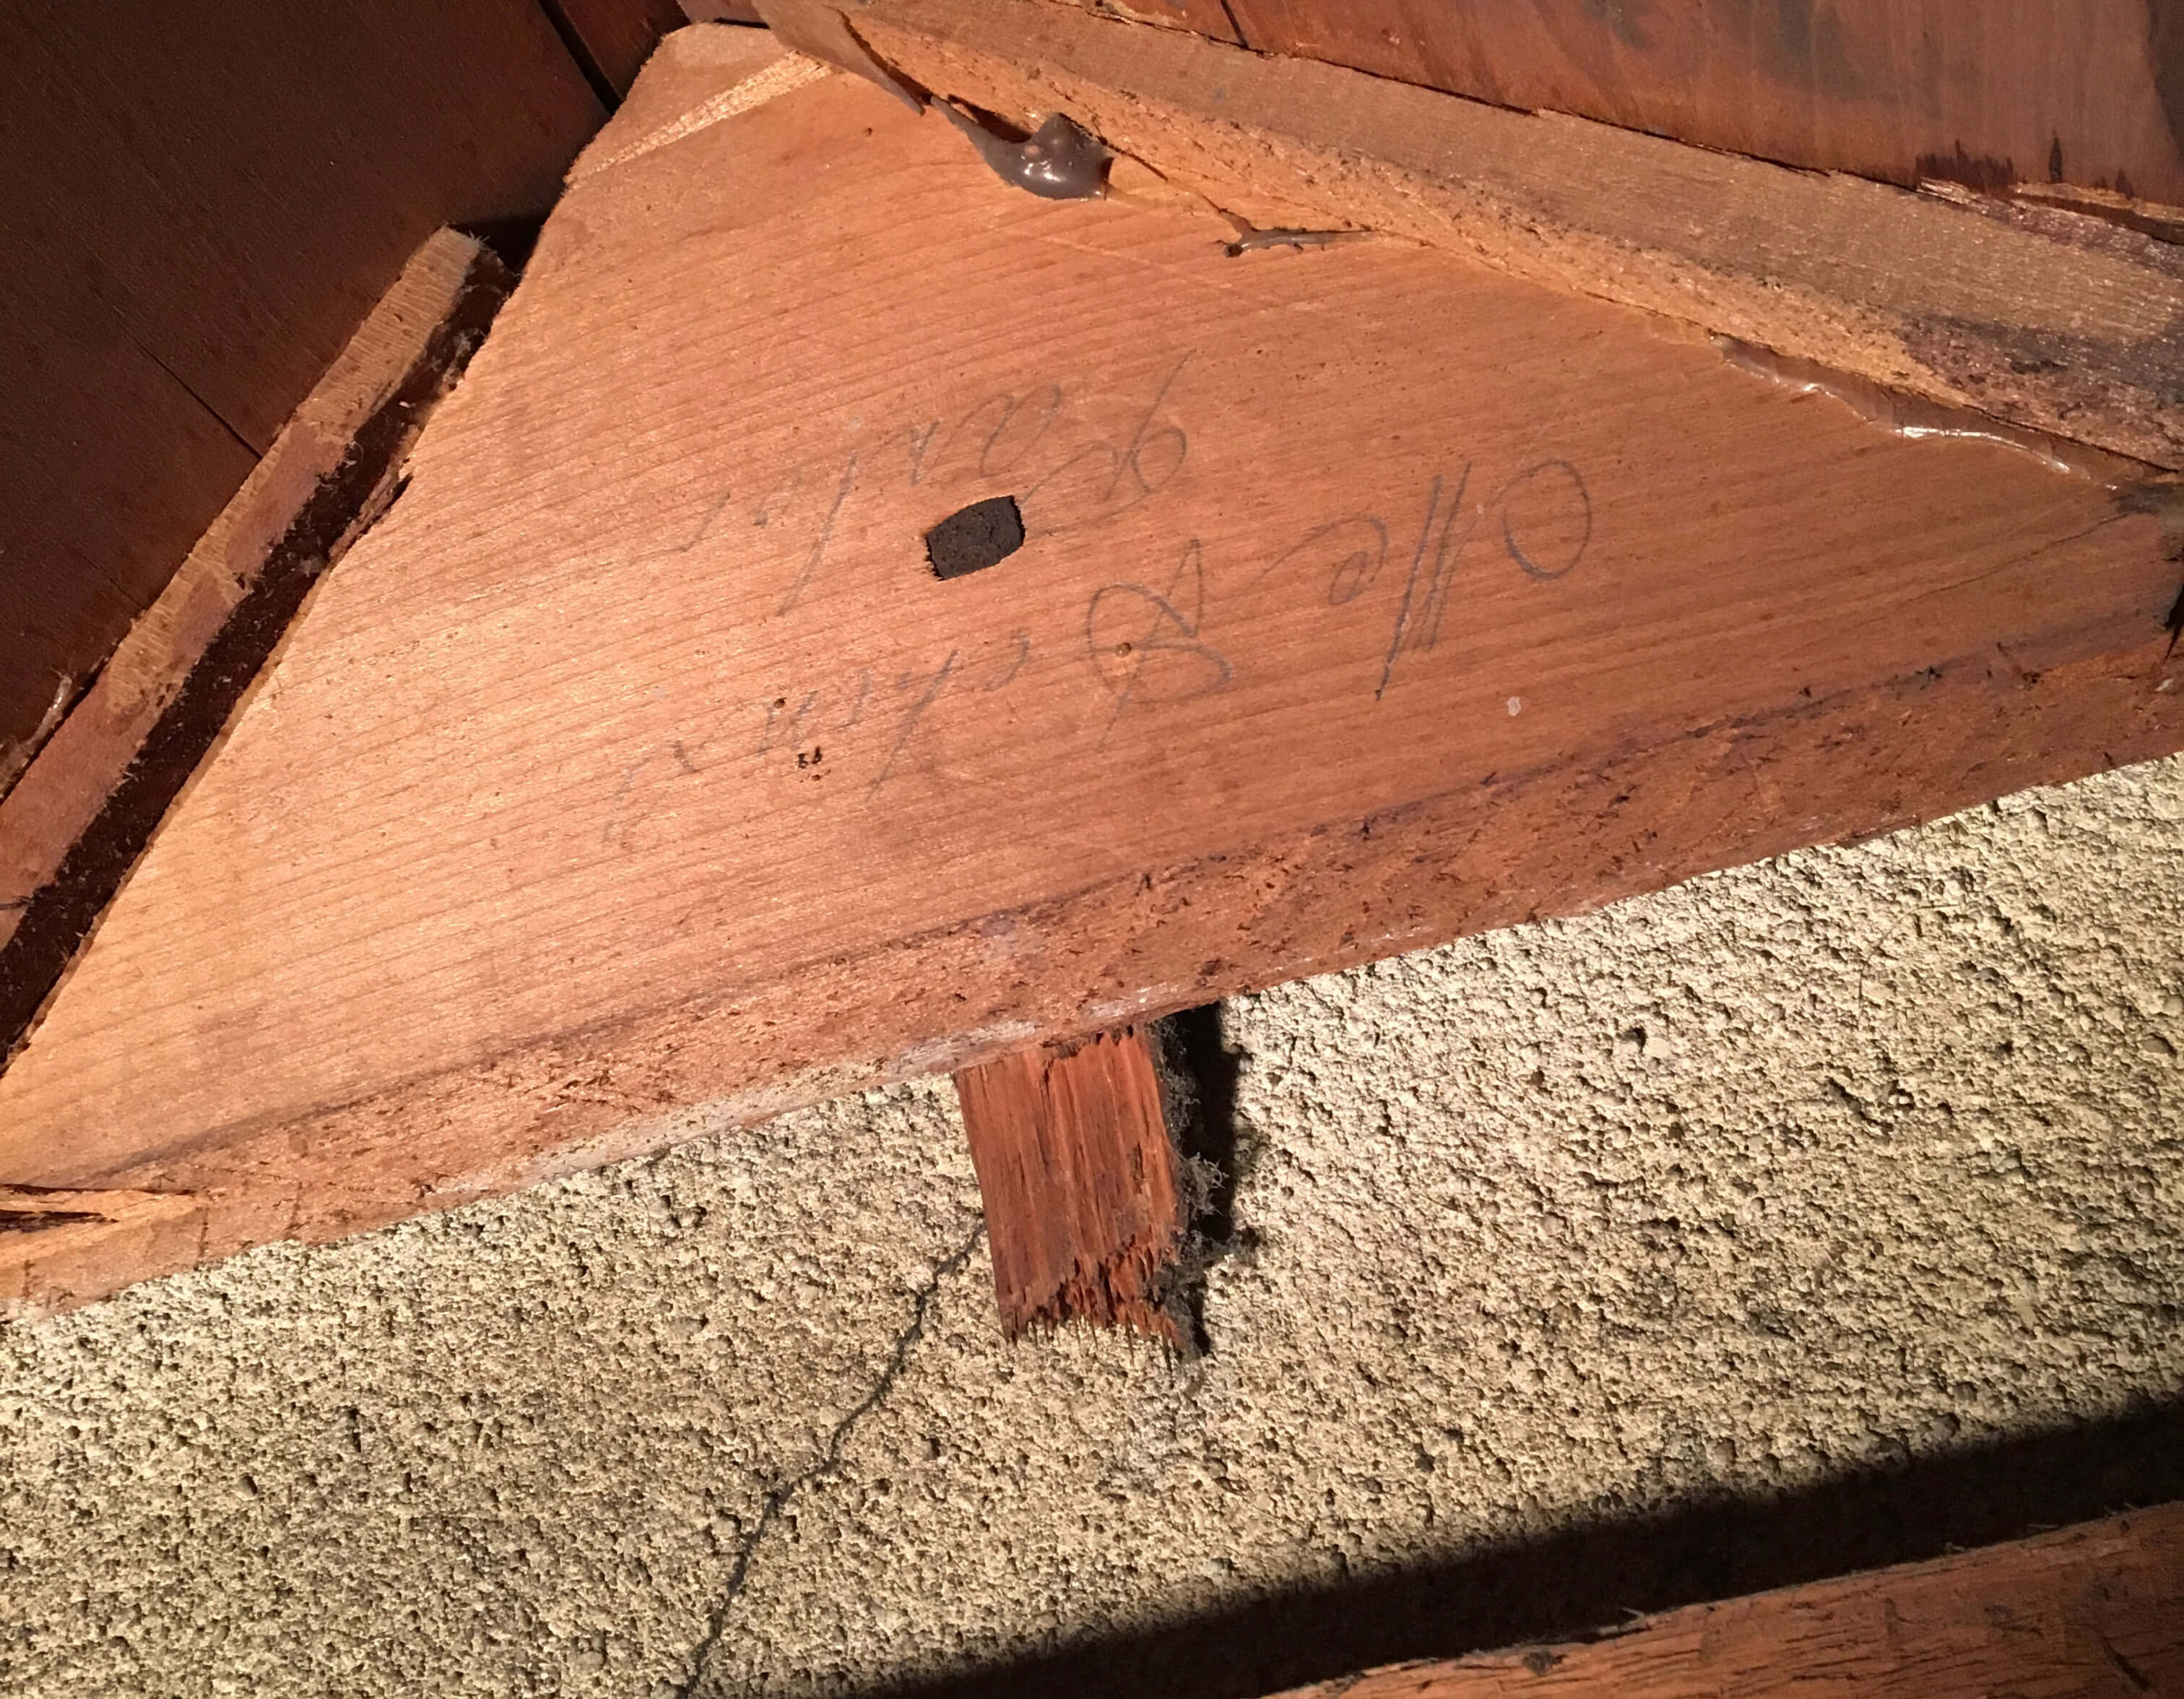
Being able to see the structure of the stairs gave us a pretty good idea of the problem, if not the solution. Plus, we also found notes from the millworkers and a clue that indicated the stairs were made elsewhere and then installed on site – D. McDicken, the name of the developer, along with “parlor” is scribbled in pencil.
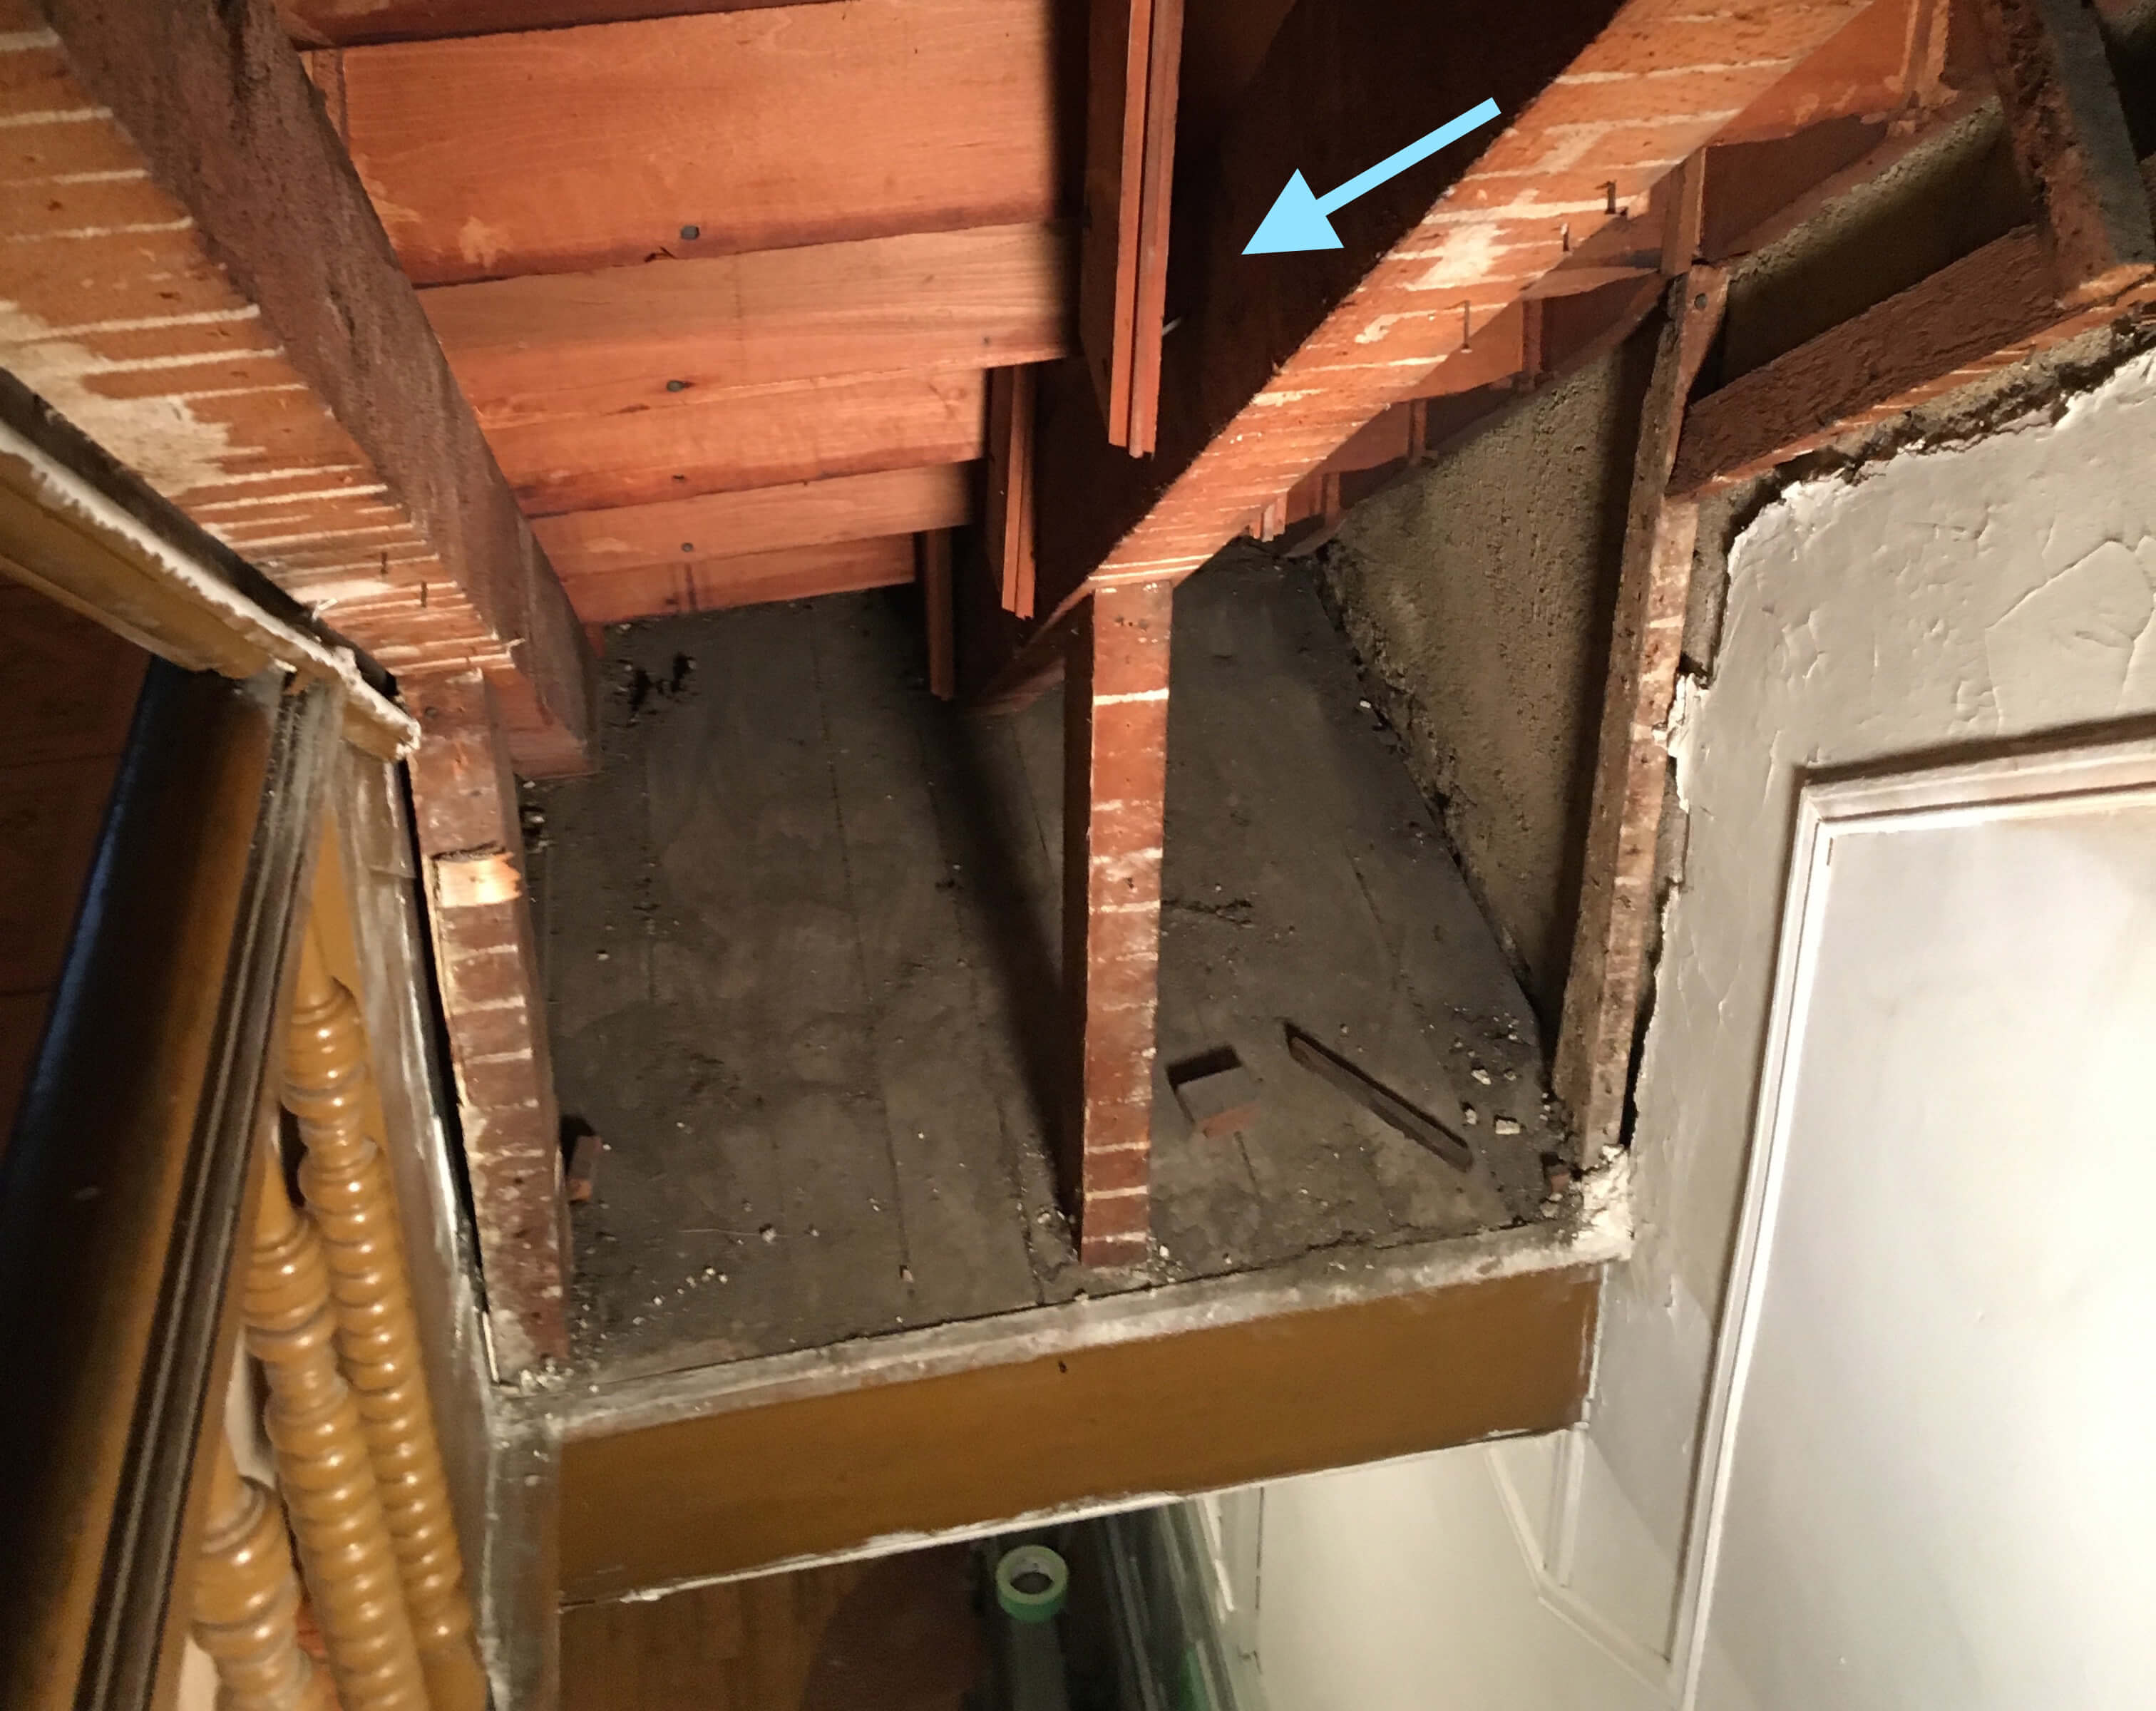
Once the underside of the steps were exposed the mystery of the squeaky stairs was solved. In modern staircase construction, the treads and rises are attached to a stringer. A stringer is essentially a piece of 2x 12 or 2x 10 which has been cut in the profile of a stair unit. The stringer serves as a support and framing method for the treads. While this is the modern method, the 1890 method apparently was to run beams of wood from one floor to the next. The beam supported the tread and rise where they met. Besides the beams, the stairs were also built into the wainscoting that runs along the wall. The carpenters then used wedges that were glued and hammered and pushed the stairs into the wainscoting.
As things shifted and settled over the years the beams were no longer on the same plane. The squeak was from the tread and rise rubbing together as they flexed from the weight of whoever went up the stairs.
First we tried to hammer the shims in further to get rid of the creaking. It sort of worked, but it was a labor intensive process. Because this didn’t address the root of the problem, but looked to fix the symptom, it was not a long-lasting solution. The creaking started to slowly come back.
The next step was to rip out the entire staircase and rebuild it using modern techniques, which seemed not only cost prohibitive but also potentially dangerous to all the original detail surrounding the stairs. Through a friend, we found out about stair brackets from GoPro Construction. The metal brackets are designed for quickly creating stairs by fastening the brackets to beams. Once attached, they form a type of modern stringer that you can then attach your tread and rise pieces to. We figured this was worth a try.
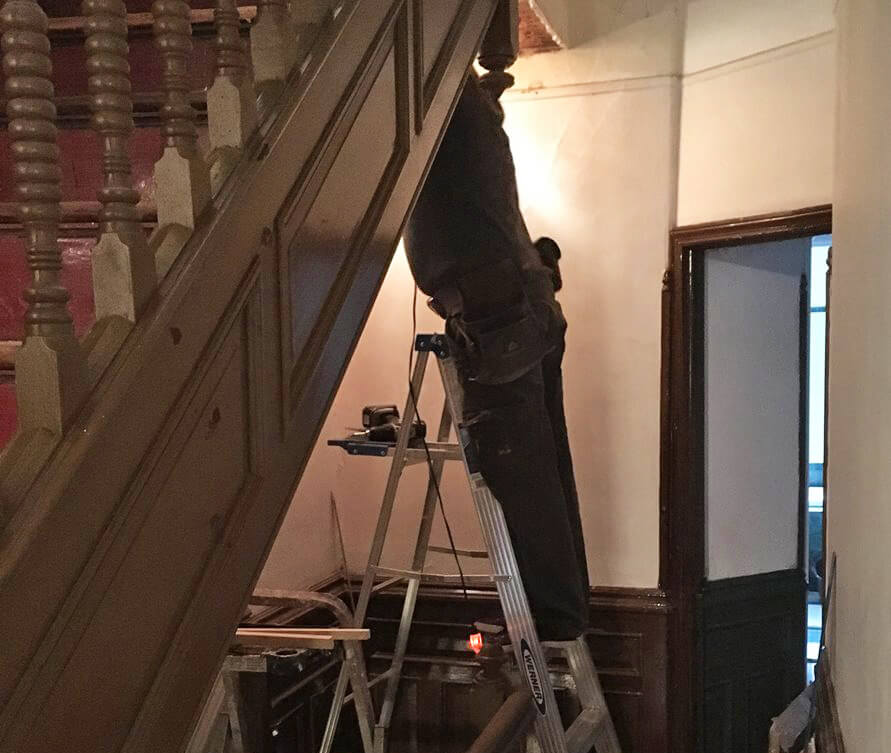
To access the underside of the stairs, which are “conveniently” located atop the garden level stairs, we built a small platform that allowed us to safety use a ladder to reach under the stairs to install the brackets.
Working from the top down, one step at a time, we carefully pulled out the original shims and installed a bracket. We started at the top because working on the stairs previously, we noticed a lot of small gaps we wanted to close. The fear was that if we started at the bottom and worked towards the top that we might come up a little short, which would mean starting all over. We made sure the top step was secured to the landing and then started working our way down. This was a very simple install and took about a day to complete.
After all the brackets were in, the stairs feel super solid, but best of all, the creaking is gone. The photos are not great on this one. We did this project during the winter and the light was not great under the stairs.
If you want to see a video of how loud the stairs creaked, hop over to Pink Brownstone.
Related Stories
- Pink Brownstone: Who We Are and How We Got Here
- See What Your Home Once Looked Like With Newly Digitized 1940s Tax Photos
- How to Clean a Marble Mantel
Email tips@brownstoner.com with further comments, questions or tips. Follow Brownstoner on Twitter and Instagram, and like us on Facebook.


What's Your Take? Leave a Comment