
This Ugly House: We Rebuild Crumbling Extension, Spruce Up Rear to Let in More Light
One of the selling points for my family and me when we bought this house was the existing rear extension, but something about it was a little off.

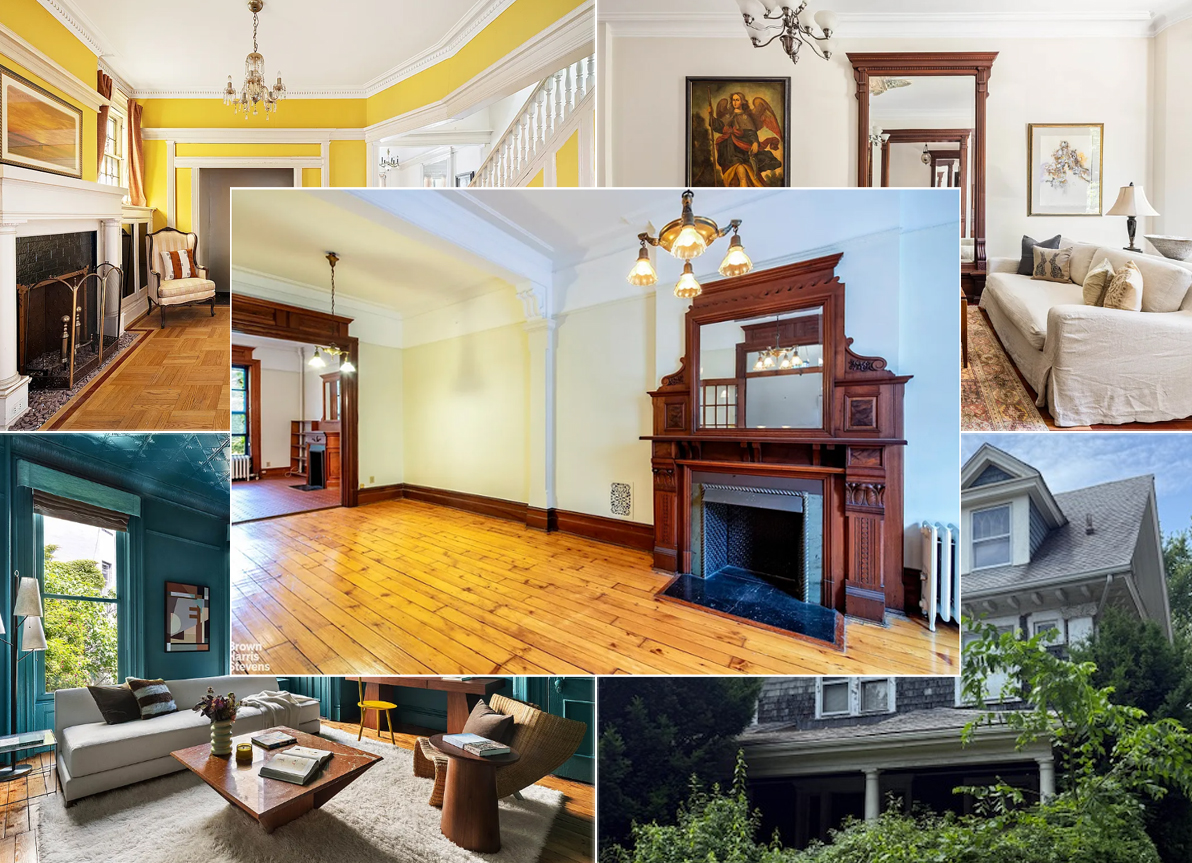
Photos via This Ugly House
Editor’s note: Welcome to the third installment of This Ugly House, a reader renovation diary. We’re excited to publish this tale of a hands-on renovation of a wood-frame house in Bed Stuy. The author also blogs at www.thisuglyhousenyc.com.
One of the selling points for my family and me when we bought this house was the existing rear extension. It takes our row house beyond the 35-foot depth another 18 feet. The extension is 12 feet wide and two stories tall. That extra 432 square feet was a bonus, plus it added so much depth and possibilities for how we could reconfigure the space.
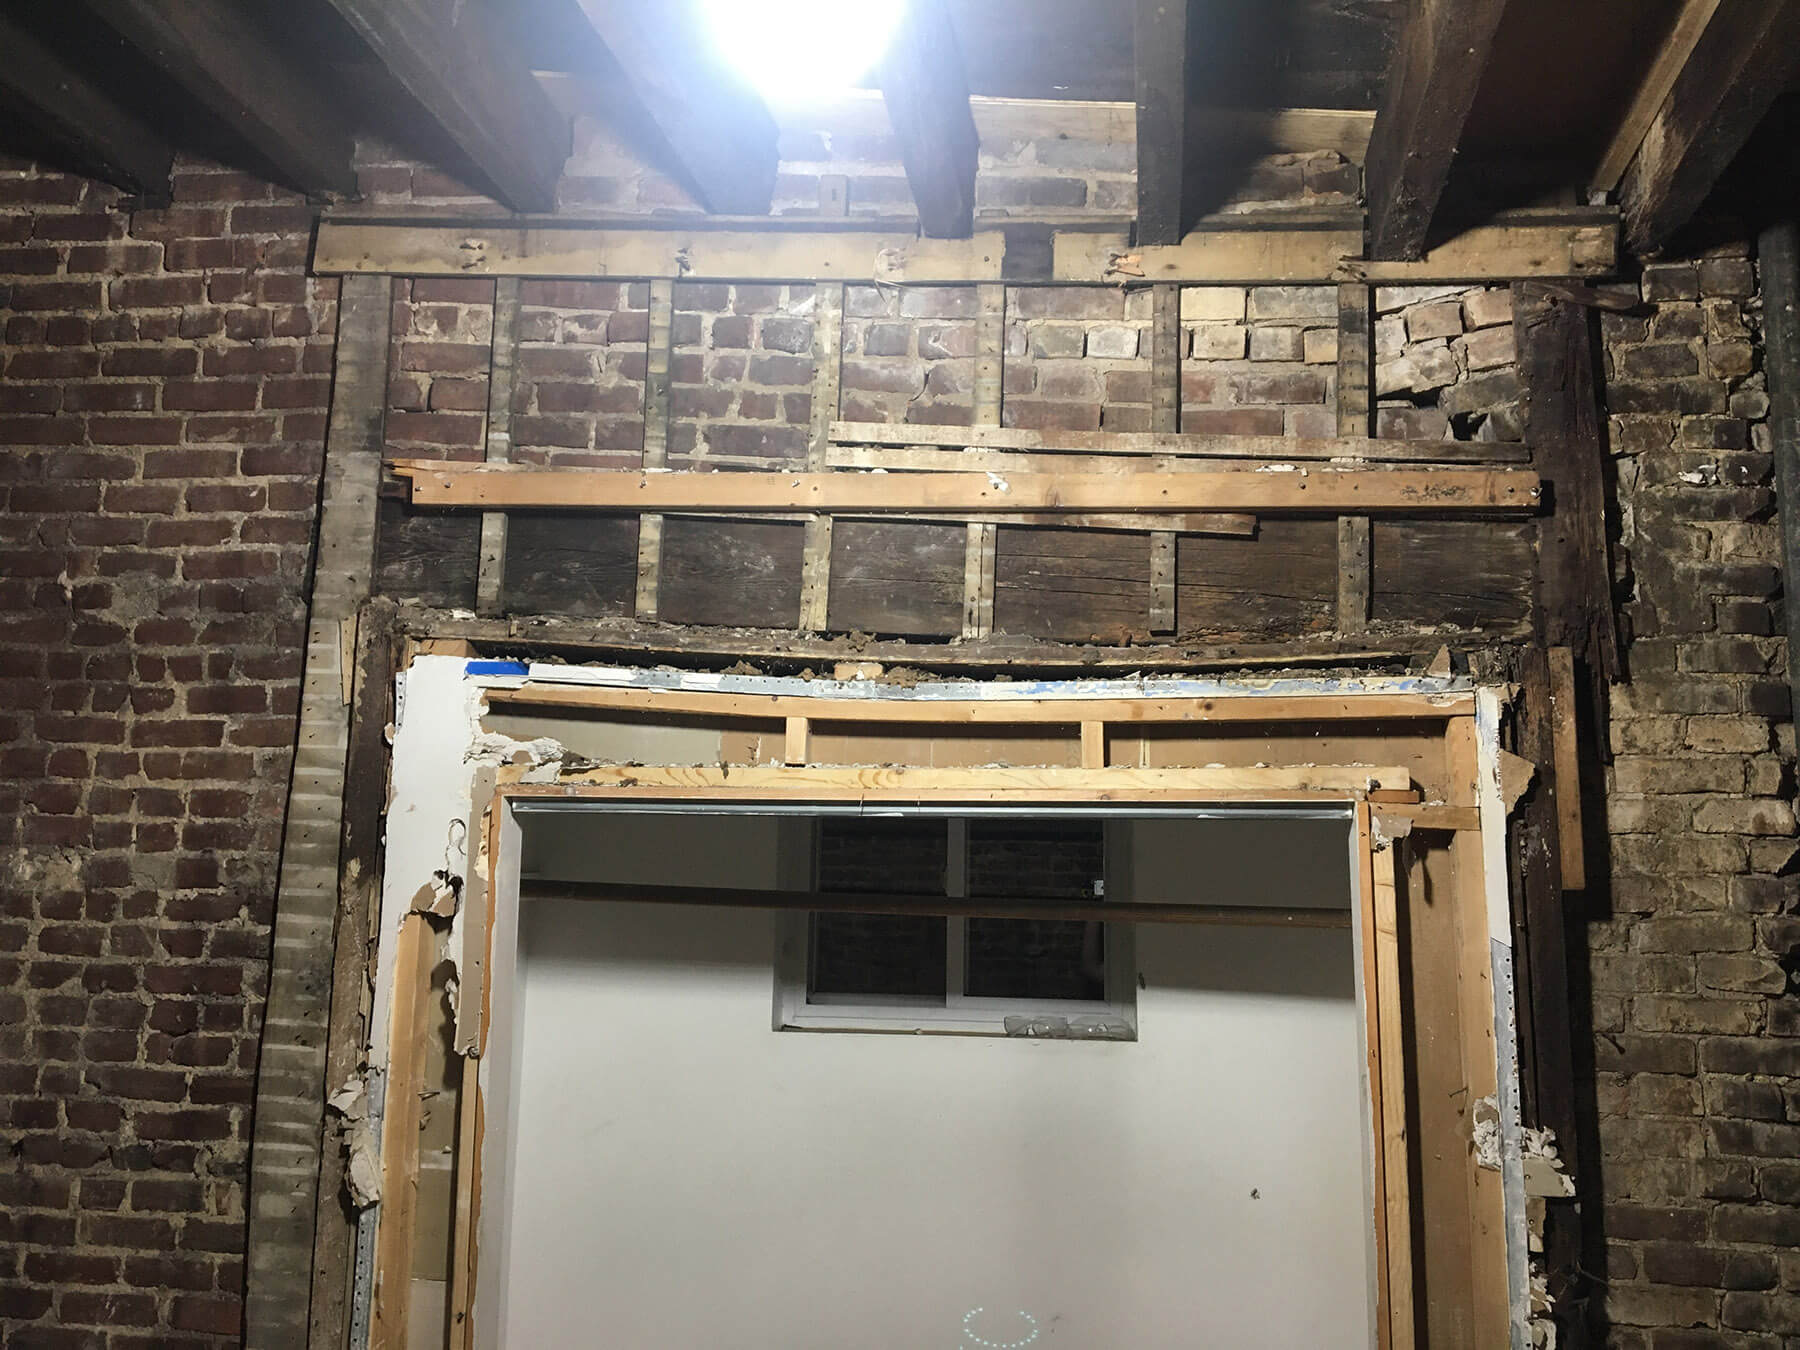
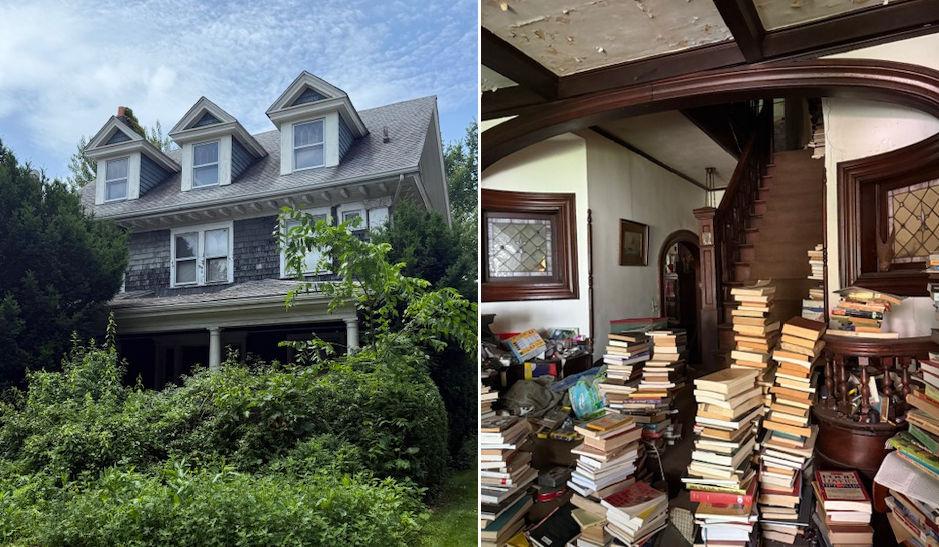
But something about it was a little off. The rear door to the backyard had a boxed-over header at 70 inches high. I had to duck my head every time I went through it. There were also wide cracks in the exterior stucco and a bulge protruding out from the first-floor rear wall. The roof was caving in so bad it looked like a potato chip. Of course, there was so much sheetrock built up throughout the interior, we couldn’t tell how far gone the structure already was.
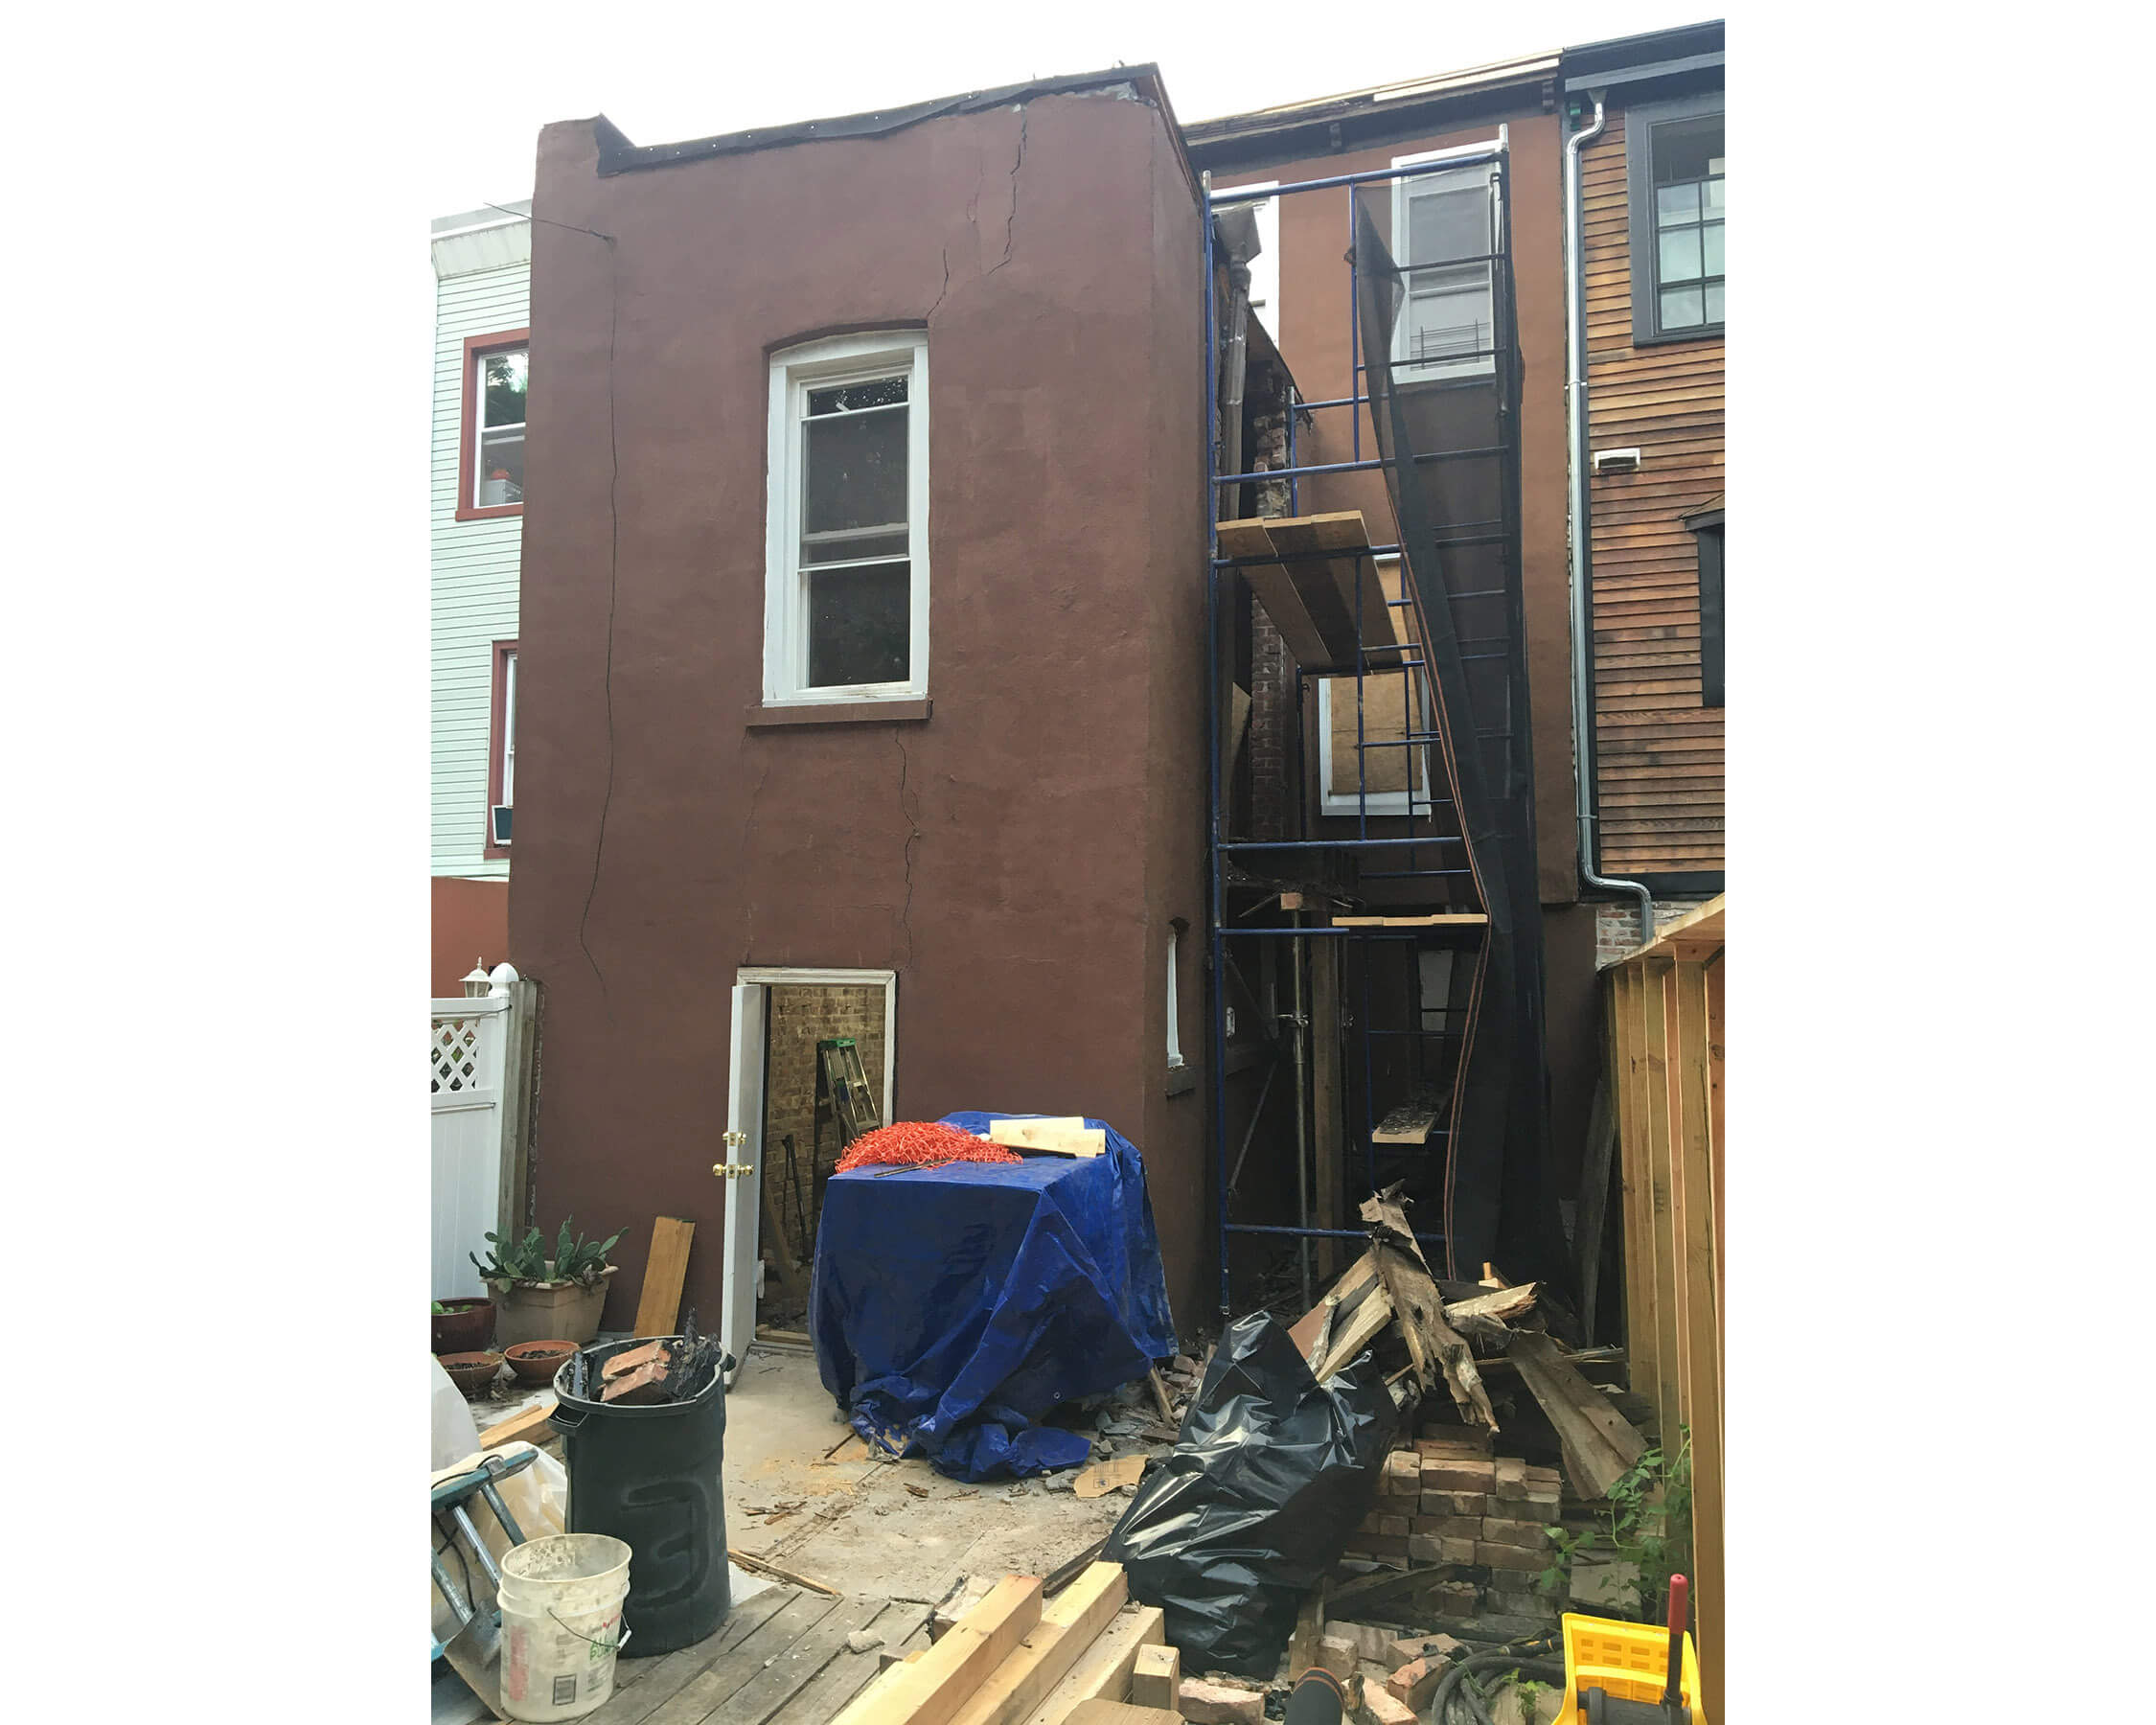
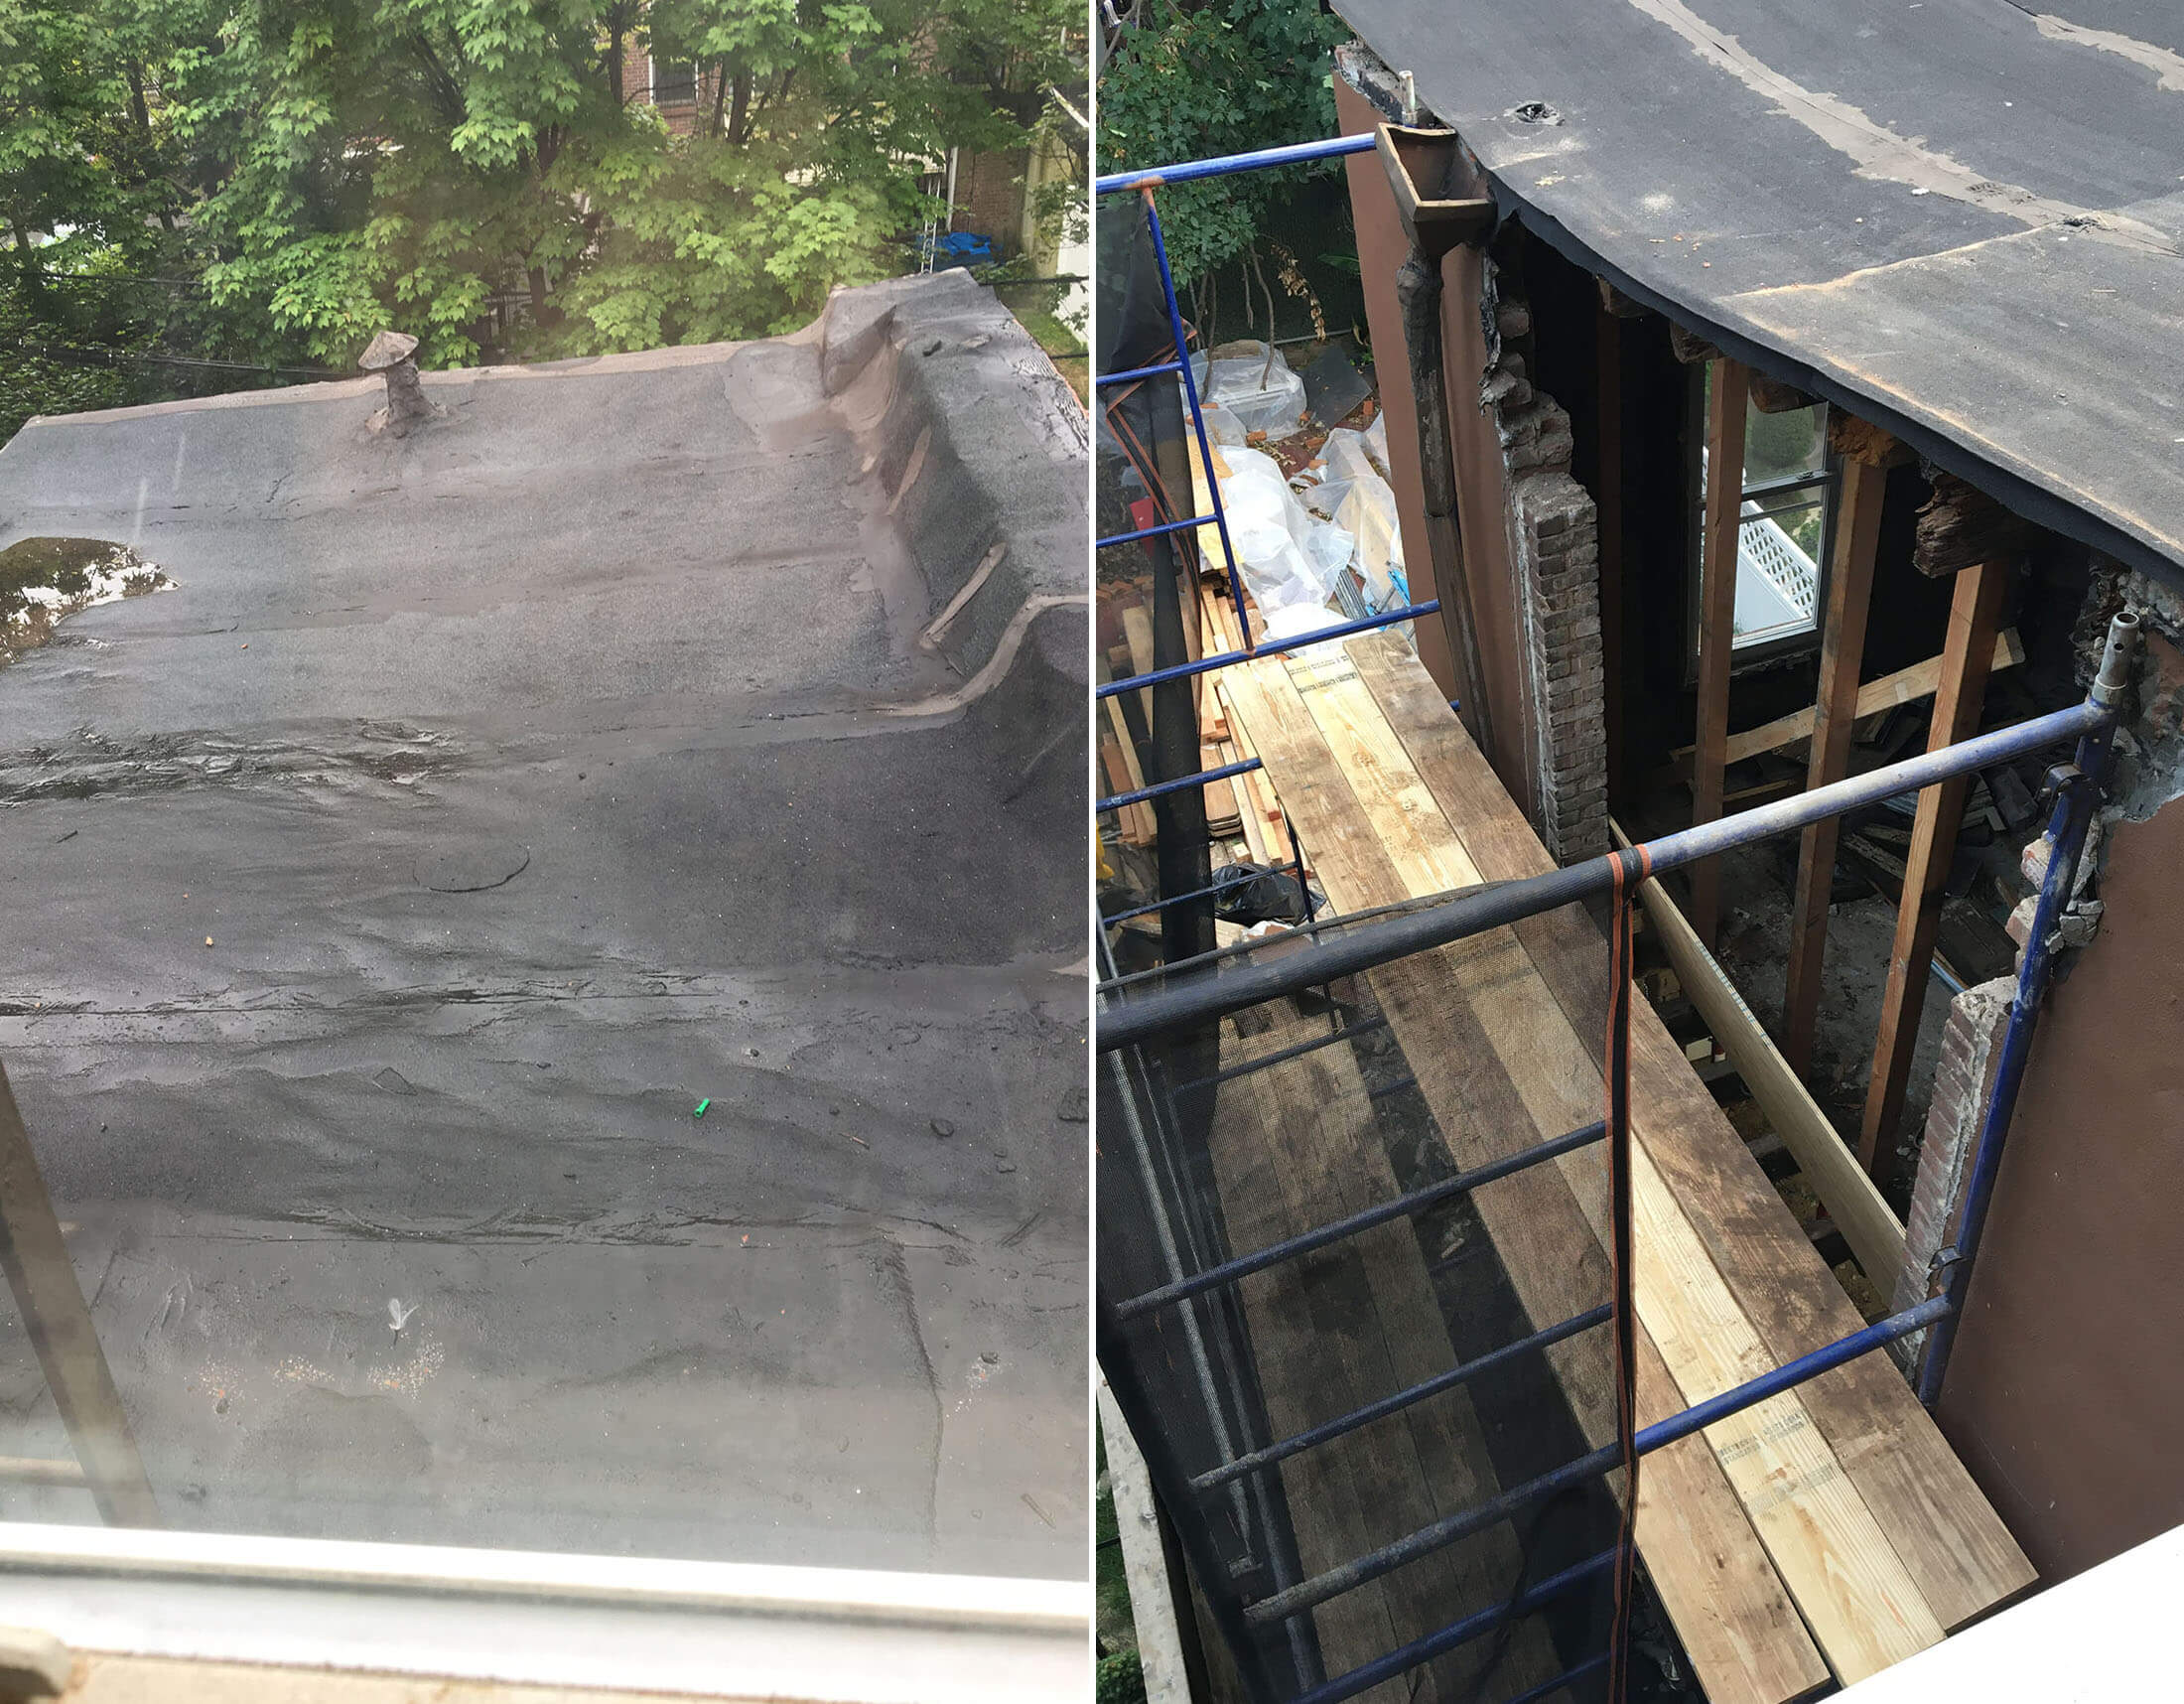
We first got a hint of the existing conditions when we stripped off the asbestos from the roof. We discovered the header above what used to be an old bay window had failed. This was causing the roof to “butterfly” and water had been slowly leaking in at the collapse it had created. We later found the roof beams in that area were broken beneath the roof. Our engineer suspected water filtration caused by the bowing was the reason for the wall cracks. When we removed the sheetrock from inside, we got the full picture of the damage.
Water had been creeping in for so long that the mortar between the bricks had completely washed out in places. There was literally nothing holding them together anymore. The wall crack was as much as 2 inches wide near the top of the structure and meandered down the wall all the way to the foundation. You could stand inside to look through the cracks and see daylight. We also discovered the header had failed above the basement-level windows along the same wall. Our engineer warned us that we needed to immediately shore up the two floors to prevent any further collapse.
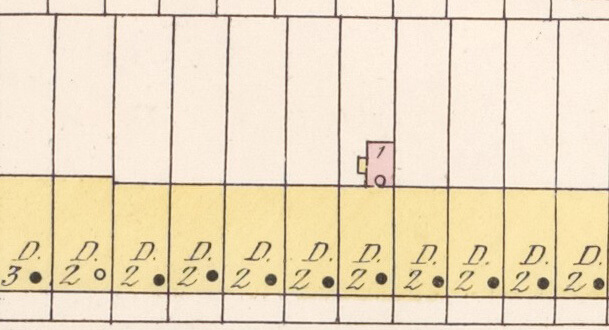
According to public record, and estimated timeline research by Brownstoner, our house was built around 1875. There is a neighborhood map from 1888 that shows our house built on the lot with the extension already in place. This indicated how old the extension actually was and gave some insight as to why it was crumbling. Like the rest of this house, it was just old and not maintained throughout the years.
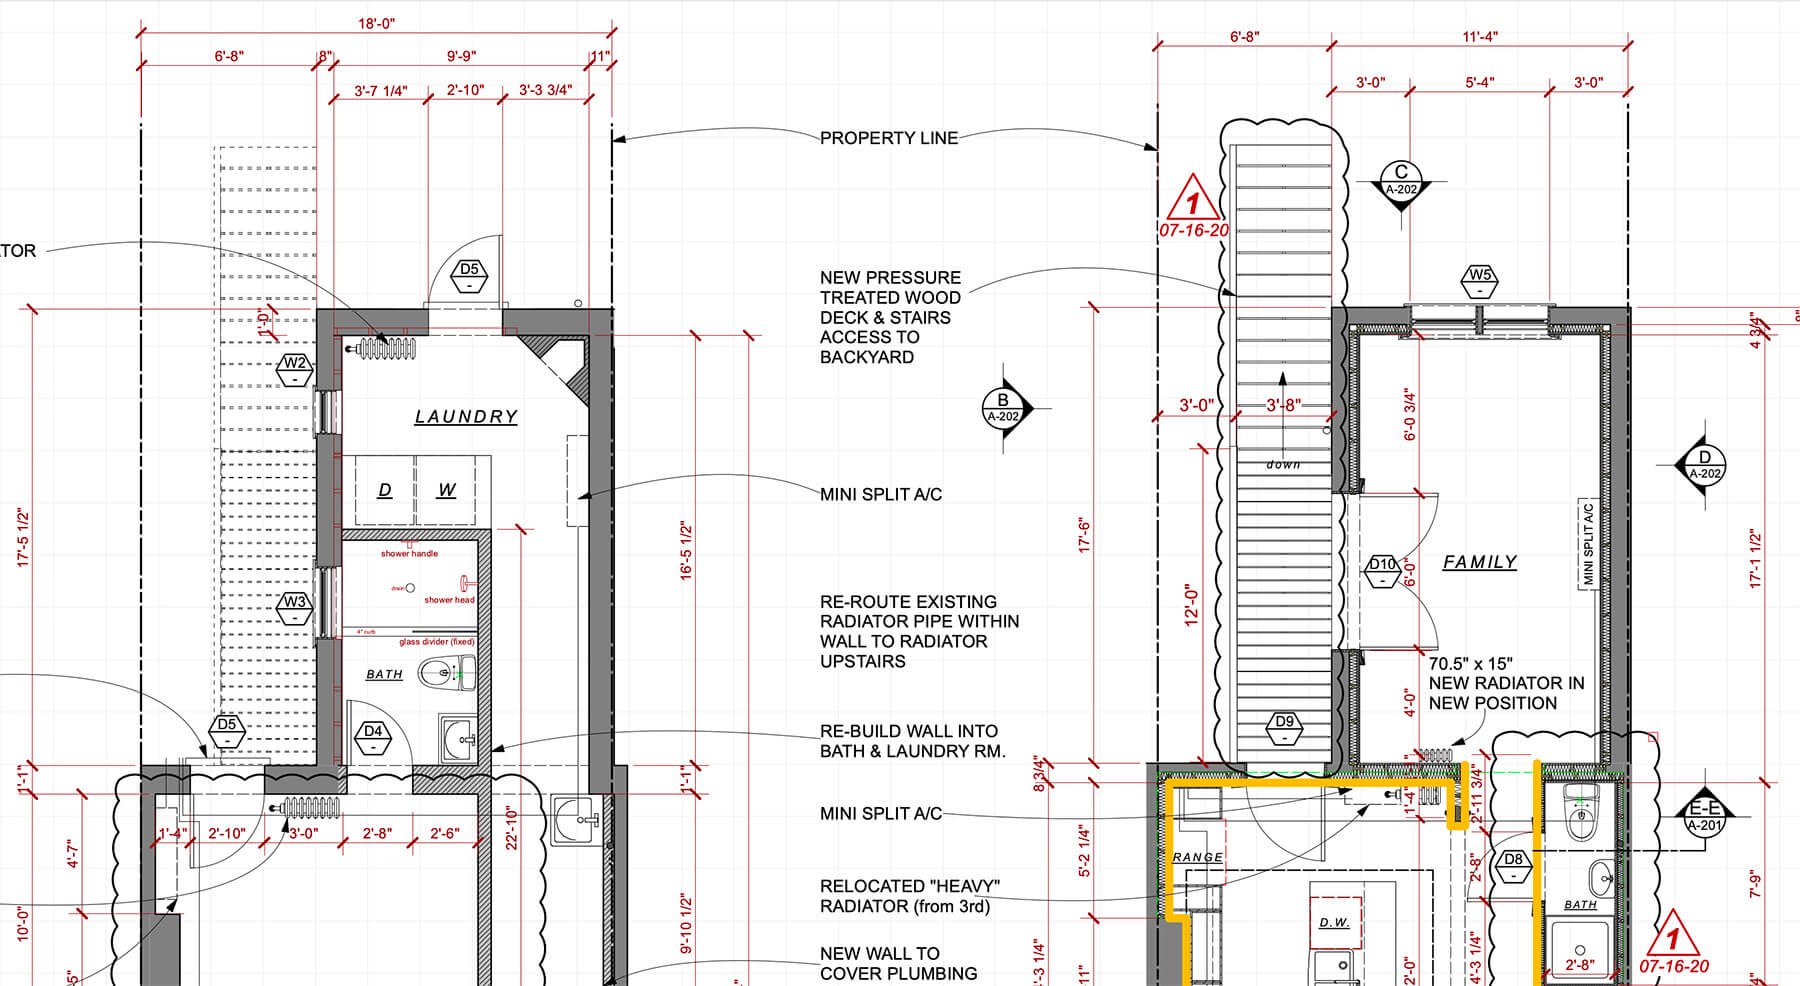
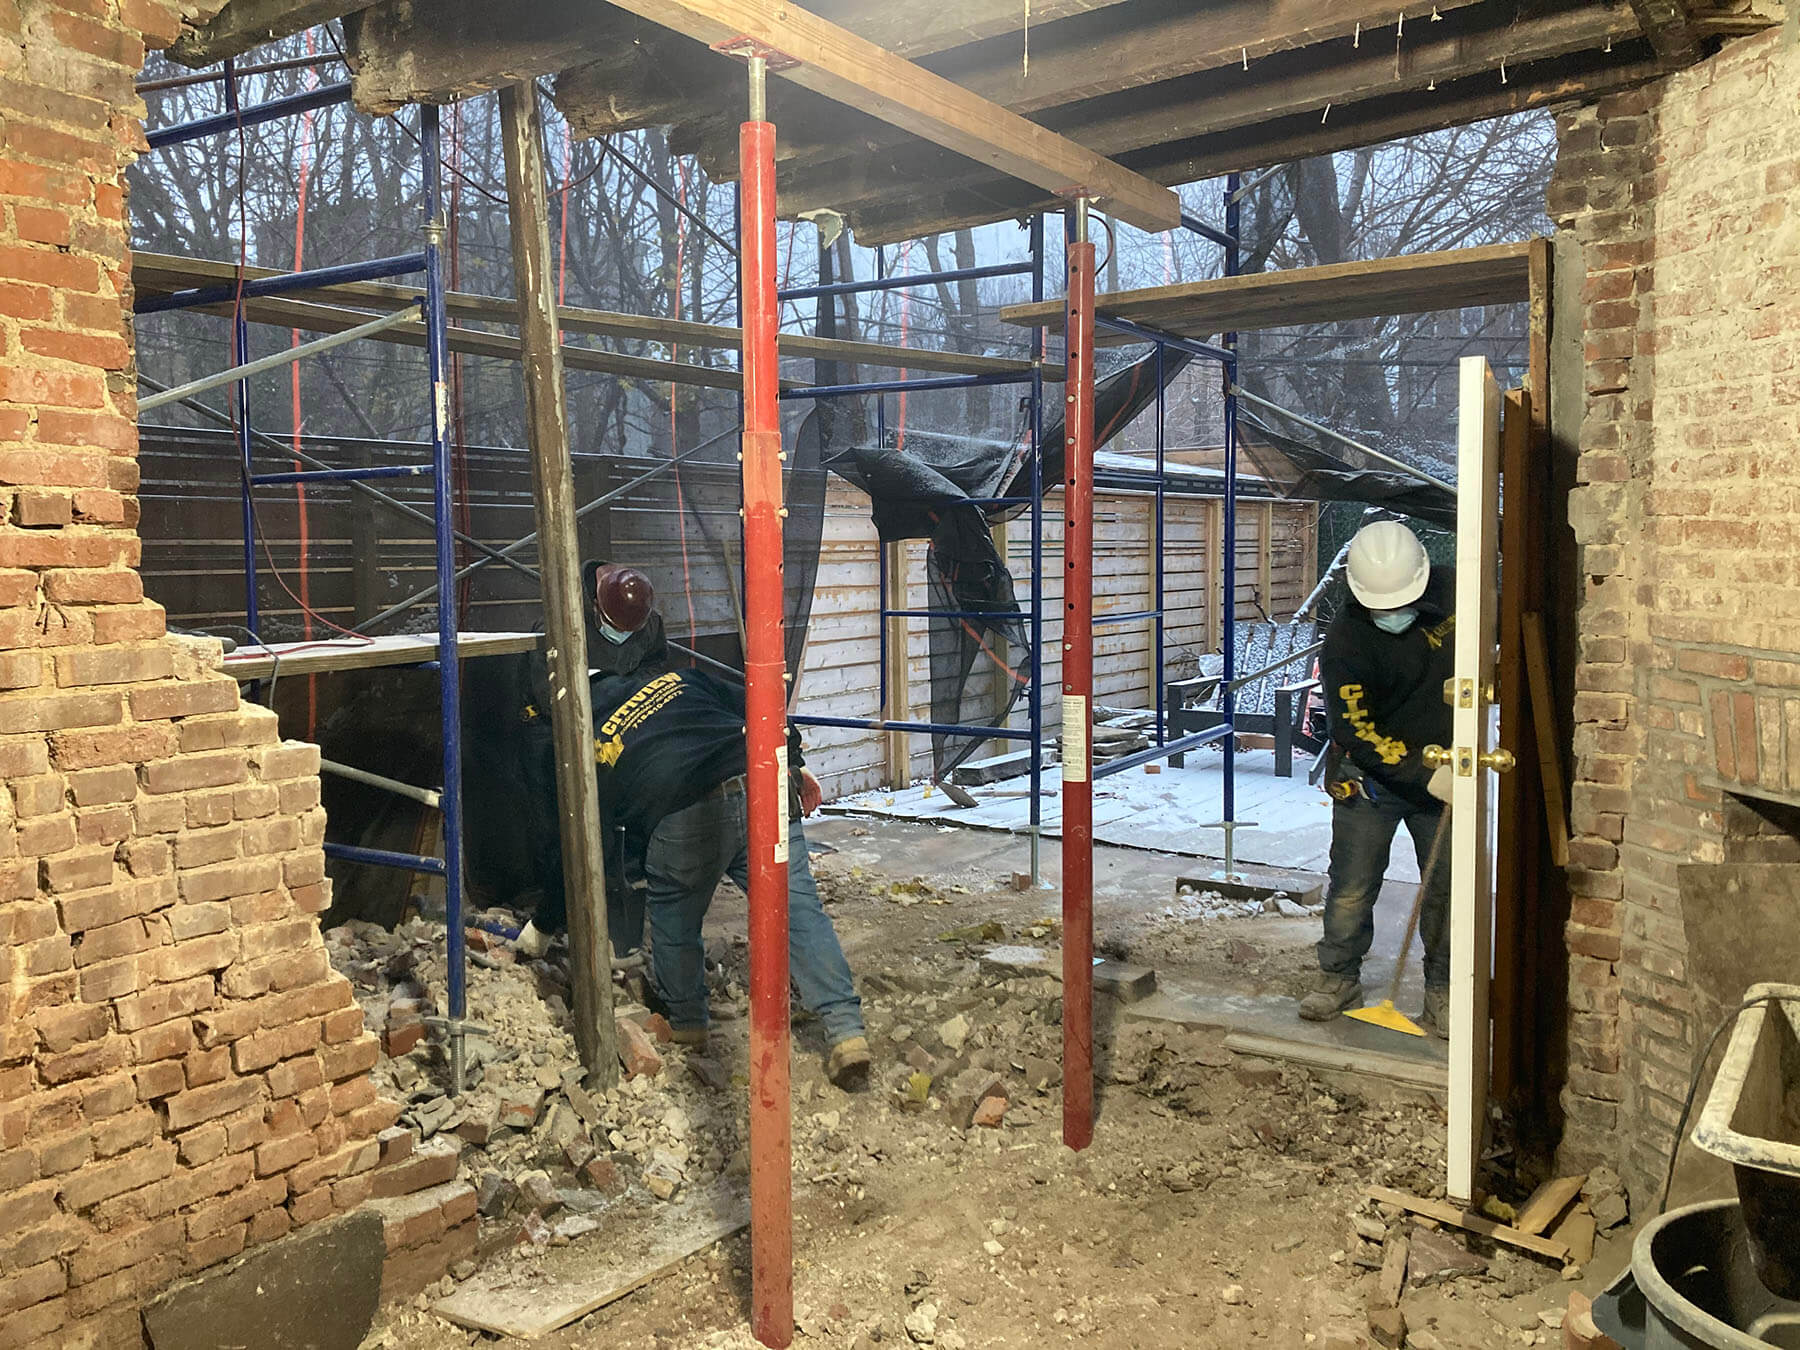
After securing the floors and roof from further damage, our team assessed what needed to be done to repair. The cracked sidewall and bowing rear wall meant we needed to remove all the loose brick down to solid structure and then rebuild. Fortunately, the brick wall that shares my neighbor’s property was sound, so all we needed to do there was repoint. My contractor took his time to design a plan to strategically take down the other two walls without endangering the good solid wall from tipping over during the process.
There was an old fireplace in the far corner that we decided to leave in place as an anchor to the good wall until the crew was able to rebuild the walls back and key into the wall. Our engineer signed off on the plan. Rather than demolish the roof and walls all at once, my contractor’s team needed to remove and replace it all in sections. After shoring up each floor and the roof, they removed the two brick walls all the way down to the foundation, which was still solid.
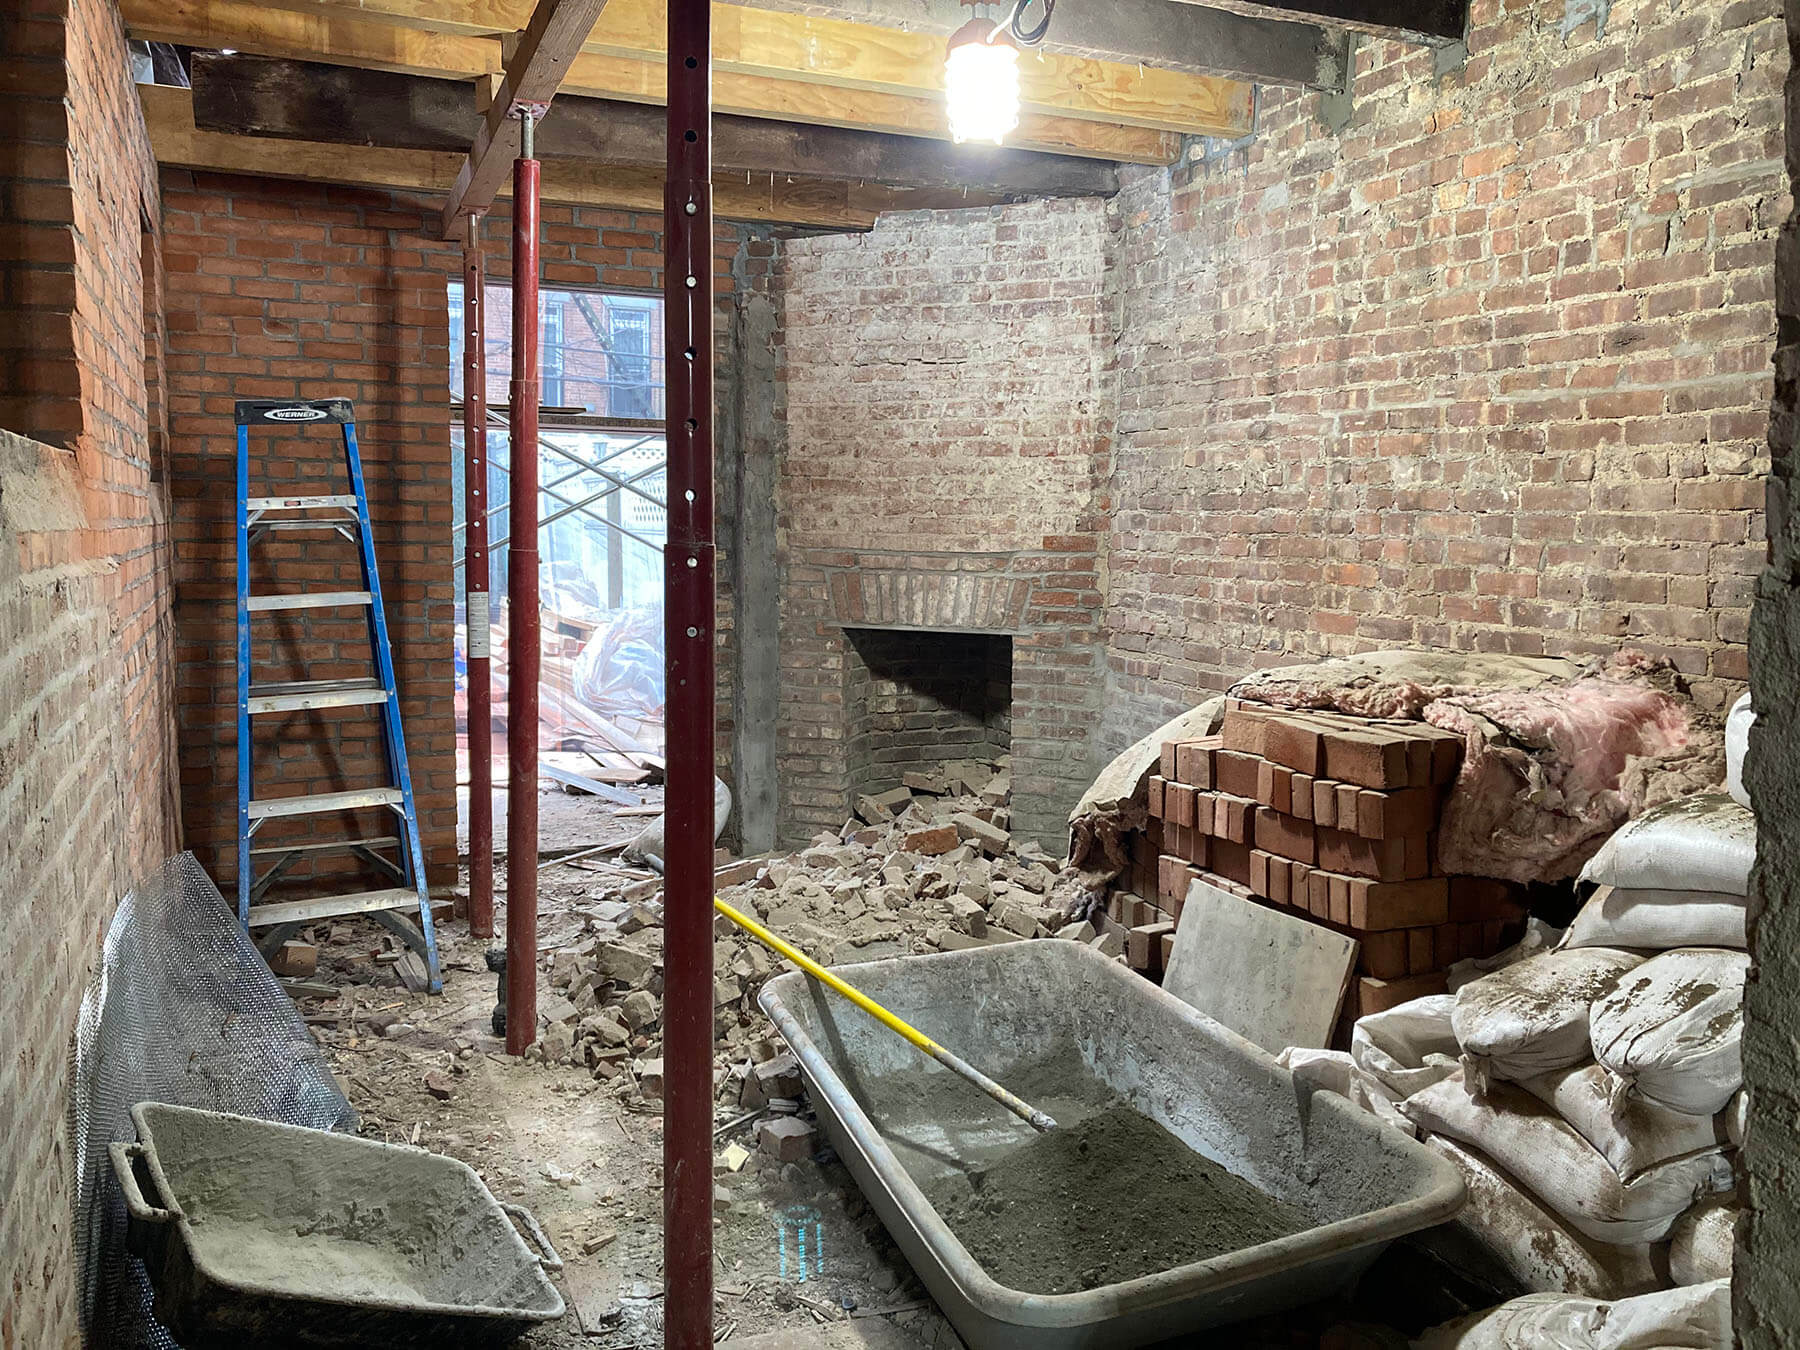
My contractor’s masons did an excellent job laying new brick and keying into areas where they could save the old. We found a brick that was close in size, color and texture to the 100-plus-year-old ones. At the time, because of Covid, the supplies of the type of brick we selected were very low. So my contractor had to search many brick yards throughout Long Island to make sure we had enough of that brick type for the job.
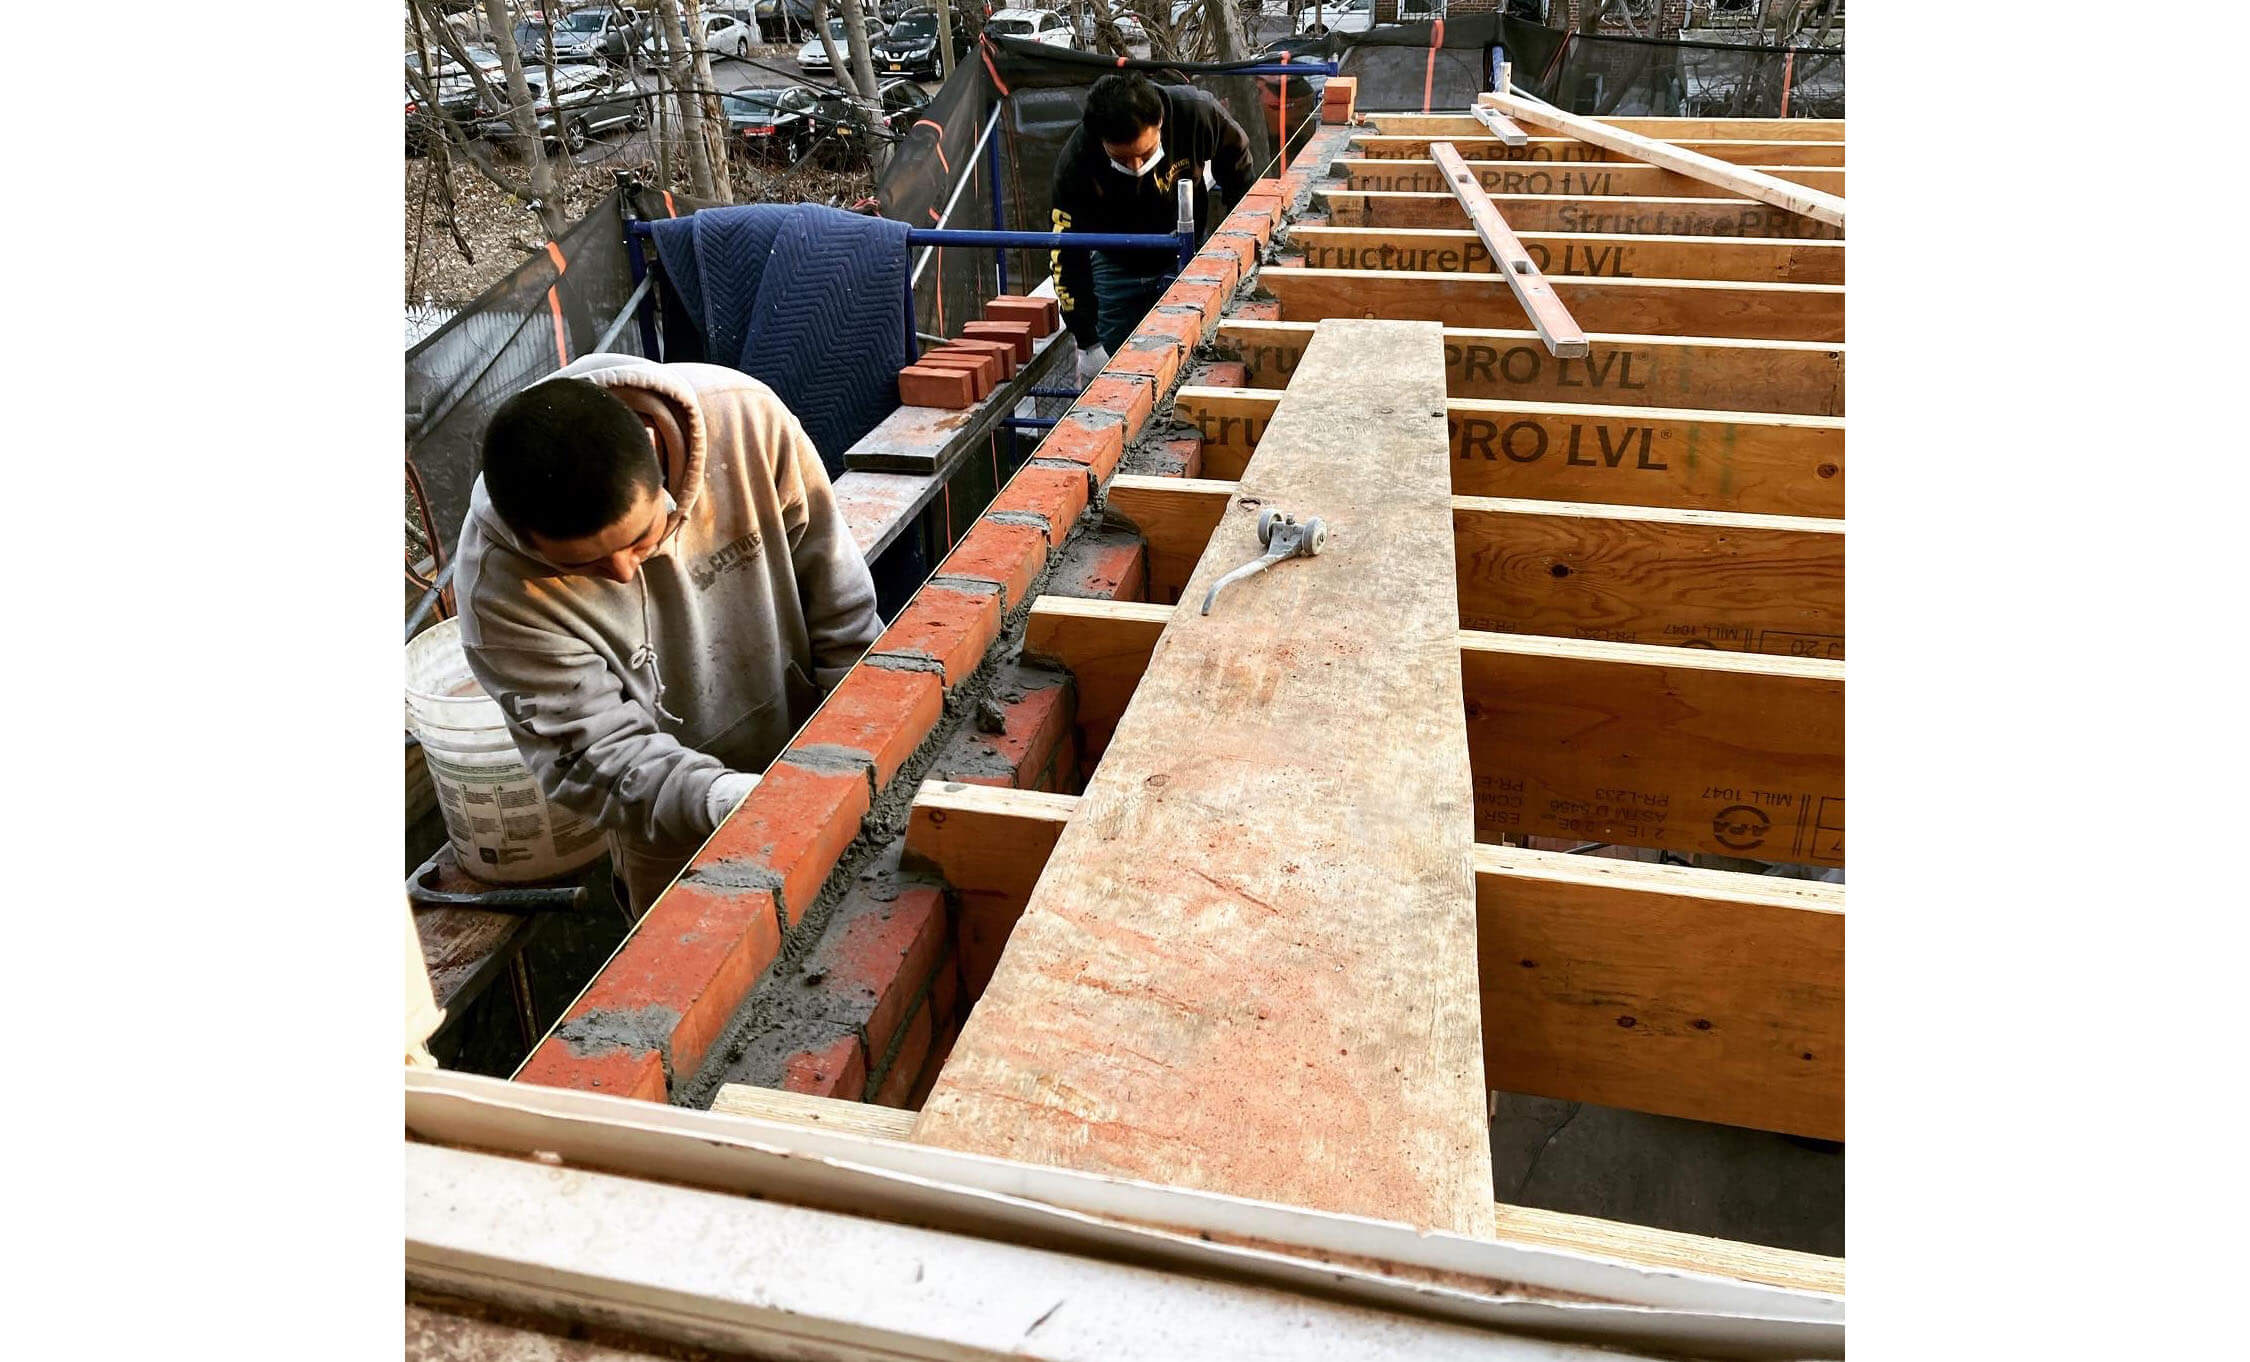
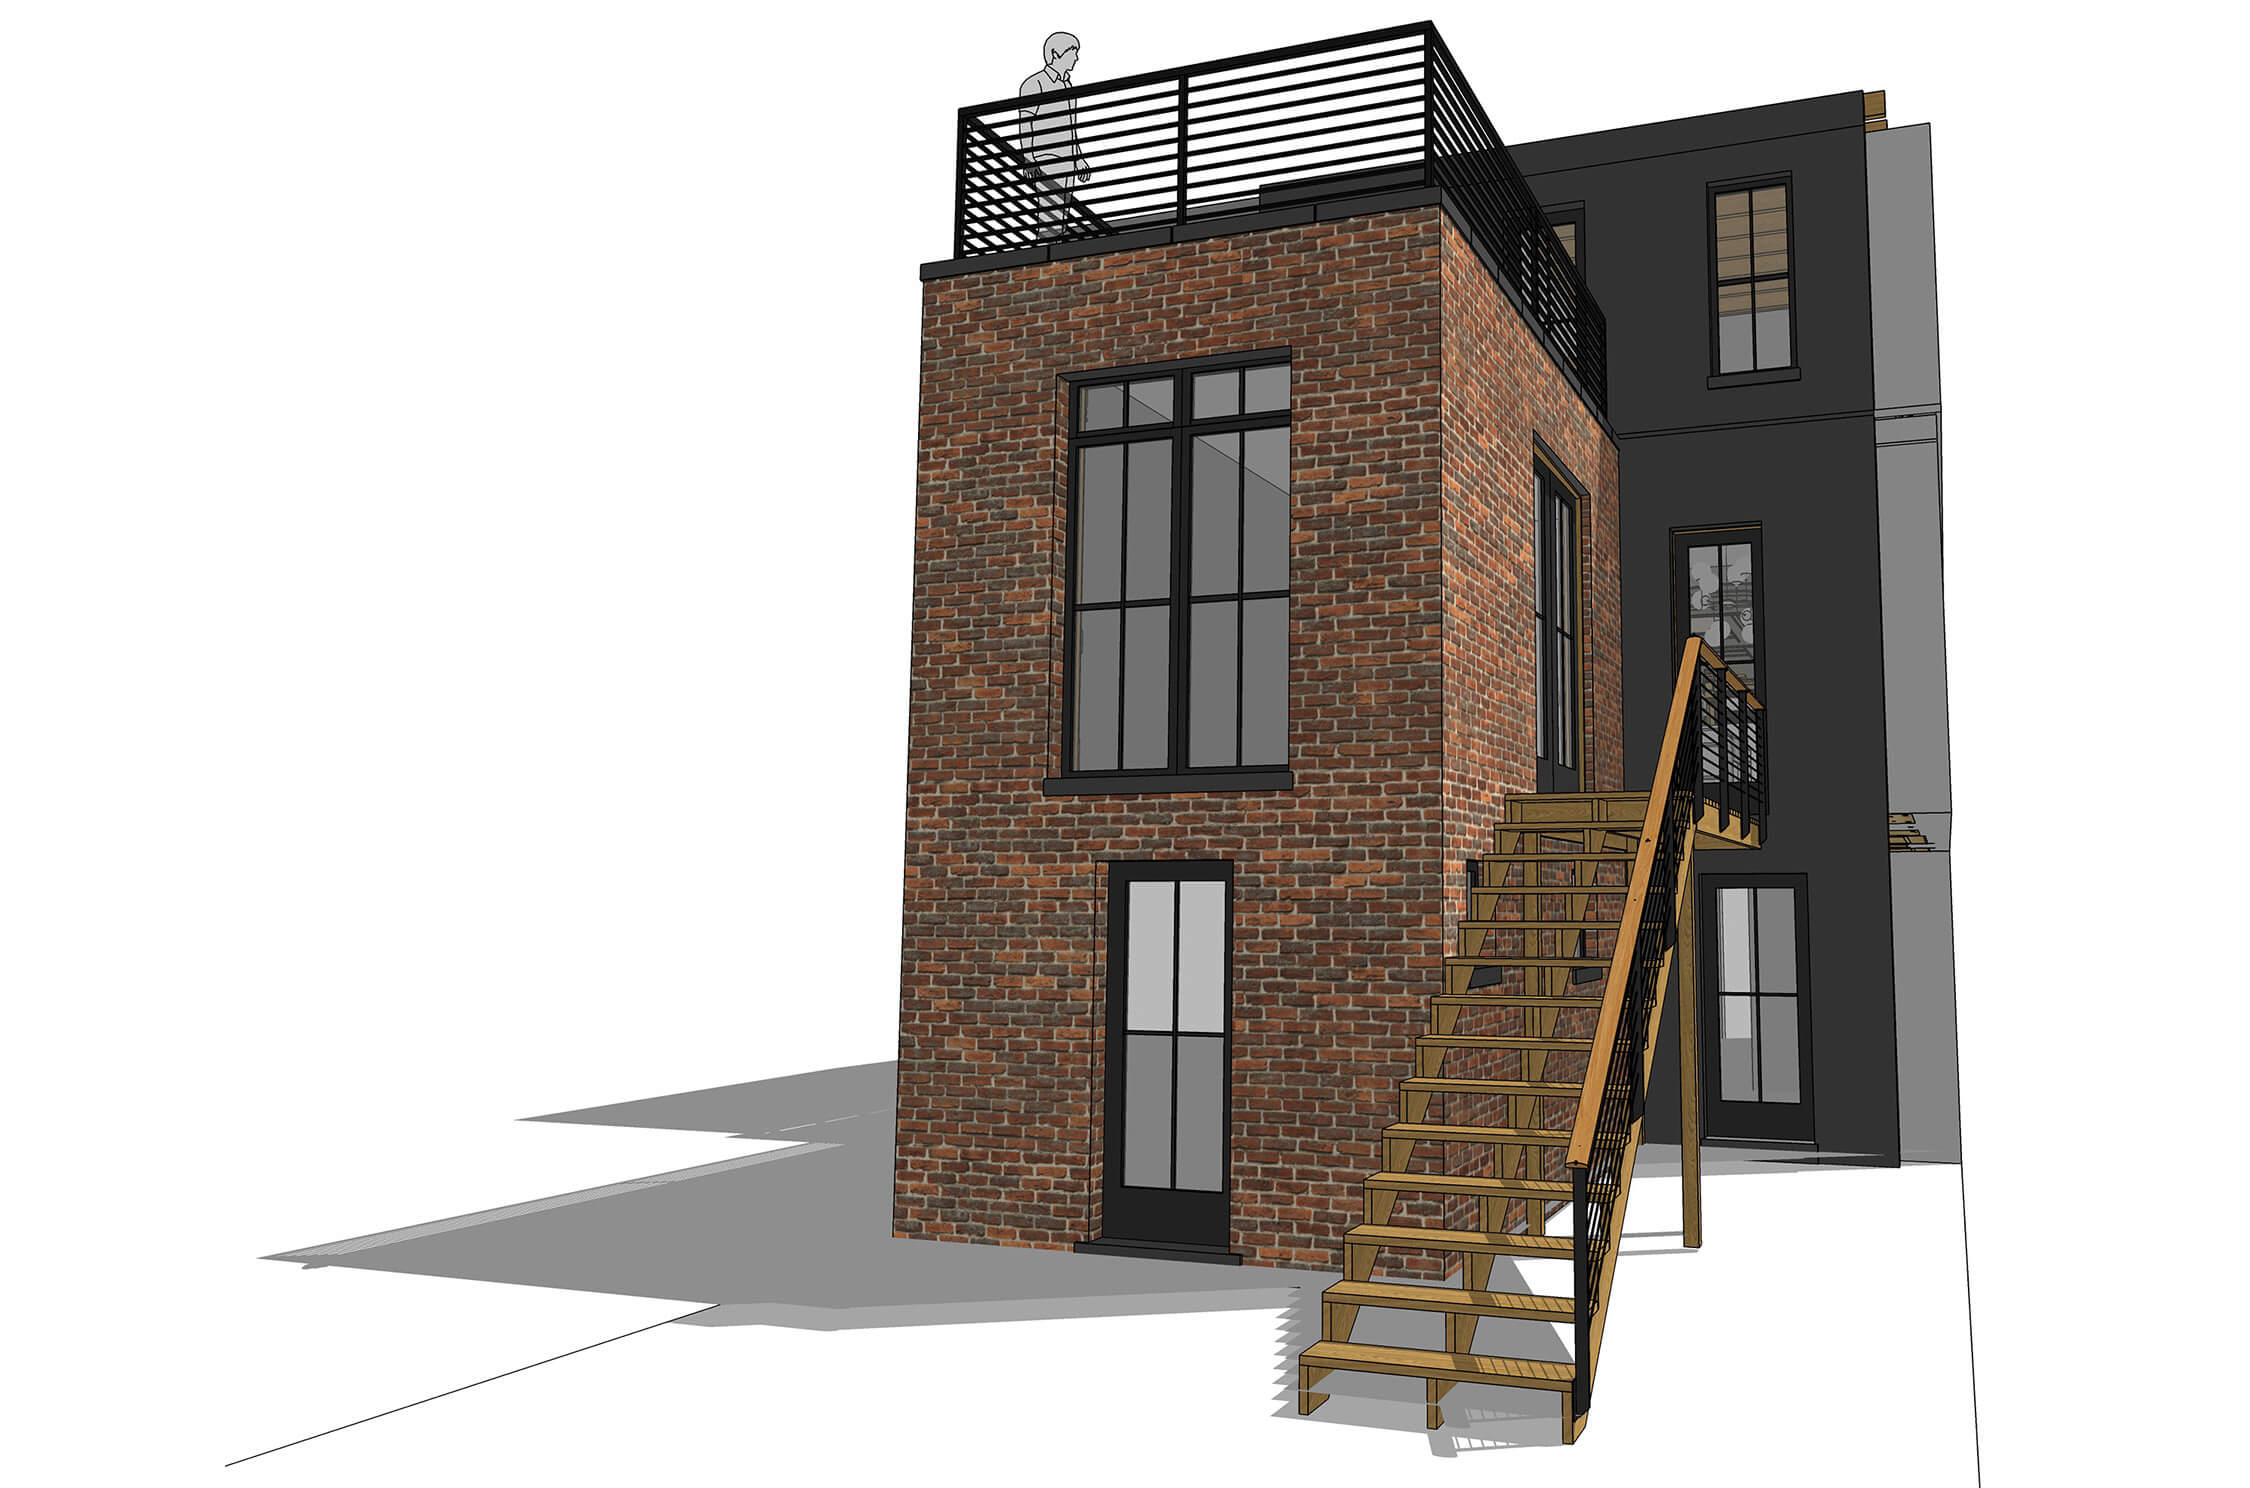
Every beam on the roof of the extension needed replacing. After the crew installed the new roof and parapet, they replaced an old center window with a door out to the future terrace. The new windows were in, so stucco was filled and feathered around all the openings to match the rest of the rear wall. Repeating the front siding on the rear of the house would have been a great finish, but we decided to paint the existing stucco as a cost savings. Besides, I like painting so I rolled up my sleeves for this one.
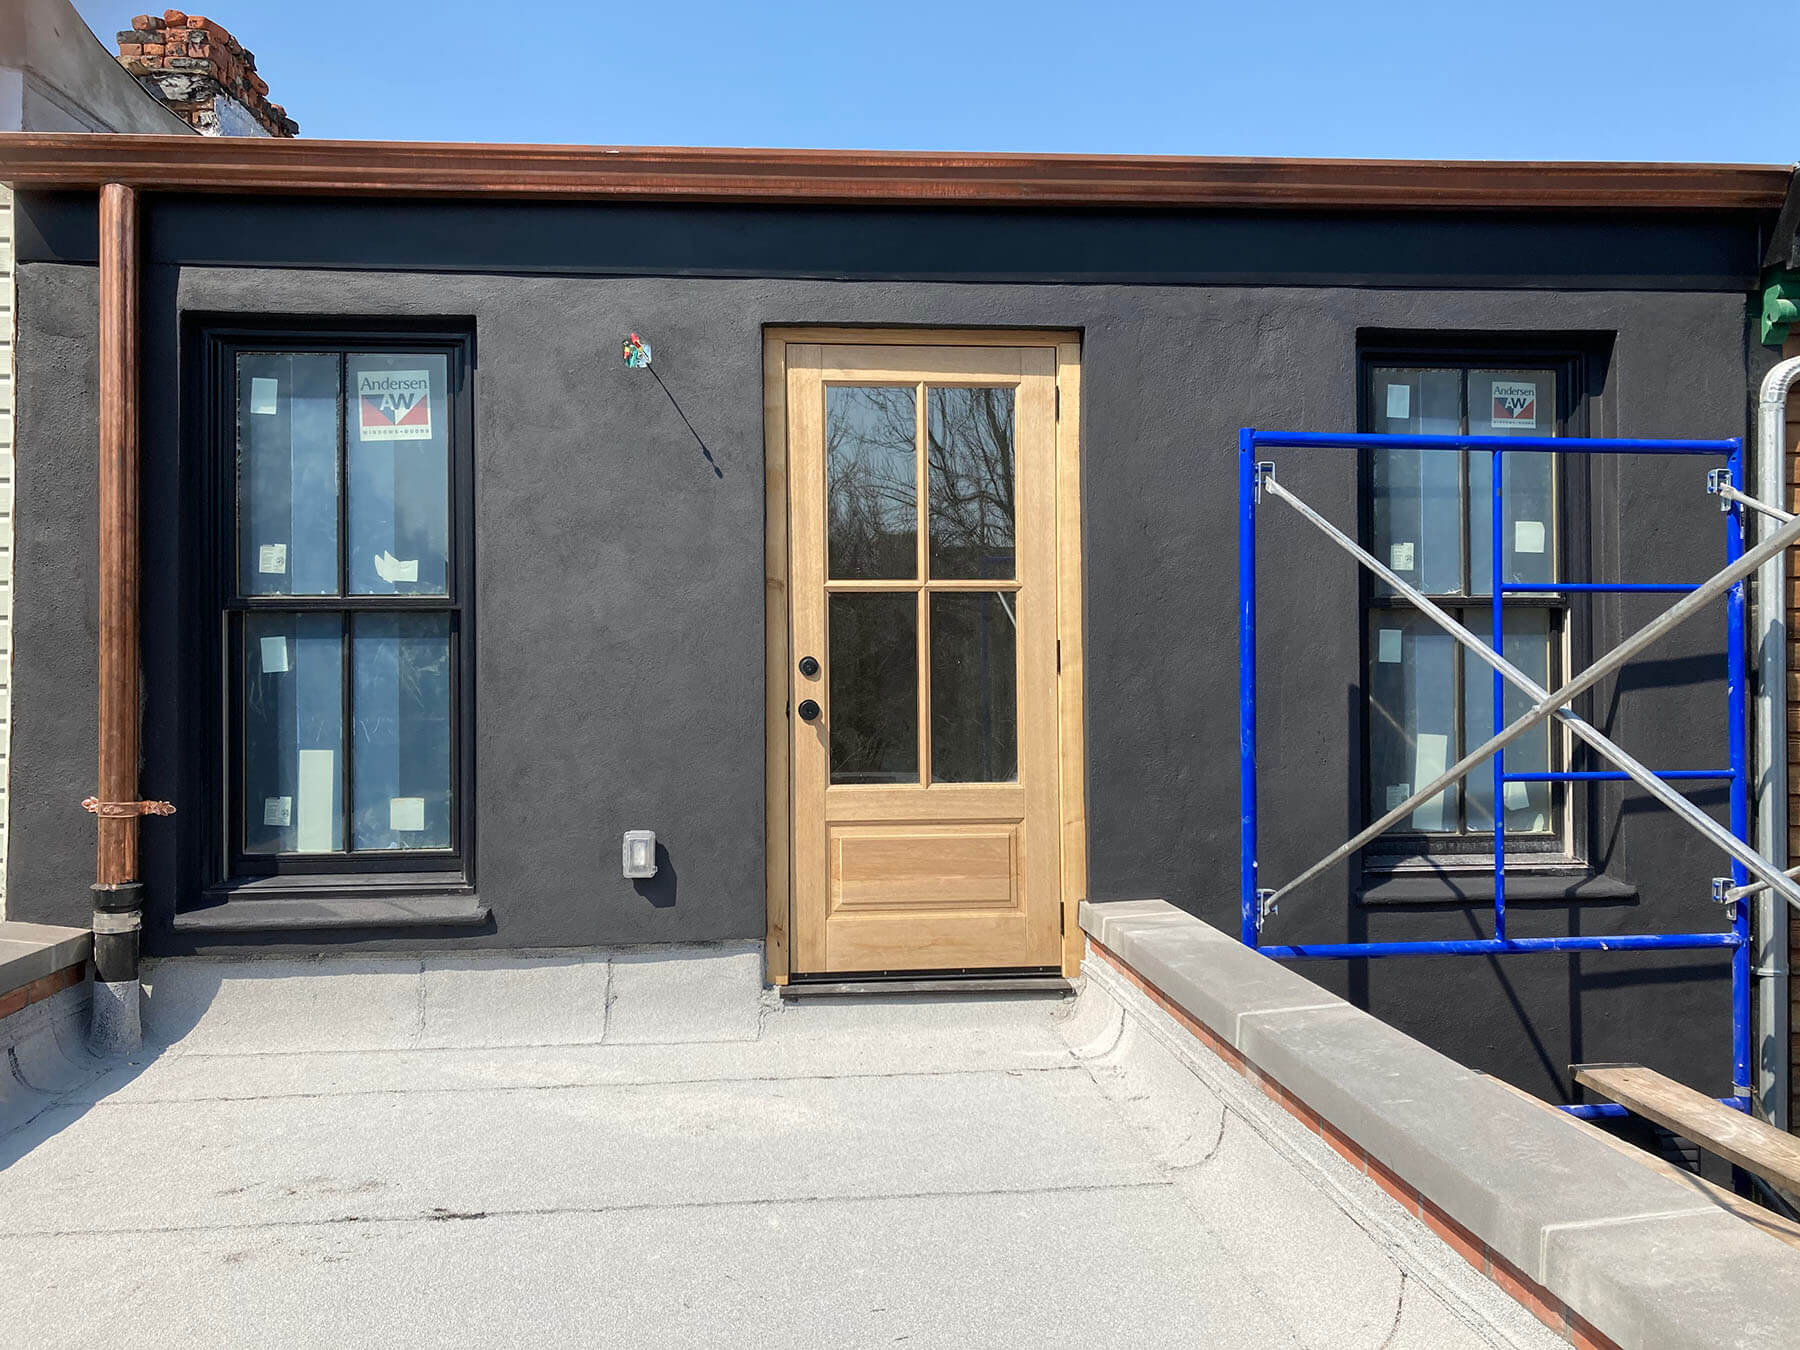
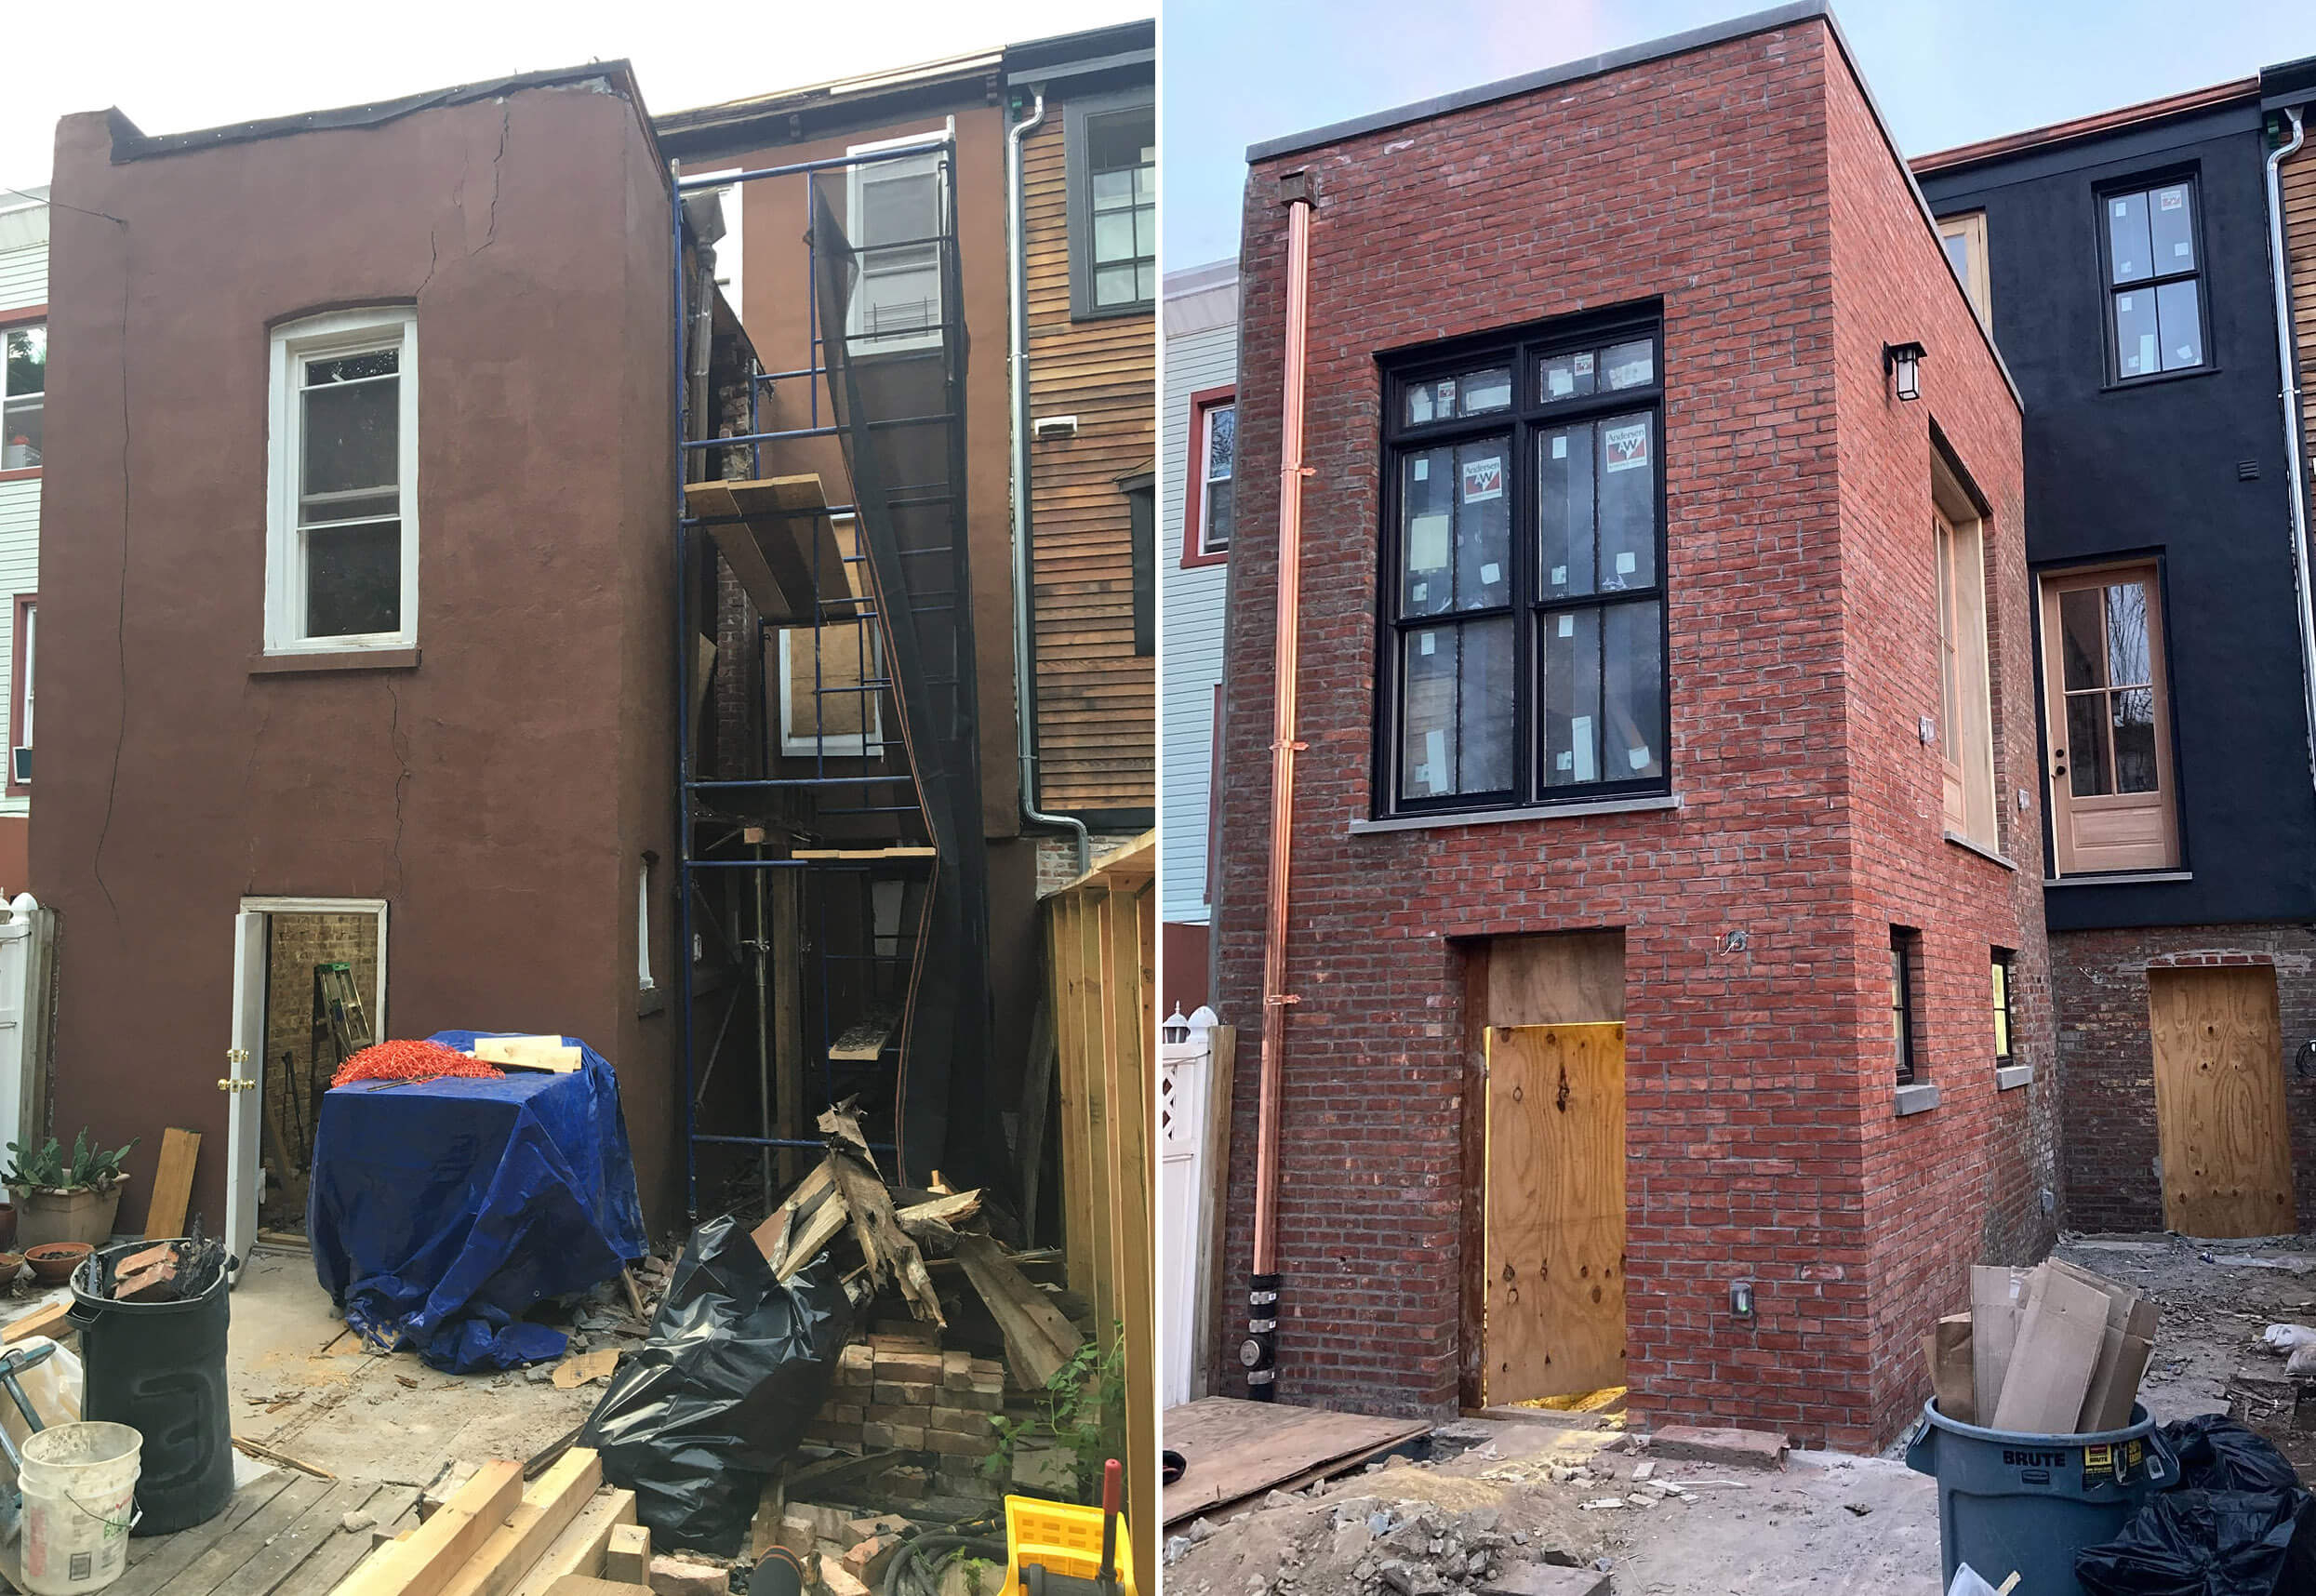
Above are before and after photos of the rear extension. The parapet was finished with precast concrete caps, copper gutters and copper downspouts. We decided to leave the exposed brick as the finish. The brick on the far left is the original where we keyed in the new. After removing all the old stucco, we repointed the rest of the old brickwork to help strengthen and tie it all in. I will have to revisit this backyard view later and post more pics when we get the basement doors and deck finished.
[Photos by This Ugly House]
Related Stories
- This Ugly House: We Level Floors, Reinforce Brick Nogging in Bed Stuy Wood Frame
- This Ugly House: Demo of Chopped-Up Bed Stuy Wreck Reveals Hidden Mantels, Asbestos
- The Insider: Prospect Heights Brownstone Retains Old-School Charm in Major Reno
Email tips@brownstoner.com with further comments, questions or tips. Follow Brownstoner on Twitter and Instagram, and like us on Facebook.
What's Your Take? Leave a Comment